
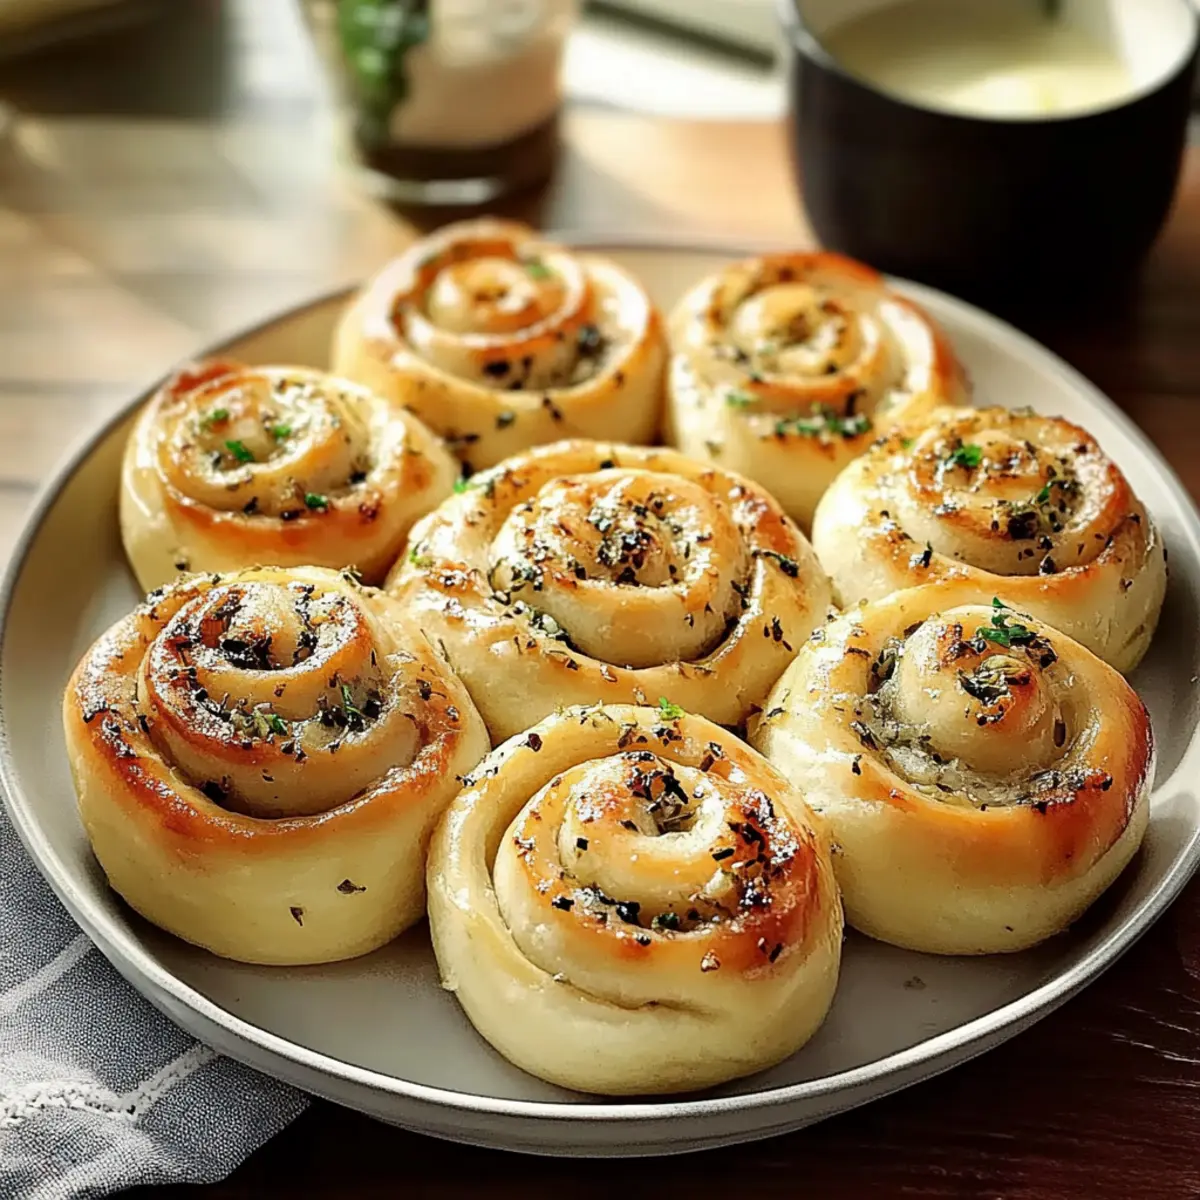
A charmed kitchen filled with the tempting scent of fresh bread baking can transport me to my favorite family gatherings. That’s where my love for garlic-swirled rolls truly blossomed. These delightful Garlic-Swirl Rolls are not only soft and fluffy but also infused with rich garlic and aromatic herbs that elevate any meal you serve. Imagine gathering around the table with loved ones, each bite bringing comfort and warmth to the heart. Plus, they’re so easy to customize! Whether you want to add a touch of cheesy goodness, some vibrant spinach, or even sweet caramelized onions, these rolls provide the perfect canvas for your creativity. They’re ideal as a comforting side dish or a standout appetizer, leaving your guests dreaming of seconds. Ready to twist your way into everyone’s hearts with these heavenly rolls? Let’s get started!
Why Are Garlic Swirl Rolls So Irresistible?
Comforting Fluffiness: The soft, pillowy texture of these rolls makes them the perfect companion for any meal.
Aromatic Fusion: Rich garlic and herbs create an irresistible aroma that fills your kitchen and entices your guests.
Customizable Delight: Easily adapt the filling with cheese, spinach, or caramelized onions, allowing you to make each batch uniquely yours.
Quick to Prepare: These rolls save you time without skimping on flavor, making them ideal for busy weeknights.
Crowd-Pleasing Appeal: Great for family gatherings, they’ll leave everyone craving more, whether served with soups or as a standalone appetizer.
For a delicious twist, consider pairing them with creamy dips like marinara or garlic aioli for a delightful appetizer spread.
Garlic Swirl Rolls Ingredients
For the Dough
• All-Purpose Flour – Provides structure; can substitute with bread flour for a chewier texture.
• Active Dry Yeast – Leavening agent that makes the rolls rise; ensure it’s fresh and properly proofed.
• Warm Milk – Hydrates the dough and activates the yeast; aim for about 110°F, not hot.
• Granulated Sugar – Adds sweetness and helps activate yeast; you can use honey for a natural sweetener.
• Unsalted Butter (melted for dough, softened for filling) – Adds richness; substitute with plant-based butter for a dairy-free version.
• Eggs – Provides moisture and binds the ingredients; for a vegan option, consider flax eggs or applesauce.
• Salt – Enhances flavor; it’s essential for overall taste.
For the Filling
• Minced Garlic – Key flavor in the filling; can be replaced with shallots for a milder taste.
• Fresh Parsley (or dried) – Adds freshness; you can substitute with herbs like basil or thyme.
• Parmesan Cheese (optional) – Adds a savory flavor to the topping; omit for a dairy-free version.
• Black Pepper – Adds seasoning; adjust to your taste preference.
Feel free to get creative and mix in your favorite ingredients to make these Garlic Swirl Rolls truly your own!
Step‑by‑Step Instructions for Garlic Swirl Rolls
Step 1: Prepare the Dough
In a small bowl, combine warm milk and granulated sugar, then sprinkle the active dry yeast on top. Allow it to sit for about 5-10 minutes until frothy. In a mixing bowl, whisk together melted butter, eggs, and salt, then add the yeast mixture. Gradually incorporate all-purpose flour until a soft dough forms, ensuring it is slightly sticky but manageable.
Step 2: Knead the Dough
Transfer the dough to a floured surface and knead for 5-7 minutes until it becomes smooth and elastic. If the dough sticks, sprinkle a little more flour as you work. To check readiness, stretch a small piece; it should hold together without tearing. Form the dough into a ball and prepare it for its first rise.
Step 3: First Rise
Place the kneaded dough in a greased bowl, turning it to coat evenly with oil. Cover the bowl with a clean kitchen towel or plastic wrap and let it rise in a warm area for 1-1.5 hours. The dough is ready when it has doubled in size and feels light and puffy to the touch.
Step 4: Prepare Filling
While the dough rises, prepare the garlic filling by mixing softened butter, minced garlic, chopped parsley, salt, and pepper in a bowl. Blend until smooth and well combined. This fragrant mixture will infuse your Garlic Swirl Rolls with a delightful aroma and flavor that beckons you to the kitchen.
Step 5: Shape Rolls
After the first rise, punch down the dough to release any air bubbles and transfer it to a floured surface. Roll the dough into a rectangle approximately 12×18 inches. Spread the garlic filling evenly over the surface, then tightly roll the dough lengthwise into a log. Slice the log into even pieces, about 1-2 inches wide, to get those perfect, individual Garlic Swirl Rolls.
Step 6: Second Rise
Arrange the sliced rolls in a greased baking dish, placing them close together for a cozy fit. Cover the dish with a towel again and let the rolls rise for another 30-45 minutes. They should puff up nicely and look slightly larger, preparing them for that beautiful bake ahead.
Step 7: Bake
Preheat your oven to 350°F (175°C). Once the rolls have completed their second rise, place them in the oven and bake for 20-25 minutes. Watch closely as they turn golden brown and emit that heavenly garlic aroma. When they’re done, remove them from the oven and let them cool slightly before serving.
Expert Tips for Garlic Swirl Rolls
Activate Your Yeast: Always check that your yeast is fresh and activated in warm milk—look for frothiness to ensure it’s working correctly.
Knead Gently: Knead until the dough is smooth but avoid over-kneading, as it can toughen your garlic swirl rolls.
Mind Your Rise Times: Allow sufficient time for both rises to achieve light and fluffy rolls; finding a warm spot helps if your kitchen is cool.
Filling Considerations: Don’t overstuff the rolls with filling, as this can lead to sogginess—stick to recommended amounts for the best results.
Preheat Properly: Always preheat your oven thoroughly to ensure even cooking, resulting in a perfectly golden crust every time.
Garlic Swirl Rolls Variations & Substitutions
Feel free to personalize these rolls with your own flourishes, letting your culinary creativity shine!
- Cheesy Delight: Mix in shredded mozzarella or cheddar into the filling for a gooey, cheesy surprise in every bite.
- Herb Extravaganza: Substitute parsley with fresh basil or thyme for a unique, herb-infused twist that elevates the flavor profile.
- Veggie Packed: Add sautéed spinach or roasted red peppers into the filling for vibrant color and added nutrition, making these rolls even more delicious.
- Sweet Surprise: Incorporate caramelized onions for a touch of sweetness; their rich, sugary flavor will beautifully contrast the garlic.
- Spicy Kick: Sprinkle in some red pepper flakes or diced jalapeños into the filling for a fiery punch that will warm your heart.
- Dairy-Free Option: Use plant-based butter and skip the cheese for a delectable dairy-free roll that everyone can enjoy without compromising on taste.
- Sundried Tomato Bliss: Chopped sundried tomatoes mixed with the filling will provide a burst of tanginess, giving flavor depth you didn’t know you needed.
- Nutty Texture: Add toasted pine nuts or walnuts to the filling for an extra crunch that adds delightful texture and richness to each bite.
For a truly comforting experience, serve these rolls warm with a side of Garlic Parmesan Duchess Potatoes, or pair them with your favorite dip like marinara or garlic aioli for an impressive appetizer spread.
How to Store and Freeze Garlic Swirl Rolls
Room Temperature: Keep at room temperature for up to 2 days in an airtight container to maintain freshness and softness.
Fridge: You can refrigerate Garlic Swirl Rolls for up to a week, but be sure to store them in an airtight container to prevent them from drying out.
Freezer: After cooling completely, wrap them tightly in plastic wrap and freeze for up to three months. Thaw overnight in the fridge before reheating.
Reheating: To enjoy warm, reheat in a preheated oven at 350°F (175°C) for about 10-15 minutes, or until heated through.
Make Ahead Options
These Garlic Swirl Rolls are perfect for meal prep enthusiasts! You can prepare the dough and let it rise up to 24 hours in advance. Once the dough has risen, simply punch it down, shape the rolls, and place them in a greased baking dish. Cover tightly with plastic wrap and refrigerate. When you’re ready to bake, allow the rolls to sit at room temperature for about 30 minutes to regain their puffy texture, then proceed with the second rise before baking. For even longer storage, consider freezing the shaped but unbaked rolls for up to 3 months. When you need them, just thaw overnight in the fridge and follow the same finishing instructions, resulting in warm, fluffy rolls that taste just as delicious as fresh!
What to Serve with Garlic-Swirl Rolls
Pairing these fluffy and flavorful rolls with delightful sides will transform your meal into a memorable feast.
-
Creamy Tomato Soup: A piping hot bowl of creamy tomato soup perfectly complements the garlic flavors, creating a cozy, comforting vibe. Slather the rolls in the delicious broth for a delightful duo!
-
Garden Salad: Fresh greens mixed with ripe tomatoes, cucumbers, and a light vinaigrette provide a crisp contrast to the soft rolls. This refreshing salad balances the richness of the garlic swirls while adding a burst of color to your meal.
-
Herbed Roasted Vegetables: Roasty, caramelized veggies like carrots, zucchini, and bell peppers add a sweet-savory component that pairs beautifully with the rolls. The earthy flavors enhance the aromatic garlic for a balanced dish that’s both nutritious and satisfying.
-
Cheesy Garlic Dip: Serve these rolls with a warm, cheesy garlic dip, and you have a perfect appetizer! The creamy texture makes for an irresistible pairing.
-
Beef Stew: A hearty, flavorful beef stew offers a rustic touch that matches effortlessly with garlic swirl rolls. Use the rolls to soak up the savory goodness.
-
Garlic Aioli: This easy-to-make dip elevates your rolls to the next level. The creamy garlic flavor enhances each bite, making it a delightful addition for those who can’t get enough garlic!
-
Sweet Corn Pudding: The sweet, buttery flavors of corn pudding provide a lovely contrast to the savory rolls. It’s an unexpected yet delightful pairing that brings warmth to the table.
-
Chardonnay or Light Rosé: A chilled glass of white wine, like Chardonnay, can enhance the flavor of the rolls beautifully, while a light Rosé adds a refreshing touch to the meal, making it feel festive.
Garlic Swirl Rolls Recipe FAQs
What is the best way to select garlic for the filling?
Absolutely! When choosing garlic for your rolls, look for firm cloves with dry, papery skins and no dark spots. Fresh garlic should feel compact and not have any signs of sprouting or soft spots, ensuring maximum flavor in your Garlic Swirl Rolls.
How should I store leftover Garlic Swirl Rolls?
For sure! Store your Garlic Swirl Rolls at room temperature in an airtight container for up to 2 days. If you want them to last longer, refrigerate them for up to a week. Just remember to keep them covered to prevent them from drying out!
Can I freeze Garlic Swirl Rolls?
Yes, indeed! To freeze your Garlic Swirl Rolls, let them cool completely after baking, then wrap each roll tightly in plastic wrap. For added protection, you can place them in a freezer-safe bag or container. They’ll keep well in the freezer for up to three months. When you’re ready to enjoy them again, thaw in the fridge overnight and reheat in a preheated oven at 350°F (175°C) for about 10-15 minutes.
What if my dough doesn’t rise properly?
Very important to know! If your dough doesn’t rise significantly during the proofing stages, it could be due to inactive yeast or too cool of an environment. Make sure your yeast is fresh and activate it with warm milk at about 110°F. If your kitchen is cold, try placing the dough in a slightly warm (turned off) oven or near a warm window to encourage rising.
Are Garlic Swirl Rolls suitable for people with allergies?
Absolutely! These rolls can be modified to accommodate dietary restrictions. For gluten-free, you can use a gluten-free flour blend. If you’re catering to a dairy allergy, substitute with plant-based butter and omit Parmesan cheese. For a vegan version, just replace the eggs with flax eggs or applesauce. Always double-check ingredient labels, especially for pre-packaged items!
Garlic Swirl Rolls: Fluffy, Flavorful Comfort in Every Bite
Ingredients
Equipment
Method
- In a small bowl, combine warm milk and granulated sugar, then sprinkle active dry yeast on top. Allow to sit for about 5-10 minutes until frothy.
- In a mixing bowl, whisk together melted butter, eggs, and salt, then add the yeast mixture. Gradually incorporate all-purpose flour until a soft dough forms.
- Transfer the dough to a floured surface and knead for 5-7 minutes until smooth and elastic. Form into a ball and prepare for its first rise.
- Place the kneaded dough in a greased bowl, cover, and let it rise in a warm area for 1-1.5 hours until doubled in size.
- Prepare the filling by mixing softened butter, minced garlic, chopped parsley, salt, and pepper in a bowl until smooth.
- After the first rise, punch down the dough, roll it into a rectangle, spread the filling, and roll it tightly into a log. Slice into rolls.
- Arrange the sliced rolls in a greased baking dish, cover, and let them rise for another 30-45 minutes.
- Preheat your oven to 350°F (175°C). Once risen, bake for 20-25 minutes until golden brown.
Leave a Reply