
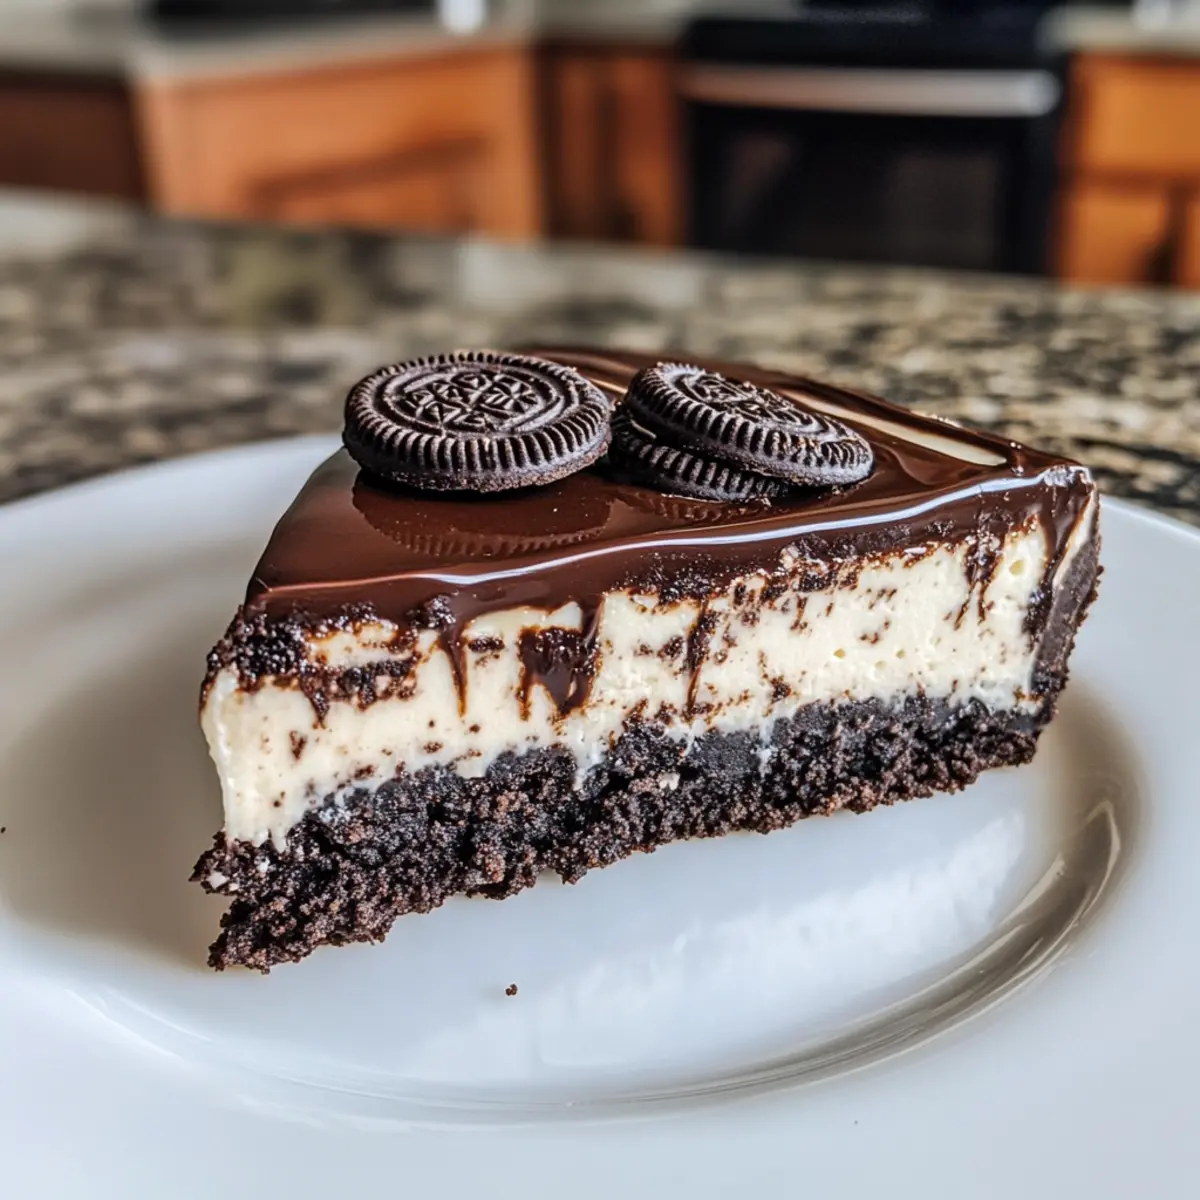
There’s something incredibly satisfying about creating a dessert that doesn’t require any baking, especially when it involves the beloved Oreo cookie. My No-Bake Oreo Cheesecake is a dreamy delight, perfectly combining a crunchy Oreo crust with a creamy, rich filling that’s speckled with even more crushed Oreos. This dessert stands out as a fantastic time-saver that allows you to impress friends and family without breaking a sweat in the kitchen. Plus, it’s a guaranteed crowd-pleaser—even those who usually shy away from sweets are tempted by its decadent allure. If you’re ready to indulge your sweet tooth without the hassle of preheating an oven, keep reading to discover how to whip up this delightful treat!
Why is No-Bake Oreo Cheesecake a Must-Try?
Easy Preparation: No oven needed! Simply mix and chill for a stress-free dessert experience.
Decadent Flavors: The rich creaminess of the cheesecake combined with crunchy Oreo goodness creates an irresistible bite.
Impressive Presentation: Show off your culinary skills with a stunning dessert that’s as beautiful as it is delicious, perfect for gatherings.
Customizable Options: Mix in peanut butter or experiment with different Oreo flavors to keep things exciting offers great alternatives!
Crowd-Pleaser: Guaranteed to entice both kids and adults alike—everyone loves chocolate and cream cheese!
This No-Bake Oreo Cheesecake is not just a treat; it’s a celebration of flavor and simplicity!
No-Bake Oreo Cheesecake Ingredients
For the Crust
• Oreo Cookies – Essential for both the crust and filling; their chocolate crunch adds delicious flavor. For gluten-free, use gluten-free cookie alternatives.
• Butter – Binds the crust and adds richness; melted for easy mixing. Can substitute with coconut oil for a dairy-free version.
For the Filling
• Full-fat Cream Cheese – Creates a smooth and rich filling, essential for that classic cheesecake texture. Low-fat cream cheese is a lighter option, though the texture may vary.
• Powdered Sugar – Sweetens the filling while ensuring a smooth consistency. Granulated sugar can be used, but it may affect the overall texture.
• Vanilla Paste – Enhances the flavor depth in the filling beautifully. You can swap it with vanilla extract using the same amount.
• Heavy Cream – Whipped to create stability for the filling while also serving as a decorative topping. Non-dairy whipped cream can be used for a vegan option.
• Crushed Oreos – Folded into the filling for an extra burst of Oreo flavor and texture.
For the Ganache
• Semi-Sweet Dark Chocolate – Provides a rich chocolate flavor that complements the cheesecake. Milk chocolate can be swapped for a sweeter profile.
• Butter – Added to the ganache for a glossy finish and rich texture.
• Cold Heavy Cream – Mixed into the ganache to create a smooth pourable sauce over the cheesecake.
For Decoration
• Mini or Regular Oreos – Used for decorating the cheesecake, adding a fun visual touch that enhances its appeal.
Now that you’ve gathered all the ingredients for your delightful No-Bake Oreo Cheesecake, you’re just a few simple steps away from creating a show-stopping dessert that your loved ones will adore!
Step‑by‑Step Instructions for No-Bake Oreo Cheesecake
Step 1: Prepare the Pan
Start by greasing a 9-inch springform pan with butter or cooking spray, ensuring it’s easy to remove the cheesecake later. Next, line the bottom with parchment paper for added protection. This setup will help your No-Bake Oreo Cheesecake maintain its shape while chilling and make serving a breeze!
Step 2: Make the Crust
In a food processor, blend the Oreo cookies until they turn into fine crumbs, which should resemble damp sand. Melt the butter in a microwave or on the stove, then combine it with the cookie crumbs. Pour the mixture into the prepared pan, pressing it firmly into the bottom to form a solid crust. Chill in the refrigerator for 15–20 minutes to set.
Step 3: Prepare the Filling
In a stand mixer, beat the room temperature cream cheese, powdered sugar, and vanilla paste on medium speed until creamy and smooth, about 2–3 minutes. In a separate bowl, whip the heavy cream until stiff peaks form. Gently fold the whipped cream and crushed Oreos into the cream cheese mixture with a spatula, creating a velvety and delicious filling for your No-Bake Oreo Cheesecake.
Step 4: Set the Cheesecake
Pour the luscious filling over the chilled Oreo crust, using a spatula to smooth the top evenly. Cover the pan with plastic wrap or a lid, and refrigerate the cheesecake for at least 6–8 hours or overnight. This chilling time allows the flavors to meld and the cheesecake to firm up beautifully.
Step 5: Make Ganache
For the ganache, heat the semi-sweet dark chocolate and butter in a microwave-safe bowl until melted, about 30 seconds at a time, stirring in between. Once melted, gradually add cold heavy cream, stirring until smooth and glossy. Let the ganache cool slightly before pouring over the chilled cheesecake for an irresistible finish.
Step 6: Decorate
When the ganache has set, whip the remaining heavy cream until stiff peaks form. Use a piping bag or a spatula to adorn the edges of the cheesecake with decorative swirls of whipped cream. Top with mini Oreos for a fun and appealing look, then give it a final chill in the refrigerator to set completely before serving.
Expert Tips for No-Bake Oreo Cheesecake
-
Room Temperature Cream Cheese: Ensure cream cheese is at room temperature for easier blending and a smoother filling texture, avoiding lumps.
-
Cooling Ganache: Allow the ganache to cool slightly before pouring over the cheesecake to prevent it from melting the filling underneath.
-
Whipped Cream Technique: Whip heavy cream until stiff peaks form for stability. Be gentle while folding it into the cream cheese mixture to maintain lightness.
-
Proper Chilling Time: Refrigerate the cheesecake for at least 6-8 hours—overnight is best—to ensure it sets properly and the flavors meld beautifully.
-
Decoration Mastery: Use a pastry bag with a star tip for neat, decorative swirls of whipped cream around the edges, enhancing presentation and appeal for any gathering.
-
Crust Consistency: When pressing the crust into the pan, make sure it’s compact enough to hold together when served, avoiding a crumbly mess!
What to Serve with No-Bake Oreo Cheesecake?
Indulging in the creamy decadence of this dessert opens doors to delightful pairings that can elevate your meal to perfection.
-
Fresh Berries: The vibrant tang of strawberries or raspberries contrasts beautifully with the rich cheesecake, adding a refreshing burst of flavor.
-
Chocolate Sauce: A warm drizzle of chocolate sauce enhances the dessert’s indulgence while offering a luxurious touch that chocolate lovers will adore.
-
Whipped Cream: Light and airy, whipped cream complements the creamy cheesecake, providing a delightful textural contrast.
-
Coffee: The rich depth of coffee balances the sweetness of the cheesecake, making it the perfect after-meal beverage for a cozy finish.
-
Mint Tea: A soothing cup of mint tea refreshes the palate, cleansing the senses after each sweet, creamy bite.
-
Ice Cream: Serve alongside a scoop of vanilla or cookies and cream ice cream for a heavenly combination, creating a luxurious dessert experience.
-
Caramel Drizzle: A luscious caramel drizzle brings a sweet, buttery flavor that pairs beautifully with the decadent creaminess of the cheesecake while adding an extra touch of elegance.
-
Almonds or Nuts: Sprinkle some roasted almonds or walnuts on top for a delightful crunch that contrasts with the creamy filling, offering a satisfying bite.
Let these delightful pairings inspire your serving style for this No-Bake Oreo Cheesecake, ensuring that every bite is a celebration of flavors and textures!
How to Store and Freeze No-Bake Oreo Cheesecake
Fridge: Store leftover No-Bake Oreo Cheesecake in the refrigerator, covered or in an airtight container, for up to 3–4 days for the best flavor and texture.
Freezer: If you need to keep it longer, wrap individual slices tightly in plastic wrap and then aluminum foil, storing in the freezer for up to 2 months. Thaw in the fridge before serving.
Serving Tips: When ready to enjoy, let the cheesecake sit at room temperature for about 10 minutes before slicing, allowing the creamy texture to soften slightly for a delightful bite.
Reheating: No reheating is necessary, as this delightful cheesecake is served chilled.
No-Bake Oreo Cheesecake Variations
Feel free to let your creativity shine by making these delightful twists to the classic No-Bake Oreo Cheesecake!
-
Peanut Butter Swirl: Mix smooth peanut butter into the cheese filling for a nutty flavor that’s simply divine. It’s the perfect combo of chocolate and peanut butter, reminiscent of your favorite candy bars!
-
Minty Fresh: Use Mint Oreos instead of regular for a refreshing, mint-flavored cheesecake that’s sure to impress. Imagine each bite transporting you to a cool, minty wonderland!
-
Chocolate Lover’s Dream: Replace the dark chocolate ganache with melted chocolate hazelnut spread for an extra layer of decadence. This will create an even richer treat that will have chocolate lovers weak in the knees.
-
Fruit Infusion: Fold in chopped strawberries or raspberries into the filling for a fruity twist. The fresh berries will add a natural sweetness that beautifully contrasts with the Oreo base.
-
Cookie and Cream Delight: Mix in crushed vanilla sandwich cookies along with the Oreos in the filling for an added crunch and variation in flavor. This twist makes the dessert creamier and even more decadent!
-
Dairy-Free Indulgence: Swap the cream cheese and heavy cream for vegan cream cheese and coconut whipped cream. Your dairy-free friends will love you for this creamy, dreamy dessert that doesn’t skimp on flavor!
-
Gourmet Toppings: Elevate your cheesecake with caramel drizzle or a sprinkle of sea salt atop the ganache. These additions create a stunning presentation as well as an amazing symphony of flavors!
-
Get Creative with Ganache: Try substituting the semi-sweet chocolate ganache with white chocolate for a contrasting sweet finish. It not only looks gorgeous but tastes amazing, especially paired with the dark chocolate crust.
These variations will keep your No-Bake Oreo Cheesecake exciting every time you make it. Want to try more delicious cheesecake ideas? Check out Cherry Pistachio Cheesecake or indulge in a slice of Chocolate Raspberry Cheesecake for even more decadent delights!
Make Ahead Options
These No-Bake Oreo Cheesecake Delights are a fantastic choice for busy home cooks looking to save time! You can prepare the crust and filling up to 24 hours in advance, allowing you to quickly assemble the dessert on a hectic day. Simply make the crust and filling, then refrigerate the entire cheesecake in a covered springform pan. To maintain freshness, ensure it’s well-wrapped in plastic. When you’re ready to serve, simply drizzle the cooled ganache over the cheesecake and decorate with whipped cream and Oreos. This way, you’ll have a stunning dessert that’s just as delicious, ready to impress your guests with minimal effort!
No-Bake Oreo Cheesecake Recipe FAQs
What kind of Oreos should I use for the crust?
Absolutely! You can use regular Oreo cookies for the classic flavor, but if you want a twist, try specialty flavored Oreos like Birthday Cake or Mint. For gluten-free options, look for gluten-free cookie alternatives that mimic the taste and texture of classic Oreos.
How should I store my No-Bake Oreo Cheesecake?
Store your cheesecake in the refrigerator, covered with plastic wrap or in an airtight container, for up to 3-4 days. This helps maintain its rich flavor and creamy texture. If you find you have leftovers after a gathering, don’t fret; it’s still delicious for a few days!
Can I freeze this No-Bake Oreo Cheesecake?
Very! To freeze, wrap individual slices tightly in plastic wrap followed by aluminum foil, ensuring no air can get in. This way, your cheesecake can be stored in the freezer for up to 2 months. When you’re ready to enjoy it, simply thaw slices in the refrigerator overnight for the best results.
What if my cheesecake is too soft after chilling?
Don’t worry! If your cheesecake seems too soft, it might need additional chilling time. I recommend leaving it in the refrigerator for a few more hours or even overnight, as this allows the filling to firm up. If you notice that it still lacks structure, ensure that your heavy cream is whipped to stiff peaks before incorporating it into the filling next time.
Is this No-Bake Oreo Cheesecake suitable for gluten-free diets?
Absolutely! Just swap the regular Oreos with gluten-free Oreo alternatives and make sure that any other ingredients, like vanilla extract or powdered sugar, are also gluten-free. It’s a simple switch that lets everyone indulge in this delightful treat!
Can I use low-fat cream cheese instead of full-fat?
Yes, you can! However, using low-fat cream cheese may affect the overall texture, making it a bit less creamy. For the best results, I often recommend room temperature full-fat cream cheese, as it blends smoothly into the filling and contributes to the dessert’s rich flavor.
Irresistible No-Bake Oreo Cheesecake That Melts in Your Mouth
Ingredients
Equipment
Method
- Start by greasing a 9-inch springform pan with butter or cooking spray, ensuring it's easy to remove the cheesecake later.
- Next, line the bottom with parchment paper for added protection.
- In a food processor, blend the Oreo cookies until they turn into fine crumbs. Melt the butter and combine it with the cookie crumbs, then press firmly into the bottom of the pan.
- Chill the crust in the refrigerator for 15–20 minutes to set.
- In a stand mixer, beat cream cheese, powdered sugar, and vanilla paste until creamy, about 2–3 minutes.
- Whip the heavy cream separately until stiff peaks form. Gently fold the whipped cream and crushed Oreos into the cream cheese mixture.
- Pour the filling over the chilled crust, smooth the top, cover with plastic wrap, and refrigerate for at least 6–8 hours or overnight.
- For the ganache, heat dark chocolate and butter until melted. Gradually stir in cold heavy cream until smooth and glossy.
- Let the ganache cool slightly before pouring over the cheesecake.
- When the ganache has set, whip remaining heavy cream until stiff peaks form for decoration.
- Top with mini Oreos and give a final chill before serving.
Leave a Reply