
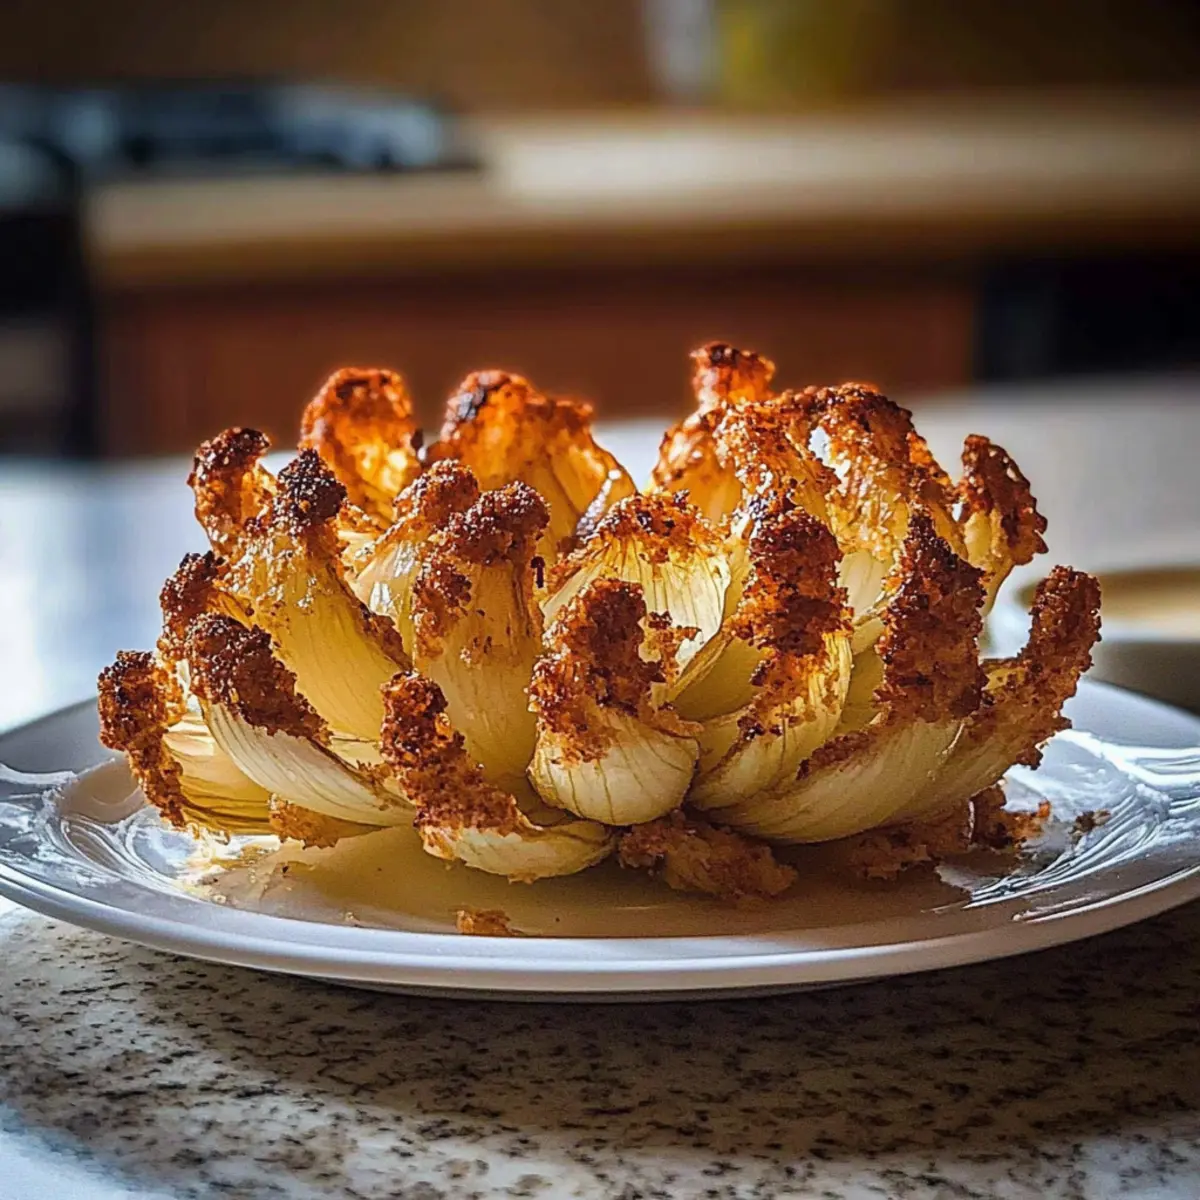
As I lifted the lid on my oven, a warm aroma enveloped the kitchen, reminding me of gatherings filled with laughter and good cheer. Today, I’m thrilled to share my Guilt-Free Oven-Baked Blooming Onion, a lighter twist on the classic favorite that brings joy without the heaviness. Each crispy petal pulls apart effortlessly, making this a fun, crowd-pleasing appetizer that’s perfect for your next party or game day. With just a sprinkle of spices and a drizzle of olive oil, you can indulge in an irresistible treat that’s healthier and vegetarian-friendly. Who knew that a dazzling centerpiece could also be guilt-free? Ready to discover how easy it is to whip up this stunning dish? Let’s dive in!
Why is This Blooming Onion Special?
Unique flavor: The combination of paprika and garlic powder creates a delightful taste that makes every petal pop with flavor.
Healthier option: This oven-baked version means you can enjoy your favorite snack with less guilt.
Easy preparation: With simple cuts and minimal ingredients, you’ll have a crowd-pleasing dish ready in no time.
Perfect for sharing: Great for parties or game days, this appetizer invites guests to pull apart and enjoy! Try pairing it with Corn Onion Souffle for a fantastic spread.
Versatile variations: Mix things up with different spices or dipping sauces to suit all palates!
Blooming Onion In Oven Ingredients
For the Onion
• Yellow Onion – Choose a large, firm onion to ensure a beautiful bloom.
• Olive Oil – Provides moisture and aids in browning; cooking spray can be a lighter substitute.
For the Coating
• All-Purpose Flour – Creates the crispy coating; gluten-free all-purpose flour works too.
• Paprika – Adds vibrant color and flavor; smoked paprika enhances the depth.
• Garlic Powder – Elevates the overall taste; feel free to switch to fresh garlic if desired.
• Cayenne Pepper – Stir in a pinch for heat; adjust to your spice comfort level.
• Salt – Essential for enhancing all the flavors.
• Black Pepper – Adds a delightful aroma and a hint of sharpness.
For the Wet Mixture
• Milk – Mixed with egg for that perfect coating; plant-based milk is a great dairy-free option.
• Egg – Acts as a binder for the coating; consider a flax egg for a vegan alternative.
For the Dipping Sauce
• Mayonnaise – Forms the base of your dipping sauce; substitute with Greek yogurt for lighter flavor.
• Ketchup – Provides a hint of sweetness; alternative sweeteners can work too.
• Horseradish – Optional, adds a zesty kick to the sauce.
Embrace the joy of creating a Blooming Onion In Oven that’s fun, flavorful, and guilt-free! Enjoy every crispy petal with your favorite sauce, and watch this dish become a star at your gatherings!
Step‑by‑Step Instructions for Blooming Onion In Oven
Step 1: Preheat the Oven
Begin by preheating your oven to 400°F (200°C). While the oven heats up, line a large baking sheet with parchment paper to ensure easy clean-up. This preparation sets the stage for your delicious Blooming Onion In Oven, making it ready for perfect crispiness as it cooks.
Step 2: Prepare the Onion
Take your large yellow onion and peel off the outer skin. Now, cut off about half an inch from the top, then place the onion with the root side down. Carefully make 12 to 16 vertical cuts around the onion, stopping just above the root to keep it intact. This creates beautiful petals that will bloom during baking.
Step 3: Mix the Dry Ingredients
In a mixing bowl, whisk together the all-purpose flour, paprika, garlic powder, cayenne pepper, salt, and black pepper. Stir until well-blended, allowing the fragrant spices to infuse the flour mixture. This coating will give the oven-baked blooming onion its crispy and flavorful exterior.
Step 4: Create the Wet Mixture
In a separate bowl, combine the milk and egg, whisking until they’re fully mixed. This wet mixture acts as the adhesive for our onion’s coating. Ensure it’s well combined, so every petal will be generously coated, resulting in a beautiful golden finish for your Blooming Onion In Oven.
Step 5: Coat the Onion
Carefully dip the prepared onion into the milk-egg mixture, making sure to let any excess liquid drip off. Then, dredge the onion in the flour mixture, ensuring even coverage on all the petals. Don’t hesitate to use your fingers to help the flour stick and achieve that appealing crunch.
Step 6: Bake the Onion
Place the coated onion on your lined baking sheet, and drizzle it generously with olive oil. Pop it into the preheated oven and bake for 30–40 minutes. Keep an eye on it; you’re looking for a tender texture and a delightful golden-brown color, which indicates the blooming onion is ready to shine.
Step 7: Prepare the Dipping Sauce
While your blooming onion is baking, it’s the perfect time to whip up the dipping sauce. In a mixing bowl, combine mayonnaise, ketchup, and horseradish if desired. Stir everything together until smooth and well-blended, creating a zesty complement to your oven-baked creation.
Step 8: Serve and Enjoy
Once the blooming onion is beautifully golden and crisp, remove it from the oven and let it cool for a few minutes. Serve it hot alongside your dipping sauce, encouraging guests to pull apart the petals. This Blooming Onion In Oven is sure to be the star of your next gathering!
What to Serve with Guilt-Free Oven-Baked Blooming Onion
Elevate your appetizer game with delightful pairings that will enhance the experience and bring joy to your table.
-
Creamy Garlic Dip: This rich and flavorful dip complements the onion’s crunch, adding a velvety texture that enhances every bite. It’s perfect for those who love a little extra creaminess in their snacks.
-
Spicy Sweet Potato Fries: These crispy fries add a hint of sweetness and a bit of heat, making them a delightful contrast to the savory blooming onion. The crunch of the fries mirrors the texture, creating a cohesive dish that’s irresistible.
-
Fresh Garden Salad: A light, refreshing salad balances the richness of the blooming onion. Toss in crisp greens, cherry tomatoes, and a zesty lemon vinaigrette for a burst of flavor and color on your plate.
-
Mini Quiches: Bite-sized mini quiches bring heartiness to your meal. Their cheesy, eggy filling pairs beautifully with the crispy petals, making for a satisfying blend that guests will adore.
-
Classic Beer: An ice-cold beer enhances the experience of munching on a blooming onion, adding a light and bubbly quality that cuts through the richness. Choose a pale ale or a light lager for a refreshing complement.
-
Sweet and Tangy Coleslaw: This crispy coleslaw provides a crunchy texture and zesty flavor that perfectly contrasts the warm onion. The vinegar dressing adds a nice touch, balancing the flavors on your plate.
-
Caramelized Onion Dip: Rich and savory, this dip takes the gnawing experience to another level, keeping with the onion theme. It introduces a sweet, yet earthy depth, inviting guests to taste and savor every flavor profile.
With these delightful pairings, your guilt-free oven-baked blooming onion is sure to steal the show at your next gathering!
Expert Tips for Blooming Onion In Oven
- Sharp Knife: Use a sharp knife to make clean cuts in the onion, ensuring the petals open beautifully without tearing.
- Root Intact: Be cautious not to cut through the root when slicing; this keeps your onion whole and allows it to bloom perfectly.
- Coating Time: Avoid coating the onion too far in advance, as this can make it soggy and less crispy when baked.
- Air Circulation: Ensure the onion has space on the baking sheet so air circulates freely, promoting even crispiness for your blooming onion in oven.
- Herb Infusion: Consider adding dried herbs to your coating mixture, like oregano or thyme, to enhance the flavor profile of your blooming onion.
Blooming Onion In Oven Variations
Feel free to get creative with this recipe and customize it to your liking!
- Sweet Onion: Substitute yellow onion with Vidalia for a milder flavor. The sweetness will add a unique twist that enhances the overall taste.
- Gluten-Free: Use a gluten-free all-purpose flour blend in the coating. This ensures everyone can enjoy a delicious blooming onion without any dietary restrictions holding them back.
- Spicy Kick: Add chili powder or cayenne for an extra spicy layer. Adjust the spice level according to your taste and make your blooming onion truly unforgettable!
- Herb Infusion: Incorporate dried herbs like oregano or thyme into the flour mixture. These little herby delights will elevate the flavor and give a fresh aroma to your blooming onion.
- Creamy Dipping Sauce: Try blending Greek yogurt and fresh herbs for a lighter yet flavorful dipping sauce. It’s a perfect complement and packs a punch of freshness!
- Veggie Bloom: Experiment with other vegetables like zucchini or cauliflower to create a veggie version. The technique remains the same, providing a delicious and crunchy option.
- Bonus Flavor: Swap in smoked paprika for enhanced depth. This twist adds a fabulous smoky flavor that will have everyone asking for the recipe!
- Zesty Sauce: Consider adding chipotle or sriracha to your dipping sauce for a spicy and tangy kick. It’ll take your dipping game to the next level and please those heat enthusiasts!
Looking for more delicious onion treats? Check out the mouthwatering Corn Onion Souffle and elevate your appetizer game!
Make Ahead Options
These Blooming Onion In Oven preparations are perfect for busy weeknights! You can slice and coat the onion up to 24 hours in advance; just keep it tightly wrapped in plastic wrap in the refrigerator to maintain freshness. While you can’t bake the onion until it’s ready to be enjoyed—this ensures it remains perfectly crispy—you can prepare the dipping sauce ahead of time as well, storing it in an airtight container for up to 3 days. When it’s time to serve, simply drizzle the prepared onion with olive oil and bake it fresh for those restaurant-quality results without the last-minute rush. Enjoy a delightful appetizer that feels effortless!
How to Store and Freeze Blooming Onion
Fridge: Store leftover blooming onion in an airtight container in the refrigerator for up to 2 days. It’s best enjoyed fresh for optimal crunchiness.
Freezer: While freezing isn’t ideal, you can freeze uncooked, coated onions on a baking sheet, then transfer to a freezer bag for up to 1 month. Bake directly from frozen, adding extra time.
Reheating: For the best results, reheat cooked blooming onion in the oven at 350°F (175°C) for about 10-15 minutes to restore its crispiness before serving.
Blooming Onion In Oven Recipe FAQs
What type of onion should I use for a blooming onion?
For the best blooming onion, I recommend using a large, firm yellow onion. These types hold their shape well while baking and develop a lovely flavor. Sweet onions like Vidalia can be used for a milder taste, while red onions can add a pop of color if you’re feeling adventurous!
How should I store leftovers of my blooming onion?
To store leftover blooming onion, place it in an airtight container in the refrigerator for up to 2 days. It’s best enjoyed fresh to maintain that delightful crunch. When you’re ready to enjoy it again, simply reheat it in a preheated oven at 350°F (175°C) for about 10-15 minutes to restore its crispy texture!
Can I freeze blooming onion?
Absolutely! You can freeze uncooked, coated blooming onions. Place them on a baking sheet in a single layer until frozen solid, then transfer them to a freezer bag. They can be stored this way for up to 1 month. When you’re ready to bake them, simply take them directly from the freezer and follow the baking instructions, adding a little extra time as needed!
What if my blooming onion doesn’t bloom properly?
If your blooming onion doesn’t bloom as beautifully as expected, it might be due to cutting through the root. Make sure to carefully slice only down to the root without cutting through it, as this keeps the onion intact for proper blooming. Additionally, ensure good air circulation on your baking sheet for even cooking, and that you’re not coating it too far in advance to maintain its crispiness.
Can I make a vegan version of this blooming onion?
Yes, you can easily make a vegan version of this blooming onion! Simply substitute the egg with a flax egg (1 tablespoon ground flaxseed mixed with 2.5 tablespoons of water, let sit for 5 minutes), and use plant-based milk. For the dipping sauce, replace mayonnaise with a vegan alternative or consider using cashew cream or tahini for added creaminess without dairy.
How spicy is the blooming onion?
The level of heat in your blooming onion depends on how much cayenne pepper you choose to use. If you prefer a milder flavor, omit the cayenne altogether or use just a pinch. For those who enjoy a bit more of a kick, feel free to add more according to your taste preference. The beauty of this dish is that it can be tailored to suit your personal heat level!
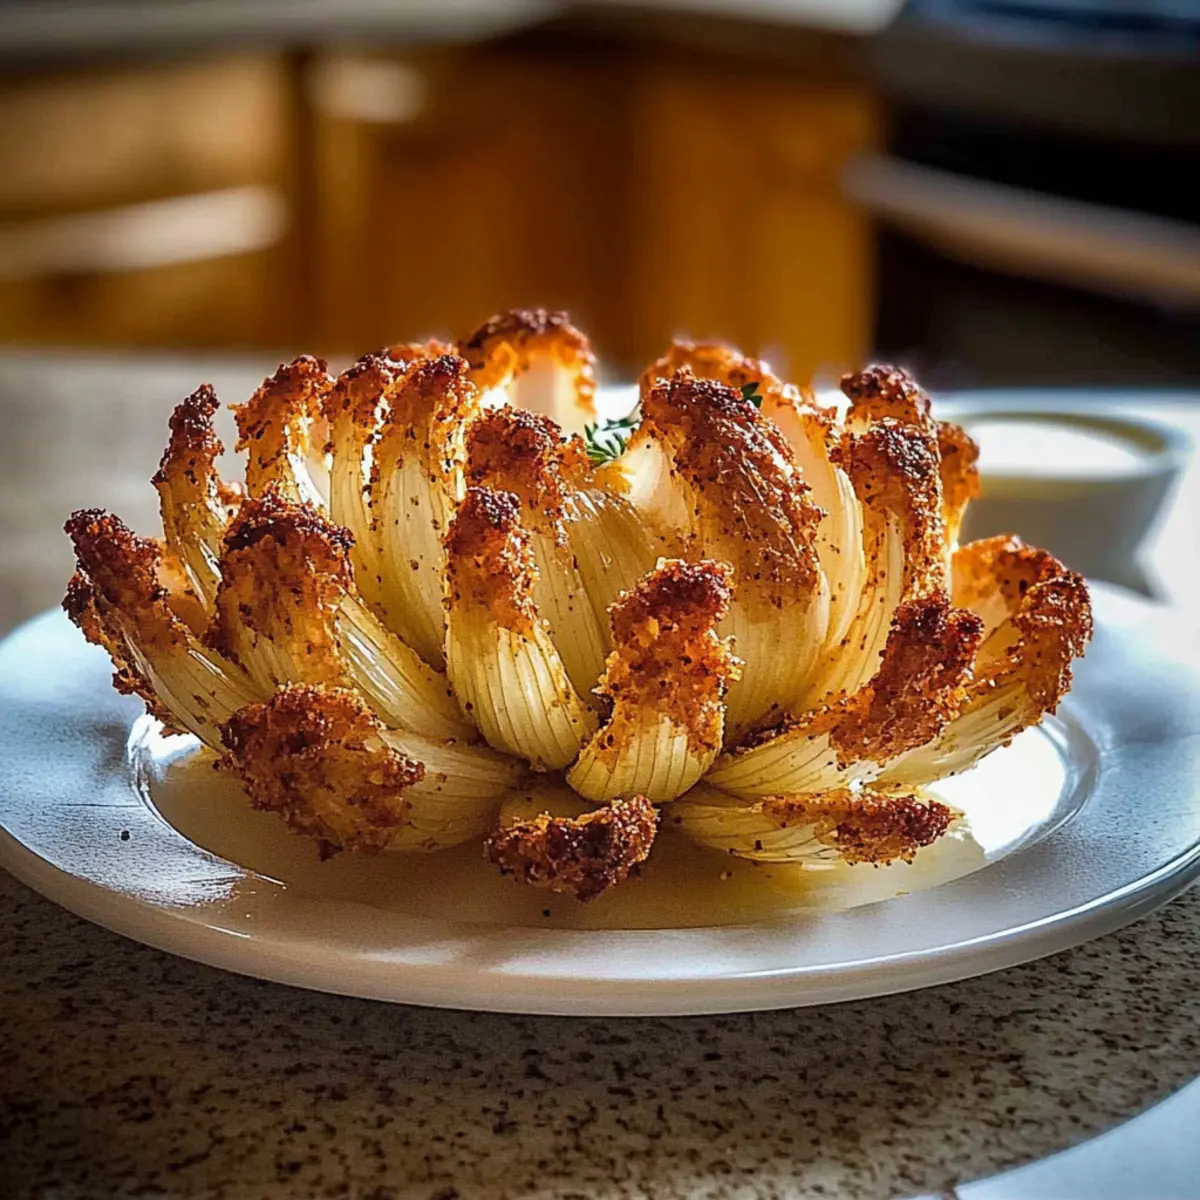
Crispy Blooming Onion In Oven for Guilt-Free Snacking
Ingredients
Equipment
Method
- Preheat the oven to 400°F (200°C) and line a large baking sheet with parchment paper.
- Peel the onion and cut off about half an inch from the top. Make 12 to 16 vertical cuts around the onion, keeping the root intact.
- In a bowl, whisk together flour, paprika, garlic powder, cayenne, salt, and black pepper until well-blended.
- In a separate bowl, mix milk and egg until fully combined.
- Dip the onion into the wet mixture, letting excess drip off, then dredge it in the flour mixture for even coating.
- Place the coated onion on the baking sheet, drizzle with olive oil, and bake for 30-40 minutes until golden brown.
- While baking, combine mayonnaise, ketchup, and horseradish in a bowl for the dipping sauce.
- Once golden and crispy, let the onion cool slightly, then serve with the dipping sauce.
Leave a Reply