
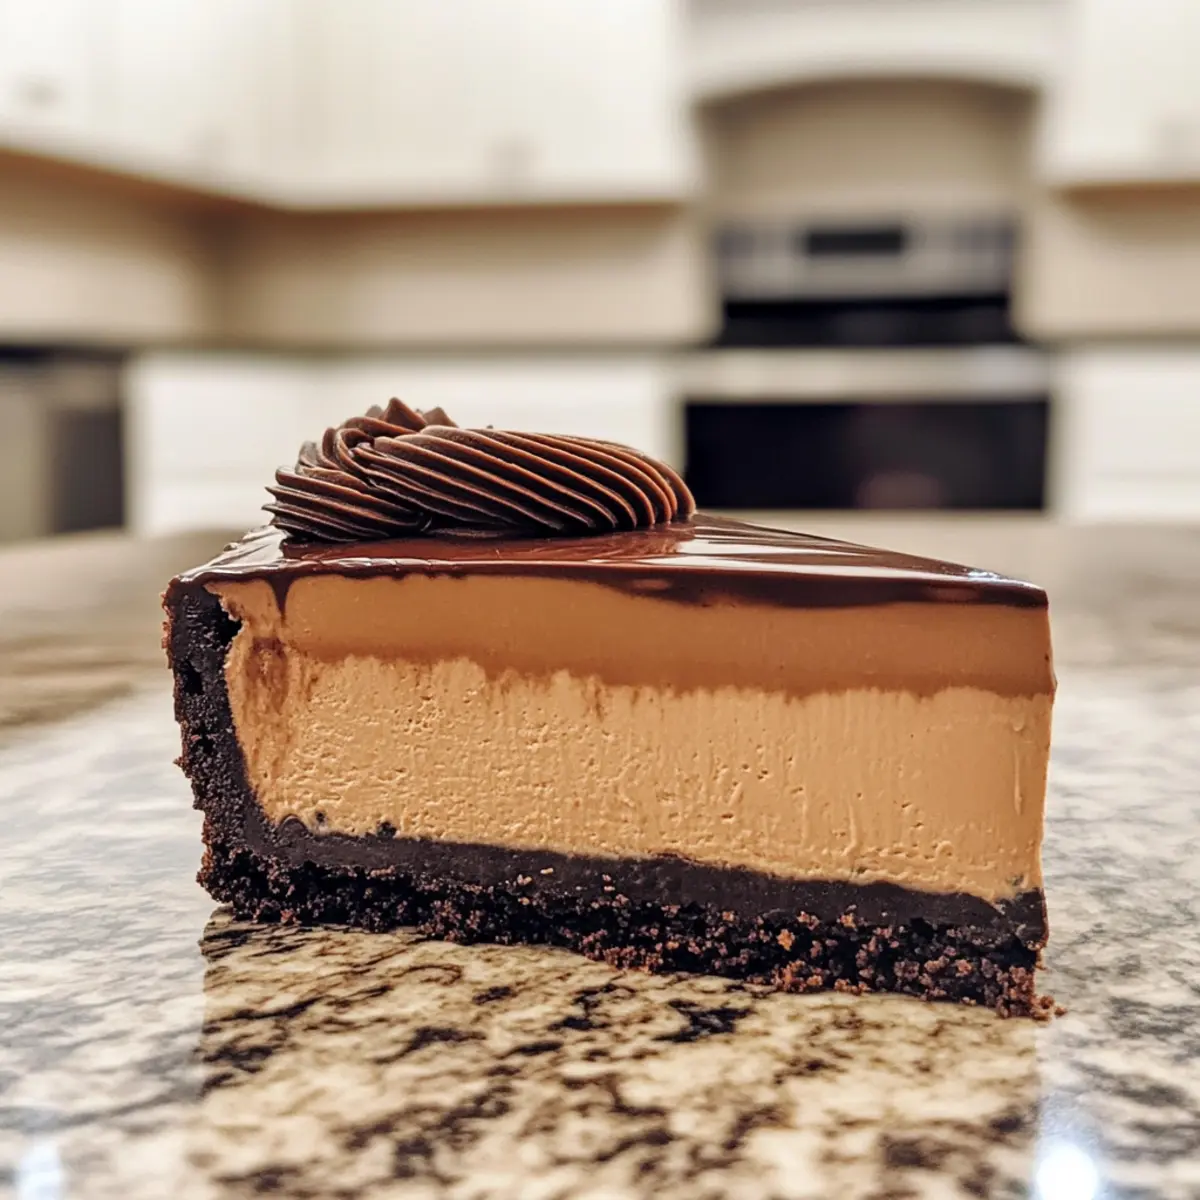
As I took a bite of my latest creation, the creamy layers of my Espresso Coffee Cheesecake enveloped my senses, sending me on a delightful coffee journey. This elegant dessert is more than just a treat; it’s a chance to impress friends at gatherings or savor a quiet evening at home. With its make-ahead convenience, you can whip it up in advance, ensuring a stress-free experience when hosting. Plus, the customizable options—from mocha to caramel variations—allow everyone to find their perfect match. Ready to see how this coffee-infused masterpiece comes together? Let’s dive into the recipe that will soon become your new favorite!
Why is this cheesecake a must-try?
Indulgent Flavor: This Espresso Coffee Cheesecake is a dream come true for coffee lovers, balancing a rich espresso flavor with creamy cheesecake bliss.
Make-Ahead Convenience: Stress less at your gatherings! This recipe lets you prepare ahead, allowing flavors to meld beautifully.
Customizable Delights: Switch things up with variations like Mocha Cheesecake or Caramel Espresso Cheesecake, catering to all taste buds.
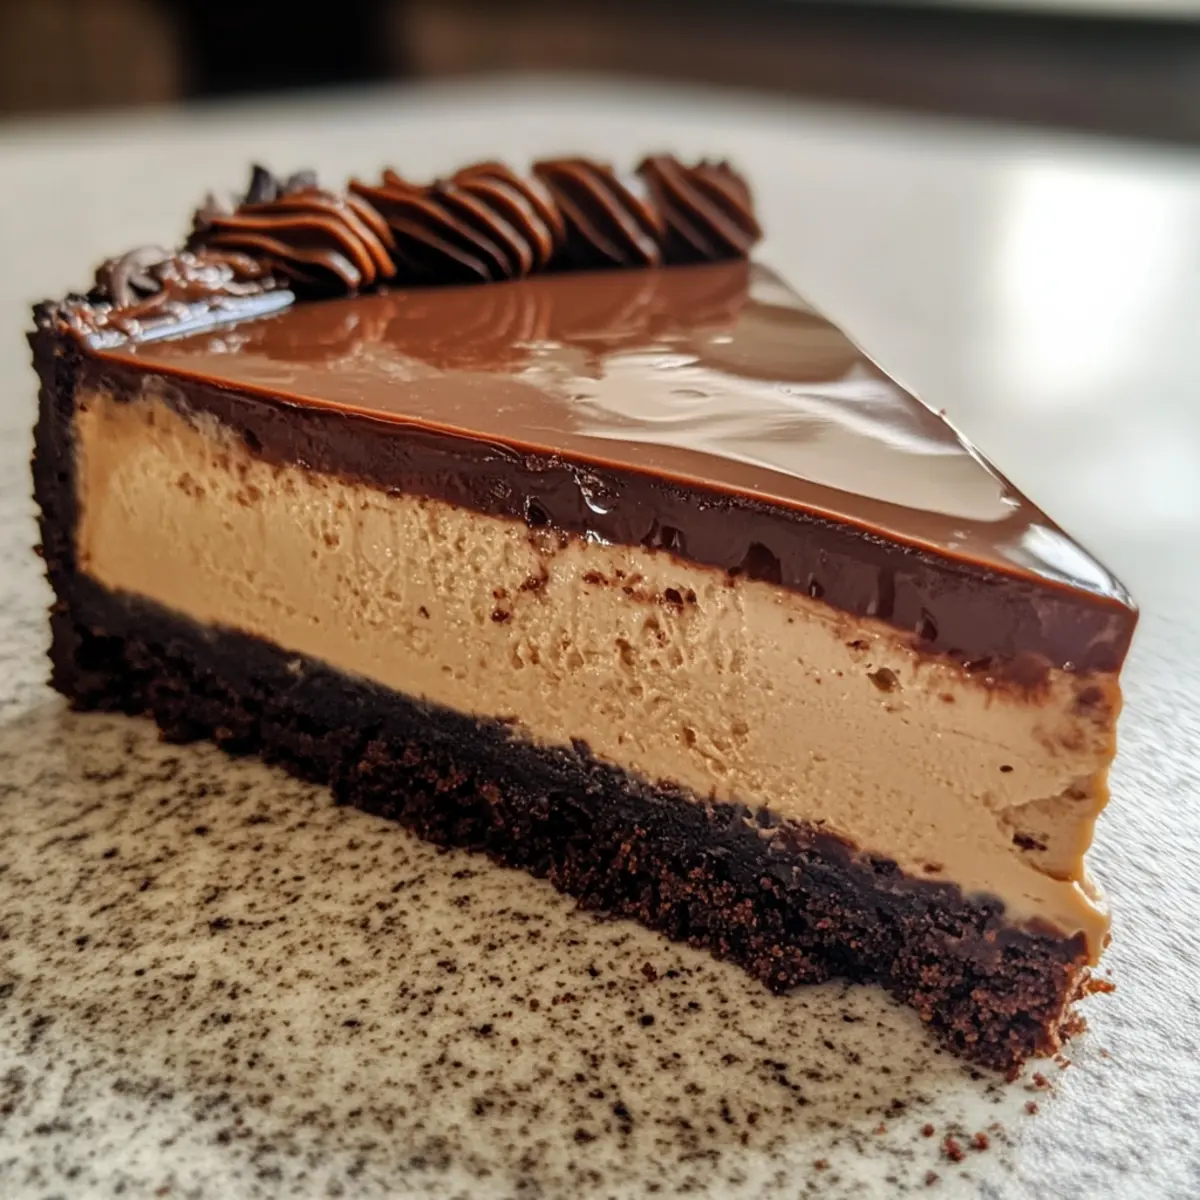
Impressive Presentation: With its glossy ganache and stunning layers, this dessert is sure to steal the spotlight, perfect for impressing guests.
Versatile Pairing: Compliments perfectly with coffee, dessert wines, or even an espresso martini, making it a well-rounded dessert choice for any occasion.
Discover more tempting ideas like the Pumpkin Pie Cheesecake or the luscious Chocolate Raspberry Cheesecake to expand your dessert repertoire!
Espresso Coffee Cheesecake Ingredients
For the Crust
• Crushed Chocolate Cookies – This creates a rich base for the cheesecake; use gluten-free cookies for a gluten-free option.
• Unsalted Butter – Binds the cookie crust together; coconut oil can be used for a dairy-free version.
For the Cheesecake Filling
• Cream Cheese – Gives the cheesecake its signature creamy texture; ensure it’s at room temperature for best mixing results.
• Granulated Sugar – Sweetens the mixture; consider reducing for a less sweet cheesecake.
• Eggs – Provides structure; make sure they are room temperature for optimal blending.
• Vanilla Extract – Enhances flavors; choose pure extract for the best taste experience.
• Sour Cream – Adds a tangy creaminess; Greek yogurt can be used as a substitute.
• Strong Brewed Espresso – Infuses the cheesecake with a rich coffee flavor; instant coffee dissolved in hot water works as a substitute.
• All-Purpose Flour – Helps set the filling; omit for a gluten-free version.
For the Ganache Topping
• Semi-Sweet Chocolate Chips – Forms the base of the ganache; dark chocolate offers a bolder flavor if preferred.
• Heavy Cream – Adds smoothness to the ganache; coconut cream makes a great dairy-free alternative.
• Brewed Espresso (for ganache) – Deepens the chocolate taste; can be omitted for a pure chocolate ganache.
Optional Garnishes
• Whipped cream – Adds a light finish to the cheesecake; use freshly whipped for best flavor.
• Chocolate shavings – Provides a decorative touch; opt for dark chocolate for a richer contrast.
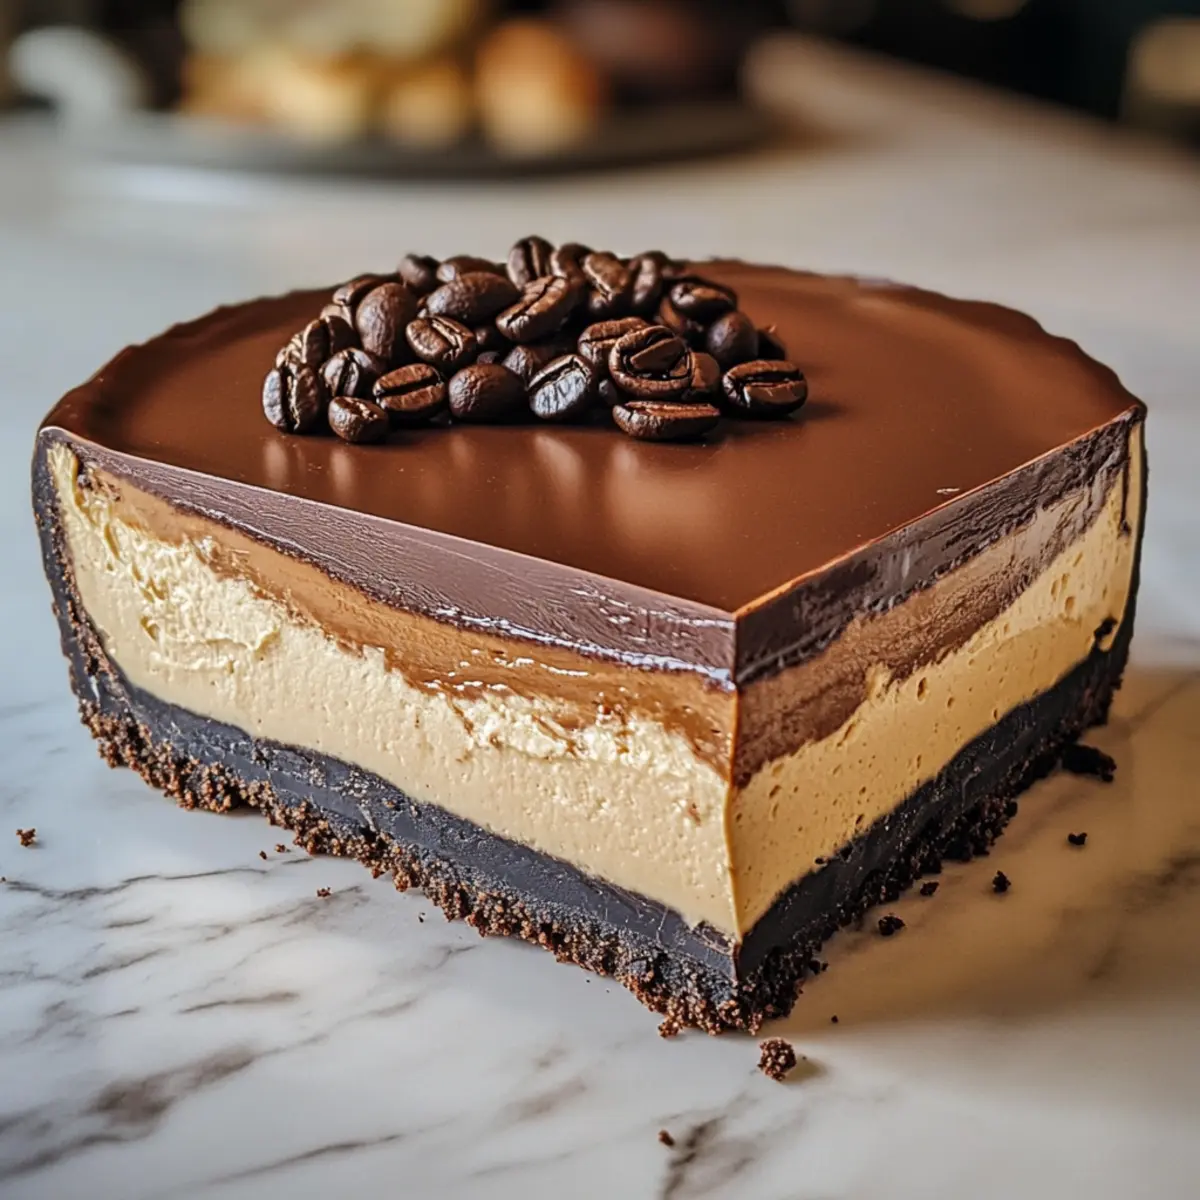
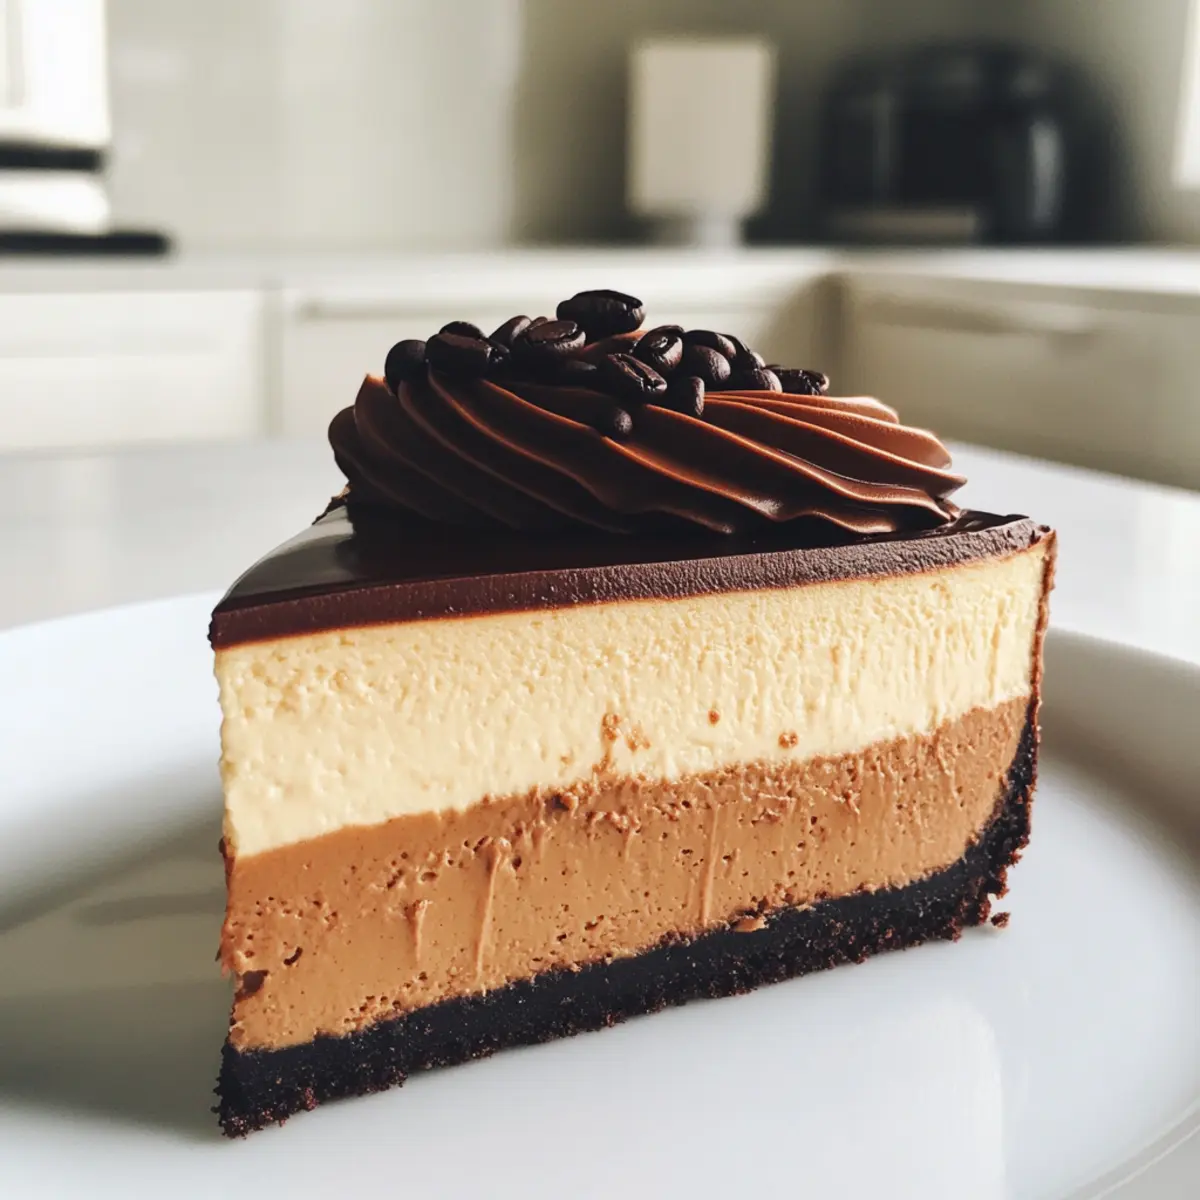
• Coffee beans – Elevates the coffee theme; use as a garnish for that extra flair.
This Espresso Coffee Cheesecake is rich in flavor and a delight to prepare, making it perfect for your next special occasion!
Step‑by‑Step Instructions for Espresso Coffee Cheesecake
Step 1: Prepare the Crust
Preheat your oven to 325°F (160°C). In a mixing bowl, combine crushed chocolate cookies with melted unsalted butter until well blended. Press this mixture firmly into the bottom of a springform pan to create an even crust. Bake the crust for 8-10 minutes until set, then remove it from the oven and allow it to cool completely.
Step 2: Make Filling
In a large mixing bowl, beat room temperature cream cheese until it’s smooth and creamy. Gradually add granulated sugar, and mix until combined. One at a time, add room temperature eggs, ensuring each is fully incorporated. Stir in vanilla extract, sour cream, and brewed espresso, blending until everything is fully combined. Gently fold in all-purpose flour, ensuring the mixture is smooth without overmixing.
Step 3: Bake the Cheesecake
Wrap the bottom of the springform pan tightly with aluminum foil to prevent water leakage. Place the pan in a larger roasting pan and fill it with hot water until it reaches halfway up the sides of the springform pan. Bake the Espresso Coffee Cheesecake for 60-70 minutes, until the edges are set but the center remains slightly jiggly. Turn off the oven and leave the cheesecake inside for an additional hour to cool gradually.
Step 4: Add Ganache
While the cheesecake cools, prepare the ganache. In a small saucepan, gently heat heavy cream until it begins to simmer. Pour the hot cream over semi-sweet chocolate chips in a bowl, letting it sit for a minute to melt. Stir until smooth, then blend in brewed espresso for added flavor. Allow the ganache to cool slightly before pouring it over the cheesecake, spreading it evenly.
Step 5: Chill and Serve
Once the ganache is set, refrigerate the Espresso Coffee Cheesecake for at least 4-6 hours, or preferably overnight, to allow the flavors to meld. Before serving, garnish with whipped cream, chocolate shavings, and whole coffee beans for an elegant touch. Slice and enjoy your delightful Espresso Coffee Cheesecake, showcasing its creamy layers and rich flavors.
Espresso Coffee Cheesecake Variations
Feel free to get creative and customize your Espresso Coffee Cheesecake with these exciting twists that will tantalize your taste buds.
-
Mocha Cheesecake: Add cocoa powder to the cheesecake filling for a delightful coffee-chocolate fusion. The richness of chocolate will perfectly complement the espresso, creating a dessert that’s even more indulgent.
-
Vanilla Latte Cheesecake: Swap espresso with brewed coffee and incorporate vanilla bean paste for a subtle yet inviting flavor. This variation will transport you to your favorite café with every bite!
-
Caramel Espresso Cheesecake: Drizzle warm caramel sauce over the ganache layer before serving for a luscious, sweet touch. The blend of caramel and coffee will awaken your senses and add an element of surprise.
-
Nutty Crust: For a delightful crunch, mix crushed almonds or walnuts into the cookie base instead of using only chocolate cookies. This nutty twist will give your cheesecake a unique flavor and texture.
-
Chocolate Raspberry Cheesecake: Fold in fresh or frozen raspberries into the filling for a delightful fruity surprise. This combination sparks a refreshingly tangy contrast to the creamy espresso cheesecake.
-
Dairy-Free Version: Substitute cream cheese with a dairy-free cream cheese alternative and use coconut cream for the ganache. This way, everyone can enjoy a slice of this delightful cheesecake without sacrificing flavor.
-
Spiced Espresso Cheesecake: Add a pinch of cinnamon or a touch of nutmeg to your filling for a cozy, spiced flavor that dances beautifully with the coffee notes. Perfect for fall gatherings!
If you love experimenting with flavors, you might also enjoy the rich layers of our Cherry Pistachio Cheesecake or indulge in the creamy delight of the Sugar Cookie Cheesecake. Customize this dessert to fit any occasion!
How to Store and Freeze Espresso Coffee Cheesecake
Refrigerator: Store your Espresso Coffee Cheesecake in the fridge for up to 5 days. Cover it with plastic wrap or aluminum foil to keep it fresh and prevent any absorption of odors.
Freezer: This cheesecake can be frozen for up to 2 months. Wrap individual slices tightly in plastic wrap, then place them in an airtight container for added protection.
Thawing: To thaw, transfer the cheesecake to the refrigerator the night before serving. This gradual defrosting helps maintain its creamy texture.
Reheating: If you prefer your cheesecake slightly warmed, gently reheat individual slices in the microwave for about 10-15 seconds. Enjoy the delightful flavors of your Espresso Coffee Cheesecake!
What to Serve with Espresso Coffee Cheesecake?
Elevate your dessert experience by pairing this rich, creamy delight with complementary flavors and textures that will make your taste buds dance.
-
Fresh Berries: Juicy raspberries or strawberries provide a tart contrast that balances the sweetness of the cheesecake. Their vibrant colors make for an eye-catching presentation.
-
Whipped Cream: A dollop of lightly sweetened, fluffy whipped cream creates a light texture that beautifully contrasts the dense cheesecake. It’s the perfect addition to each bite!
-
Espresso Shot: For true coffee aficionados, a shot of espresso intensifies the dessert experience, mirroring the coffee notes while keeping your spirits high.
-
Dark Chocolate Shavings: Sprinkle rich dark chocolate on top for a decorative and flavorful touch; it enhances the chocolate crust and adds depth to the cheesecake.
-
Nutty Biscotti: Crunchy, almond-flavored biscotti offers a pleasant texture that complements the smoothness of the cheesecake. Enjoy it alongside your dessert for a delightful crunch!
-
Coffee-Infused Dessert Wine: A glass of dessert wine with coffee notes pairs seamlessly with the cheesecake, enhancing its flavor profile and bringing out the espresso essence brilliantly.
-
Cinnamon Sugar Dusting: A light sprinkle of cinnamon sugar adds warmth and a hint of spice, elevating the overall flavor and bringing a cozy touch to every slice.
This irresistible Espresso Coffee Cheesecake holds its own, but these delightful pairings will take your dessert experience to a whole new level!
Expert Tips for Espresso Coffee Cheesecake
-
Room Temperature Ingredients: Ensure all your ingredients, especially cream cheese and eggs, are at room temperature. This helps create a lump-free Espresso Coffee Cheesecake with a smooth texture.
-
Avoid Overmixing: When combining your ingredients, mix just until smooth. Overmixing can introduce air bubbles, leading to cracks during baking.
-
Check for Doneness: Your cheesecake is ready when the edges are set but the center is slightly jiggly. This ensures a perfect creamy texture.
-
Prevent Cracks: If cracks develop while baking, don’t fret! Cover them with a generous layer of ganache or whipped cream for a beautiful finish.
-
Water Bath Technique: Always wrap your springform pan with foil to prevent water from seeping in during the water bath method. This step is crucial for achieving that perfect creamy consistency.
Make Ahead Options
These Espresso Coffee Cheesecake slices are perfect for busy home cooks looking to streamline their meal prep! You can prepare the crust up to 24 hours in advance, simply cover it tightly with plastic wrap after cooling. Additionally, the cheesecake filling can be made a day ahead and poured over the pre-made crust. Allow it to set in the refrigerator for at least 4–6 hours (or overnight) before serving. For superior quality, keep the cheesecake covered to prevent any drying out. When you’re ready to serve, simply top with the ganache, which can also be made in advance and stored in the fridge for up to 3 days. Enjoy a delicious dessert that not only saves you time but also impresses your guests!
Espresso Coffee Cheesecake Recipe FAQs
What is the best way to select fresh ingredients for this cheesecake?
Absolutely! When choosing your ingredients, look for cream cheese that’s smooth and creamy without any lumps. The eggs should be fresh, and I recommend using room-temperature eggs to improve blending. For the espresso, go for high-quality coffee beans or a fresh brew; you’ll notice a big difference in flavor!
How do I store leftover Espresso Coffee Cheesecake?
Very simple! Wrap your cheesecake tightly in plastic wrap or aluminum foil and store it in the refrigerator. It will stay fresh for up to 5 days. For best results, place it in an airtight container to prevent it from absorbing other smells from the fridge.
Can I freeze Espresso Coffee Cheesecake? If so, how?
Yes, you can definitely freeze your cheesecake! Here’s how to do it: Wrap individual slices tightly in plastic wrap, then place them in an airtight container or freezer bag. It stays fresh in the freezer for up to 2 months. When you’re ready to enjoy, simply transfer the cheesecake to the refrigerator to thaw overnight.
What if my cheesecake cracks during baking?
Don’t worry at all! Cracking is common. If your cheesecake cracks while baking, cover the imperfections with your luscious ganache or a dollop of whipped cream after it’s cooled – this makes for a beautiful presentation and adds flavor too! Just ensure you don’t overmix your ingredients next time to minimize this.
Can I use substitutions for dietary restrictions?
Absolutely! This Espresso Coffee Cheesecake is quite versatile. You can use gluten-free cookies for the crust to make it gluten-free. For a dairy-free option, substitute cream cheese with a dairy-free alternative and replace the heavy cream in the ganache with coconut cream. Always check labels for allergens to make sure they fit your dietary needs!
Irresistible Espresso Coffee Cheesecake for Coffee Lovers
Ingredients
Equipment
Method
- Preheat your oven to 325°F (160°C). Combine crushed chocolate cookies with melted unsalted butter until well blended. Press firmly into the bottom of a springform pan. Bake for 8-10 minutes until set, then cool completely.
- In a large mixing bowl, beat cream cheese until smooth. Gradually add sugar and mix until combined. Add room temperature eggs one at a time. Stir in vanilla, sour cream, and brewed espresso. Fold in flour gently.
- Wrap the bottom of the springform pan with foil to prevent water leakage. Place in a larger roasting pan and fill with hot water halfway up the sides. Bake for 60-70 minutes until edges are set and center is slightly jiggly. Turn off the oven and let cool in the oven for another hour.
- For the ganache, heat heavy cream in a saucepan until simmering. Pour over chocolate chips, let sit for a minute, then stir until smooth. Blend in brewed espresso and let cool slightly before pouring over the cheesecake.
- Refrigerate for at least 4-6 hours or preferably overnight. Garnish with whipped cream, chocolate shavings, and coffee beans before serving.
Leave a Reply