
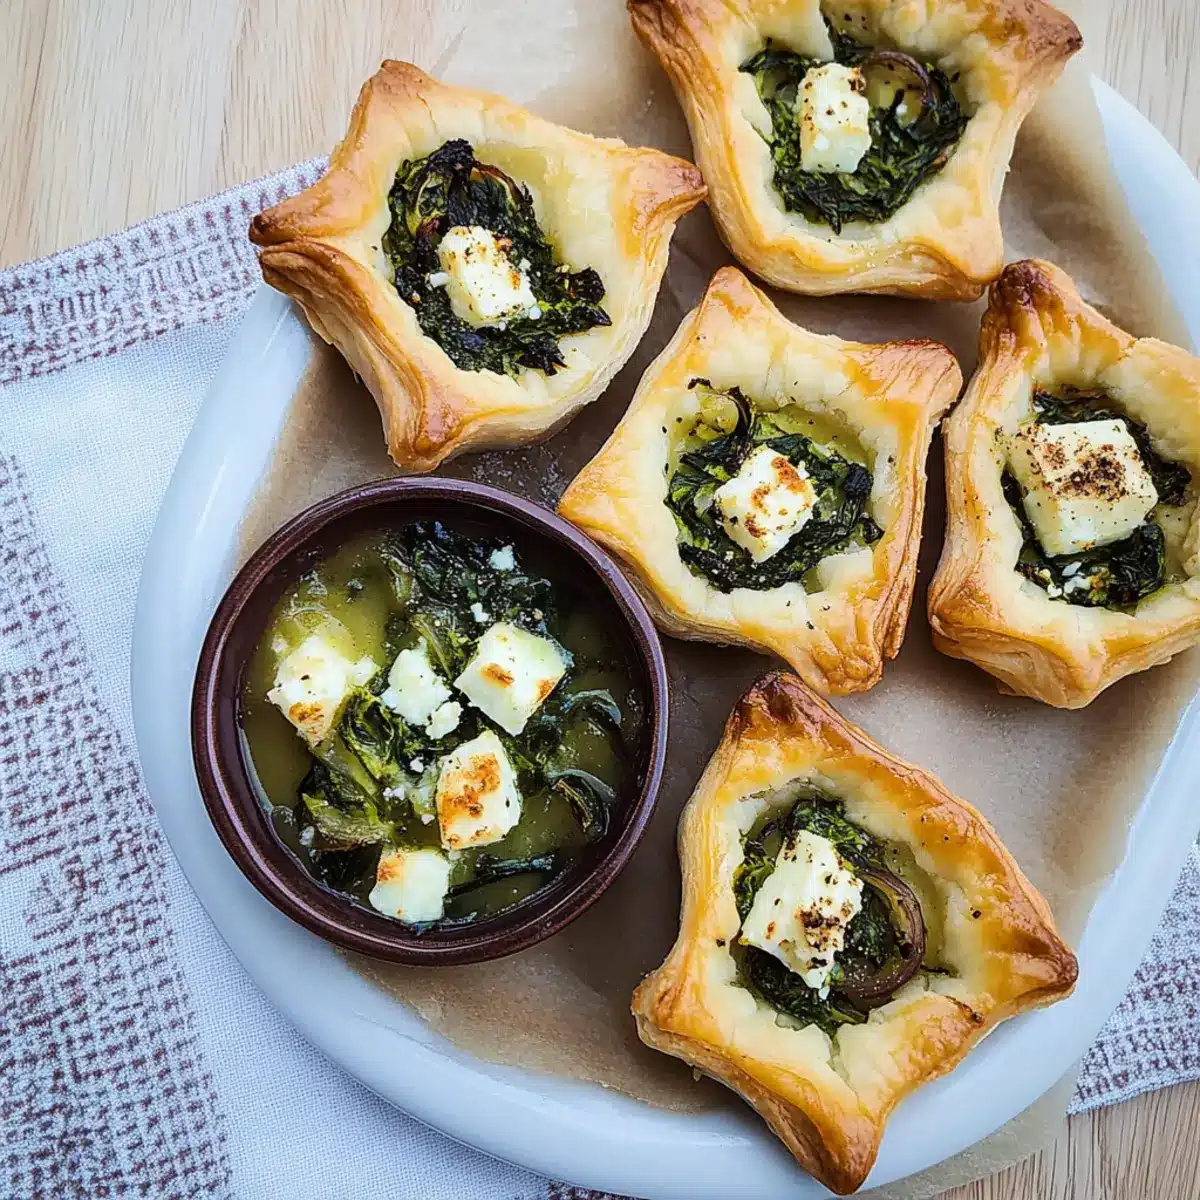
The vibrant colors of fall fill the air as I set the table for a festive Thanksgiving gathering. Among the array of flavors I love to offer, these Feta and Spinach Tartlets stand out as delightful little bites that pack a punch. Not only are they vegetarian-friendly, but their no-cook preparation makes them a breeze to whip up ahead of time, leaving more moments to cherish with family and friends. With a flaky, buttery crust cradling a creamy filling of tangy feta and fresh spinach, they’re bound to impress even the pickiest of eaters. Ready to elevate your holiday spread with some crowd-pleasing appetizers? Let’s dive into the delicious world of Thanksgiving appetizers and make your gathering truly memorable!
Why Are Feta and Spinach Tartlets Amazing?
Ease of Preparation: These tartlets require minimal cooking, making them perfect for a busy Thanksgiving. You can assemble them ahead of time, allowing you to focus on other delicious dishes, like my Oliver Leek and Potato Pie.
Flavor Explosion: The combination of tangy feta and fresh spinach creates an irresistible filling that surprises with every bite!
Vegetarian Delight: Not only are they meat-free, but they also cater to dietary preferences, ensuring every guest feels included at your gathering.
Stunning Presentation: With their golden, flaky crust, these tartlets add an elegant touch to your appetizer spread, making them visually appealing and delicious.
Versatile Ingredient Swaps: Feel free to mix and match by trying different cheeses or adding herbs for personalization—check out my take on Butternut Squash and Apple for inspiration!
Crowd-Pleasing Appeal: These bites are not only tasty but also small enough for easy snacking, making them an instant hit with anyone craving homemade food!
Feta and Spinach Tartlets Ingredients
For the Pastry
• All-purpose Flour – This forms the base of your flaky crust; whole wheat flour can be used for a heartier texture.
• Unsalted Butter – Cold and cubed, it gives the crust a rich flavor and tender crumb; margarine can be a substitute, but it may alter the taste.
• Salt – Enhances the flavor of the crust; don’t skip it!
• Ice Water – Helps bring the dough together without melting the butter, ensuring a flaky result.
For the Filling
• Feta Cheese – The star of the dish, providing tanginess; replace it with goat cheese for a milder touch.
• Fresh Spinach – Offers vibrant color and nutrition; frozen spinach can work, but make sure to drain excess moisture.
• Eggs – Bind the filling together and add richness; for a vegan alternative, consider using a flaxseed or chia seed mixture.
• Black Pepper – A dash to season the filling; add a pinch of nutmeg for a warm touch!
Optional Garnish
• Fresh Herbs – Add chopped parsley or dill for an extra layer of flavor; these will brighten the tartlets beautifully.
• Cherry Tomatoes – Halved and placed on top for a pop of color and freshness, enhancing both taste and presentation.
These Feta and Spinach Tartlets are not only a delicious addition to your Thanksgiving appetizer table but also a showcase of seasonal ingredients that make entertaining effortless. Enjoy crafting these delightful bites!
Step‑by‑Step Instructions for Feta and Spinach Tartlets
Step 1: Prepare the Pastry Dough
In a large mixing bowl, combine all-purpose flour and salt, then cut in cold, cubed unsalted butter until the mixture resembles coarse crumbs. Gradually add ice water, mixing until the dough just comes together. Turn it onto a lightly floured surface, knead gently for a few seconds, wrap in plastic, and chill in the refrigerator for at least 30 minutes.
Step 2: Preheat the Oven
While the dough chills, preheat your oven to 375°F (190°C). This temperature ensures a perfect golden brown crust for the Feta and Spinach Tartlets. Position the oven rack in the middle to allow even heat distribution for optimal baking.
Step 3: Prepare the Spinach Filling
In a bowl, whisk together eggs, crumbled feta cheese, and freshly chopped spinach until well combined. Season the filling with black pepper and stir in optional herbs if desired. The colors should be vibrant, and the overall mixture should be creamy and evenly blended for a delicious filling.
Step 4: Roll Out the Dough
Remove the chilled pastry dough from the refrigerator and place it on a lightly floured surface. Roll it out to about 1/8-inch thickness, ensuring it’s even. Using a round cutter or a glass, cut out circles of dough that will fit into your tartlet pan. Aim for a size that allows for some overhang to create a lovely crust.
Step 5: Assemble the Tartlets
Carefully place the rolled-out dough circles into the greased tartlet pans, gently pressing them into the bottoms and sides. Trim any excess dough that might hang over the edges. Spoon the spinach and feta filling into each pastry shell, ensuring not to overfill, as this allows your Feta and Spinach Tartlets to bake evenly.
Step 6: Bake the Tartlets
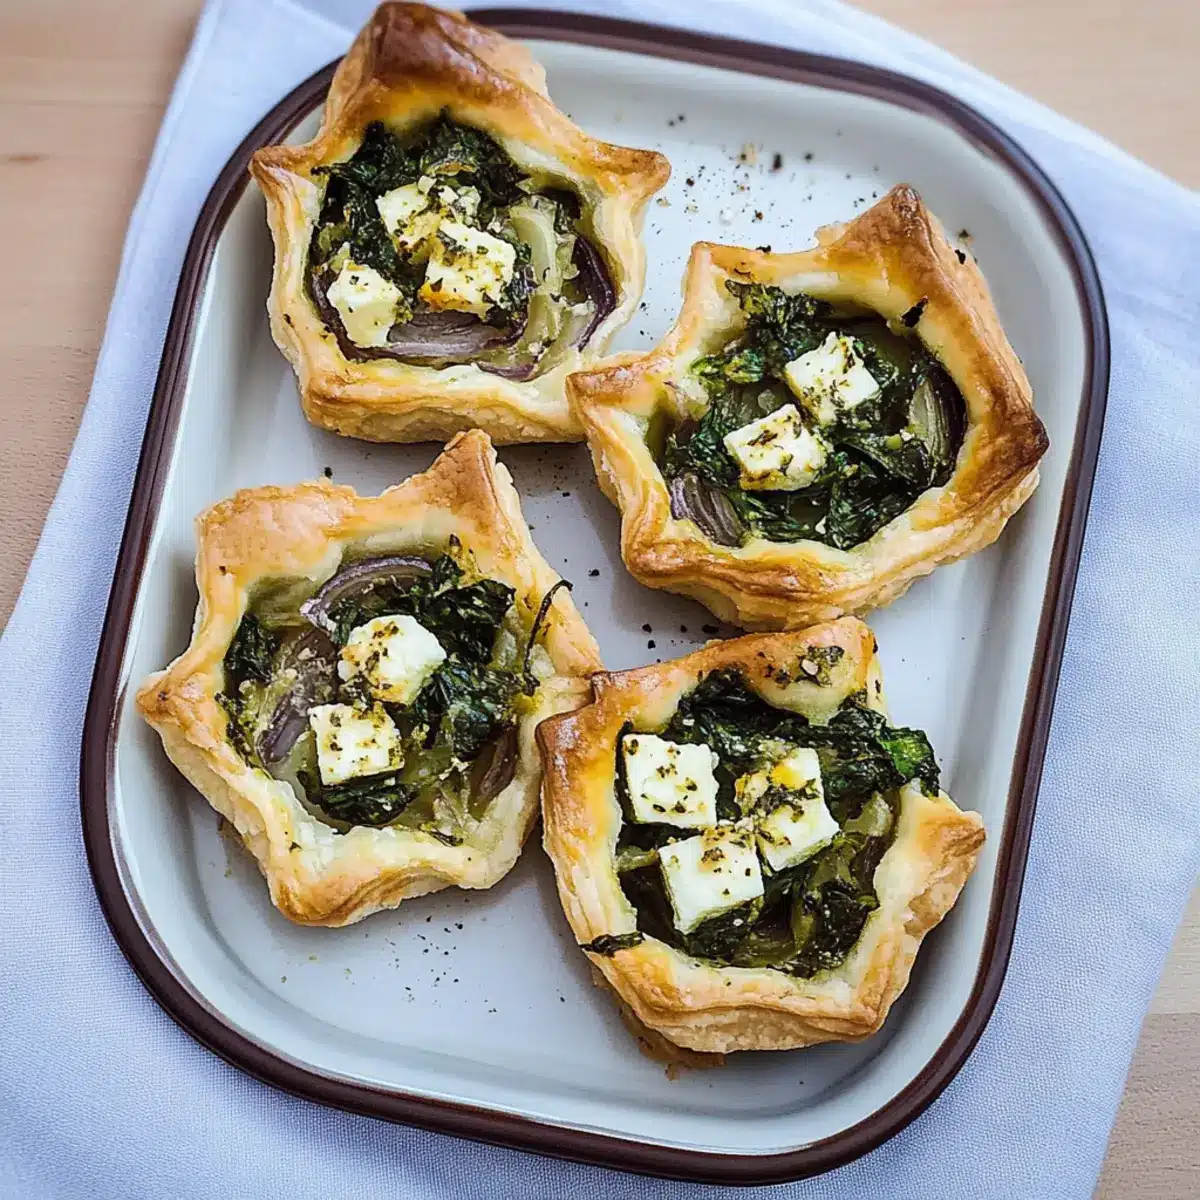
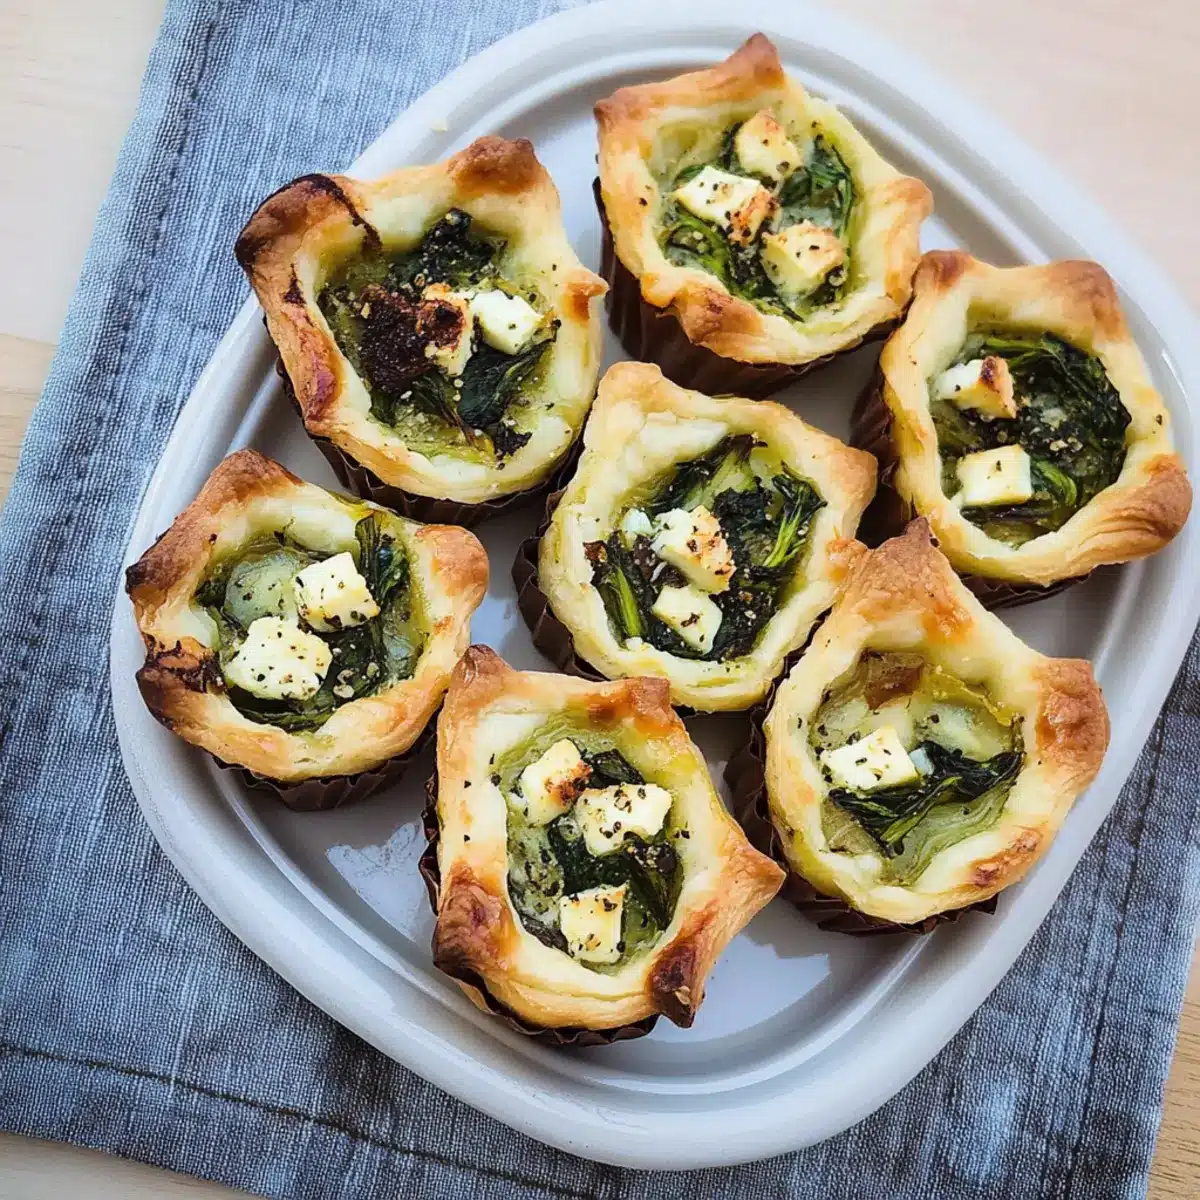
Place the filled tartlet pans in the preheated oven and bake for 20-25 minutes or until the crust is golden brown and the filling is set. The tartlets should puff slightly, and you’ll know they are ready when they’re beautifully golden on top, creating a mouthwatering visual appeal.
Step 7: Cool and Serve
Once baked, remove the tartlets from the oven and allow them to cool in their pans for about 5 minutes. Gently remove the tartlets and place them on a serving platter. If desired, garnish with halved cherry tomatoes or fresh herbs for extra flavor and color before serving these delightful Feta and Spinach Tartlets to your guests!
Feta and Spinach Tartlets Variations
Feel free to bring your creativity to life by customizing these delightful tartlets!
- Cheese Swap: Replace feta with goat cheese for a creamier, milder flavor that pleases all palates.
- Herb Infusion: Add fresh dill or basil for aromatic notes, elevating the tartlets with a garden-fresh flavor.
- Nutty Crunch: Toss in some pine nuts or walnuts for additional texture and a nutty flavor that complements the filling beautifully.
- Greens Alternative: Substitute spinach with kale or Swiss chard for a heartier option that’s still vibrant and delicious.
- Zesty Kick: Incorporate some red pepper flakes for a touch of heat; it adds an exciting contrast to the creamy filling!
- Veggie Boost: Mix in roasted red peppers or sun-dried tomatoes for added sweetness and vibrant color, making each tartlet a feast for the eyes!
- Bite-Sized Pops: Create mini versions using a mini-muffin tin for delightful party bites that are easy to handle and perfect for mingling.
- Sweet Twist: Try a sweet version by using a sweet pastry base filled with a creamy mixture of feta and honey for dessert-style tartlets!
These variations not only personalize the classic Feta and Spinach Tartlets but also ensure something delicious for everyone at your gathering, effortlessly blending seasonal ingredients and enticing flavors! If you’re looking to explore more delicious ideas, consider mixing things up with my Roasted Pear Cranberry or indulge in a colorful salad that pairs perfectly.
Make Ahead Options
These Feta and Spinach Tartlets are ideal for busy home cooks looking to save time during the hustle of Thanksgiving! You can prepare the dough and filling up to 24 hours in advance. Simply make the pastry and wrap it tightly in plastic wrap to refrigerate, while the filling can be stored in an airtight container. When you’re ready to serve, roll out the dough, fill the tartlet shells, and bake them fresh for 20-25 minutes. Just remember to keep the unbaked tartlets covered to prevent drying out. This way, the final result will be just as delicious as if you made them on the day of your gathering, allowing you to enjoy more precious moments with your loved ones!
What to Serve with Feta and Spinach Tartlets
The joy of Thanksgiving is amplified when you pair these delightful little bites with complementary dishes that elevate your gathering.
-
Crispy Mixed Greens Salad: A refreshing salad topped with a zesty vinaigrette enhances the richness of the tartlets. The crunch of fresh greens adds texture, while the acidity cuts through the creaminess beautifully.
-
Savory Roasted Vegetables: Roasted root vegetables like carrots and sweet potatoes provide a warm, sweet contrast to the tartlets’ tangy filling. The caramelization intensifies their flavors, creating a comforting centerpiece on your dessert table.
-
Herbed Quinoa with Cranberries: Nutty quinoa flecked with herbs and tart cranberries offers a wholesome side that complements the saltiness of the feta. It introduces a pop of color and freshness as a lovely contrast to the buttery crust.
-
Classic Tomato Basil Bruschetta: The fresh burst of tomatoes and aromatic basil on crusty bread pairs perfectly with the tartlets. This Italian-inspired appetizer adds a touch of summer to your cozy Thanksgiving feast, igniting the palate with brightness.
-
Homemade Butternut Squash Soup: A silky, velvety soup serves as a wonderful starter that warms the heart. The natural sweetness of the squash pairs wonderfully with the savory flavors of feta, creating a harmonious flavor journey.
-
Sparkling Apple Cider: A refreshing, bubbly drink that brings in the essence of autumn celebrations. The crispness will cleanse the palate between bites, while the sweetness complements the savory goodness of the tartlets.
With these pairings, your Thanksgiving spread will not only captivate with flavors but also bring warmth and joy to every guest around the table!
How to Store and Freeze Feta and Spinach Tartlets
Fridge: Store baked Feta and Spinach Tartlets in an airtight container for up to 3 days. They can be enjoyed cold or reheated for a few minutes in the oven to regain crispness.
Freezer: You can freeze unbaked tartlets for up to 2 months. Assemble them in the tartlet pans, cover tightly with plastic wrap, and then foil, ensuring they are well sealed. Bake from frozen, adding a few extra minutes to the cooking time.
Reheating: If reheating baked tartlets, place them in a preheated oven at 350°F (175°C) for about 10-15 minutes until warmed through. This will help maintain the flaky texture of the pastry.
Assembly Tips: If making in advance, prepare the pastry ahead and store it in the fridge wrapped tightly. The Feta and Spinach filling can be prepared up to a day in advance, making your holiday prep seamless!
Expert Tips for Feta and Spinach Tartlets
• Pastry Perfection: Ensure your butter is cold; this leads to a flakier crust. Avoid overworking the dough to maintain its tenderness.
• Filling Balance: Don’t overpower the tartlets with too much filling. Aim for about 2/3 full to allow for even baking of the Feta and Spinach Tartlets.
• Herb Freshness: Use fresh herbs as a garnish right before serving to keep their vibrant flavor from wilting. Dried herbs can be mixed into the filling.
• Chill the Dough: Letting the pastry dough chill is crucial for a flaky texture. Plan ahead and allow it at least 30 minutes in the fridge.
• Check for Doneness: Keep an eye on the tartlets while baking. They should be a lovely golden brown and puffed slightly when done.
• Serving Warm: These Feta and Spinach Tartlets are best served warm, but they also taste delightful at room temperature, making them versatile for any gathering.
Feta and Spinach Tartlets Recipe FAQs
How do I select fresh spinach for the tartlets?
Look for vibrant green spinach with firm, unblemished leaves. Avoid any that has dark spots or wilting, as these are signs of age. Fresh spinach not only enhances flavor but also maximizes the nutritional punch in your Feta and Spinach Tartlets!
How should I store leftover Feta and Spinach Tartlets?
Store your baked tartlets in an airtight container in the fridge for up to 3 days. They are just as tasty cold but can also be reheated in the oven at 350°F (175°C) for about 10-15 minutes to bring back that delightful crispiness.
Can I freeze the tartlets before baking?
Absolutely! You can freeze unbaked Feta and Spinach Tartlets for up to 2 months. Just assemble them in their tartlet pans, cover tightly with plastic wrap and then foil, and pop them in the freezer. When you’re ready, bake them directly from frozen, adding an extra few minutes to the baking time.
What should I do if my pastry dough is too sticky?
If your dough is sticky, that usually means it needs a bit more flour. Lightly flour your surface and gently knead in a bit more flour until it reaches a workable consistency. Be careful not to overdo it, as too much flour can create a tough pastry instead of a tender, flaky texture!
Are these tartlets suitable for those with gluten allergies?
To make gluten-free Feta and Spinach Tartlets, simply substitute the all-purpose flour with a gluten-free flour blend. Many brands offer one-to-one substitutes that work well. Additionally, check the labels for your feta cheese and ensure it conforms to gluten-free standards to keep your dish safe for those with allergies.
Can I use frozen spinach?
Yes, you can absolutely use frozen spinach! Just make sure to thaw it well and drain off any excess moisture before mixing it into the filling. This step is crucial as moisture can affect the texture of your Feta and Spinach Tartlets.

Delicious Feta and Spinach Tartlets for Effortless Gatherings
Ingredients
Equipment
Method
- In a large mixing bowl, combine all-purpose flour and salt, then cut in cold, cubed unsalted butter until the mixture resembles coarse crumbs. Gradually add ice water, mixing until the dough just comes together. Turn it onto a lightly floured surface, knead gently for a few seconds, wrap in plastic, and chill in the refrigerator for at least 30 minutes.
- Preheat your oven to 375°F (190°C) while the dough chills.
- In a bowl, whisk together eggs, crumbled feta cheese, and freshly chopped spinach. Season with black pepper and stir in optional herbs if desired.
- Roll out the chilled pastry dough to about 1/8-inch thickness on a lightly floured surface. Cut out circles that fit into your tartlet pan.
- Place the rolled-out dough circles into the greased tartlet pans and trim any excess dough. Spoon the spinach and feta filling into each pastry shell.
- Bake for 20-25 minutes or until the crust is golden brown and the filling is set.
- Allow the tartlets to cool in their pans for about 5 minutes before removing them. Garnish with halved cherry tomatoes or fresh herbs before serving.
Leave a Reply