
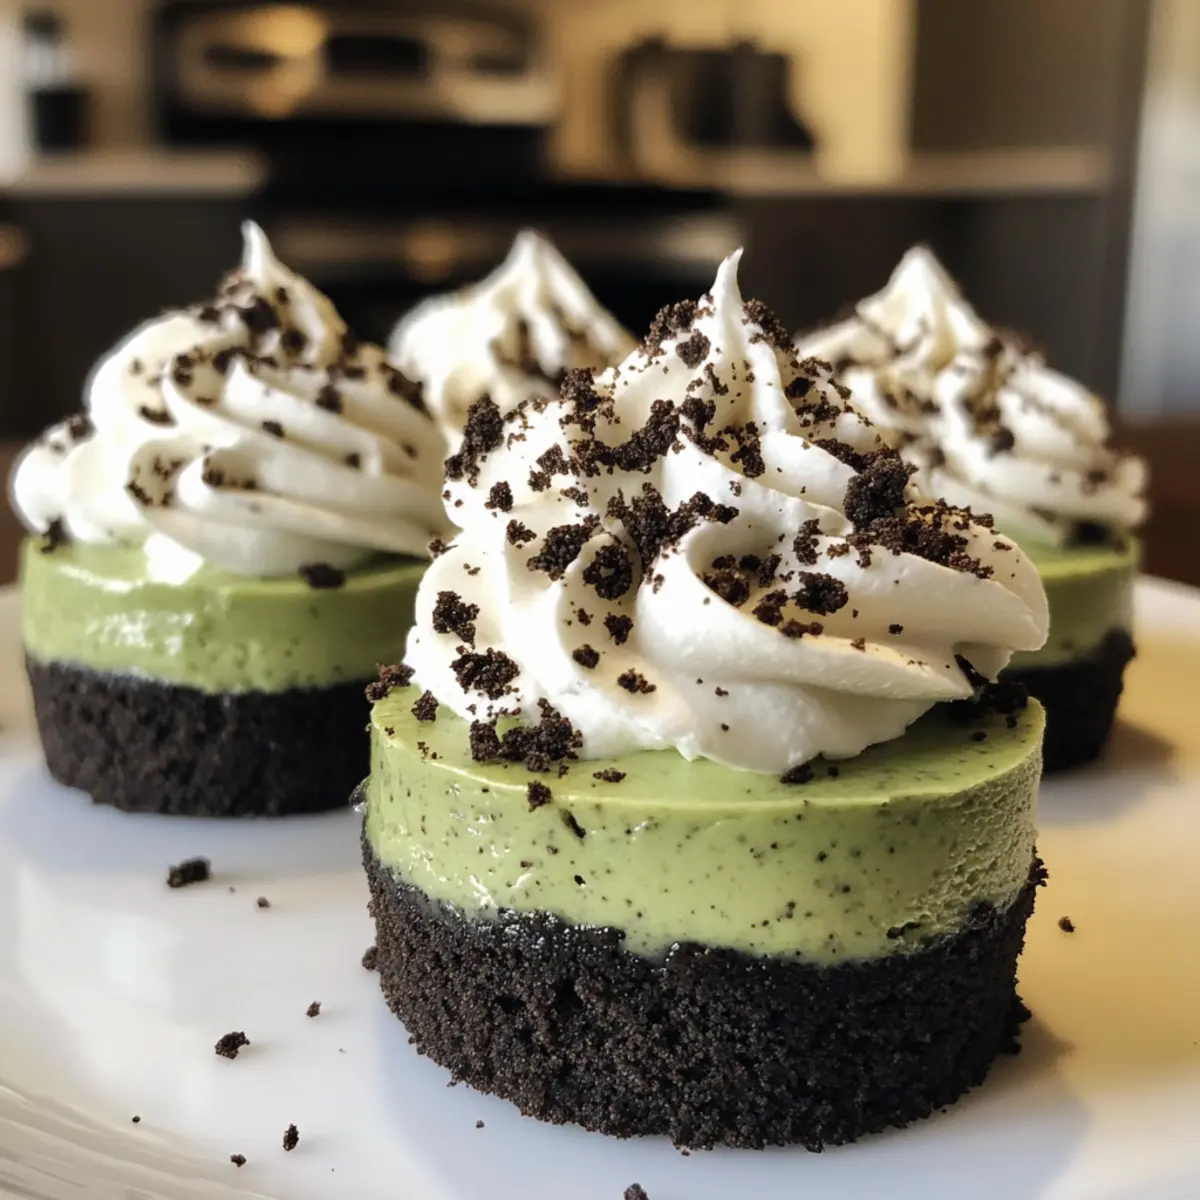
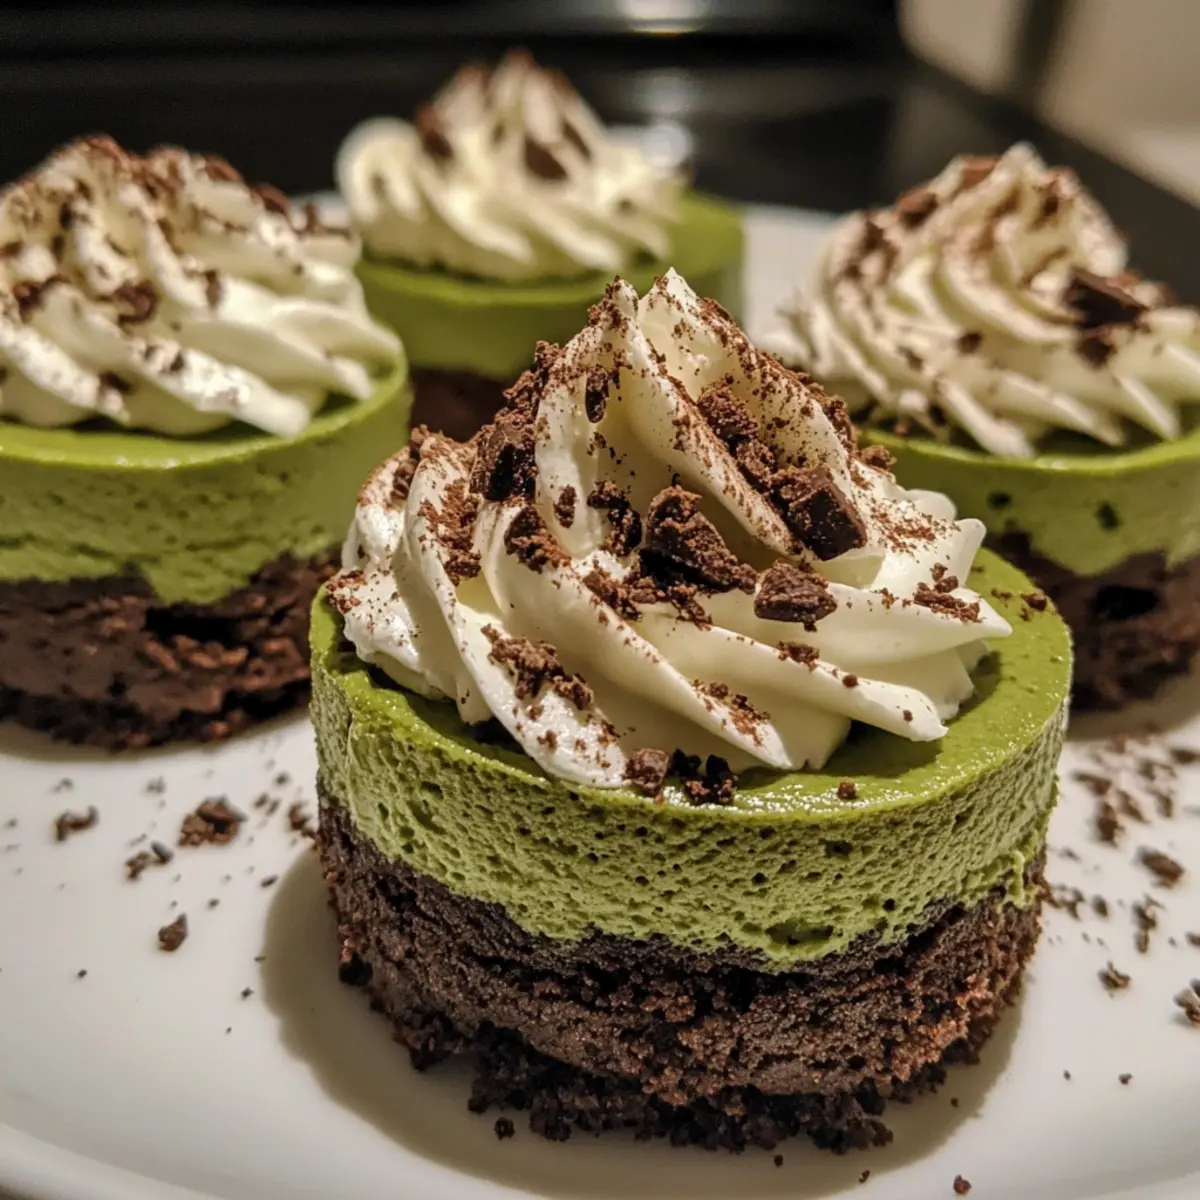
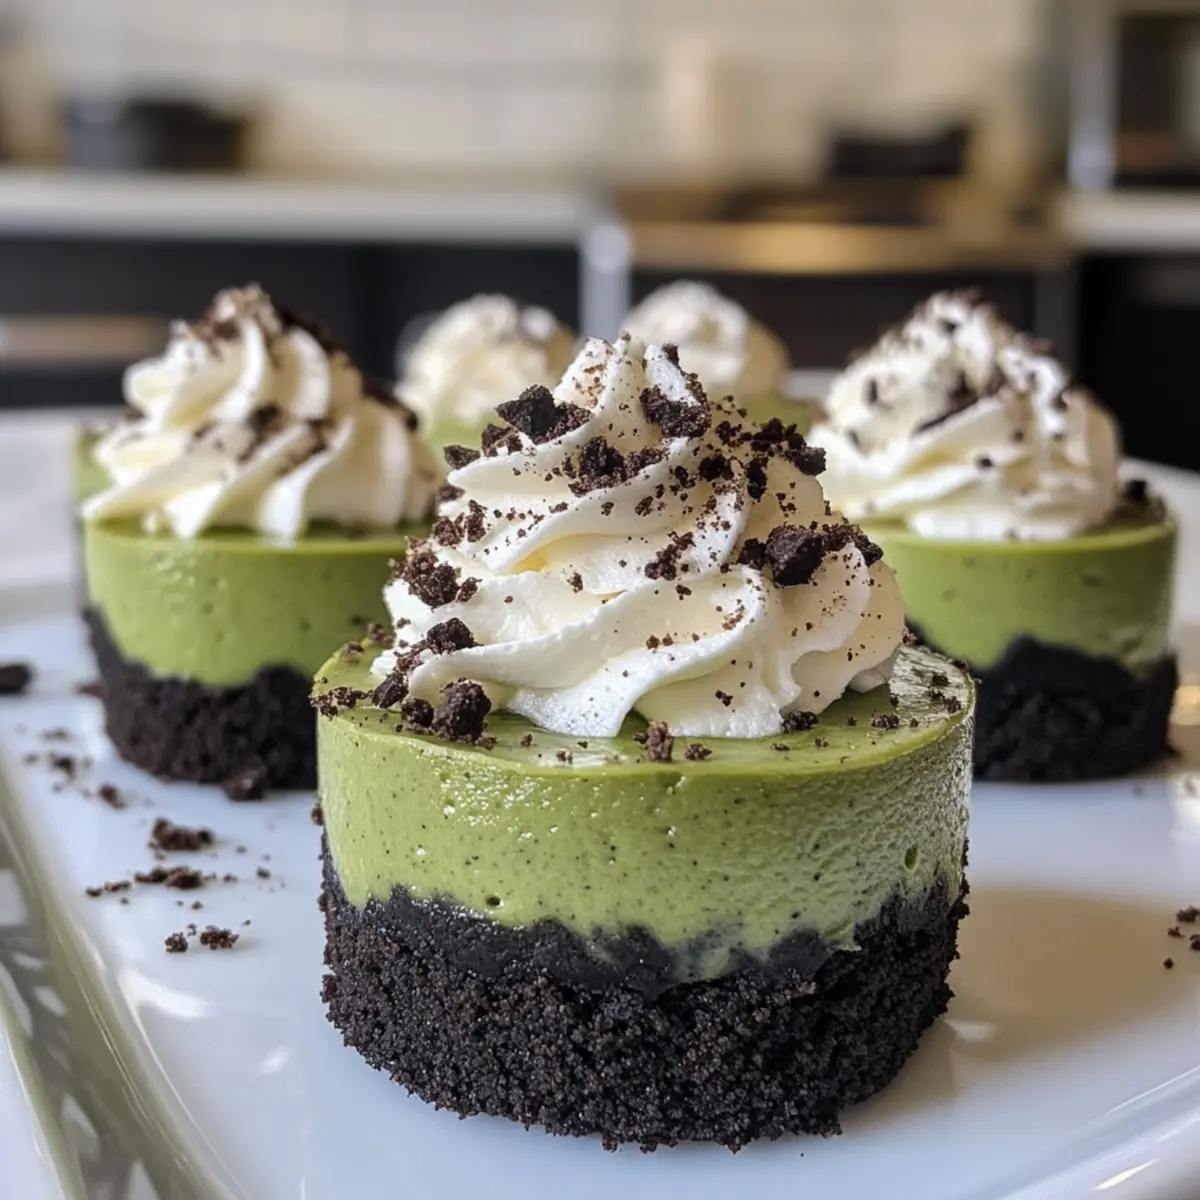
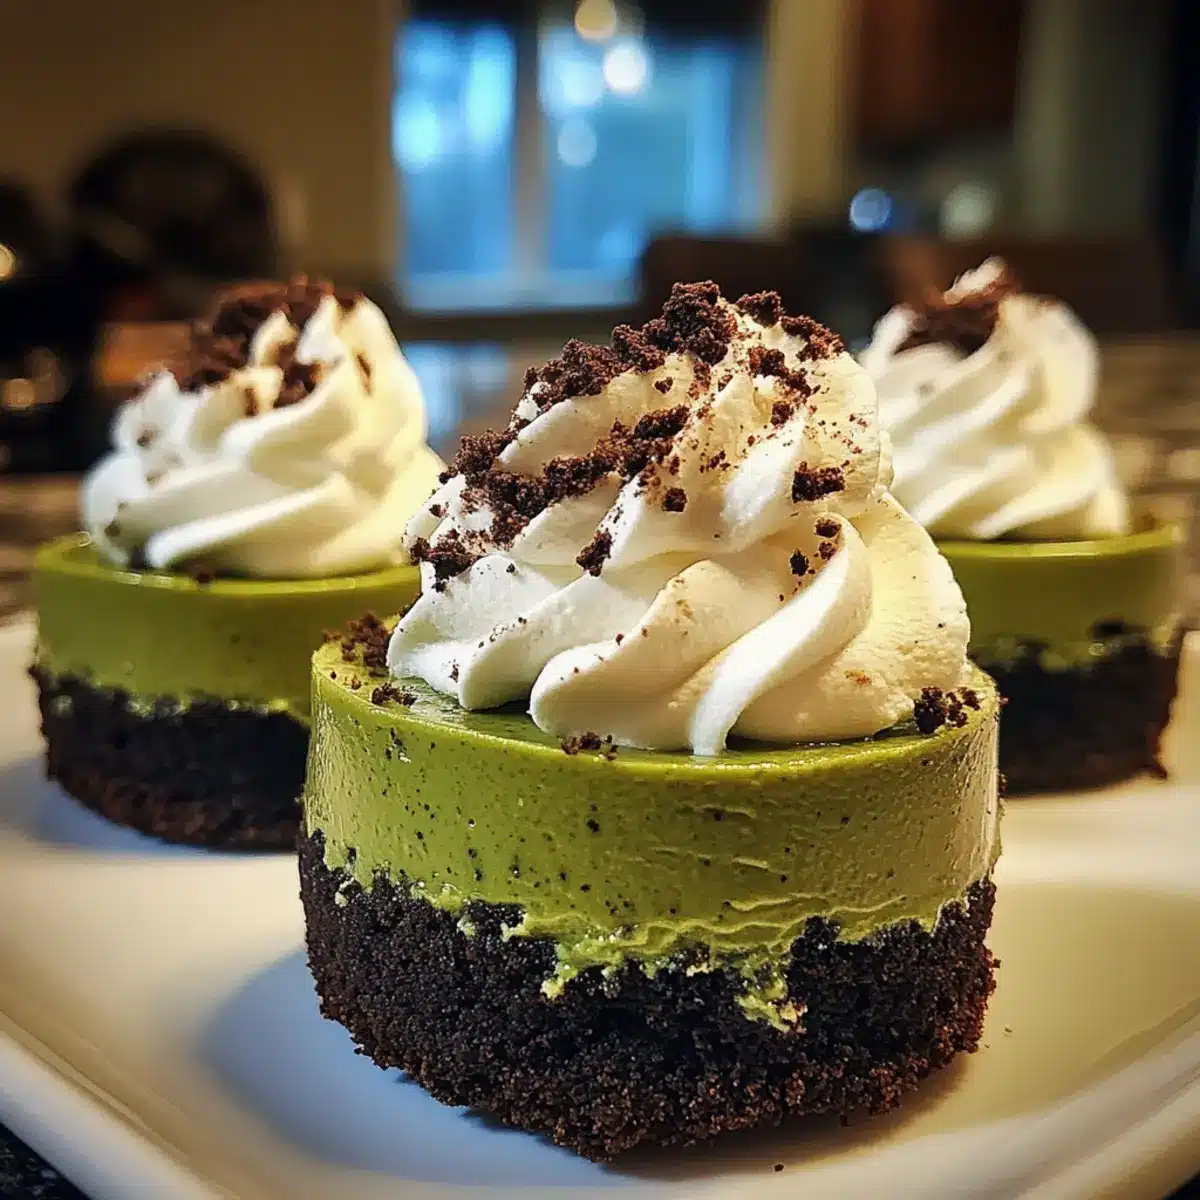
There’s something magical about creating desserts that require no oven—it feels like a triumph every time! These Mini No-Bake Matcha Cheesecakes with Oreo Crust are the perfect example, effortlessly combining rich flavors and delightful textures. Imagine a creamy, smooth matcha filling nestled in a crunchy Oreo crust, topped with fluffy whipped cream—it’s a dessert that’s sure to impress. Not only is this recipe quick to whip up, making it a breeze even on busy nights, but it’s also a versatile crowd-pleaser that can be made as mini individual treats or one larger cheesecake for gatherings. Are you ready to dive into the world of no-bake desserts? Let’s get started!
Why not try this unique twist?
Delightful Twist: These Mini No-Bake Matcha Cheesecakes elevate the traditional dessert experience with their unique matcha flavor, offering a vibrant green that’s visually striking.
Effortless Preparation: No oven is needed, making them a perfect solution for quick and easy sweet cravings.
Versatile Serving: Choose between mini cheesecakes for individual servings or a larger one for sharing at parties. Check out my Cherry Pistachio Cheesecake for a similar delightful twist!
Decadent Texture: The creamy matcha filling, topped with fluffy whipped cream and a crunchy Oreo crust creates a melt-in-your-mouth experience that will wow your guests.
Crowd Favorite: The combination of matcha and chocolate is a flavor that appeals to many, ensuring this dessert will be a hit at any gathering!
Matcha Cheesecake with Oreo Crust Ingredients
For the Crust
• Oreo Cookies – Provides a satisfying crunch and the perfect chocolatey base for the cheesecake. Gluten-free options can be used for a GF twist.
• Salt – Enhances the sweetness and rounds out the flavors of the crust.
• Unsalted Butter – Binds the crust together for a moist and delicious finish; margarine is a suitable substitute.
For the Filling
• Matcha Powder (culinary grade) – Adds vibrant color and a distinct flavor to the cheesecake while providing antioxidants. Make sure it’s culinary-grade for the best results!
• Whipping Cream – Creates a light, airy texture in the filling; coconut cream works wonderfully for a dairy-free version.
• Cream Cheese – Contributes richness and creaminess; vegan cream cheese can be swapped in for a dairy-free alternative.
• Greek Yogurt – Brings tanginess and creaminess to the filling; sour cream is a great substitute if you don’t have Greek yogurt.
• Powdered Sugar – Sweetens the filling for a smooth finish; adjust to your desired sweetness.
For the Topping
• Whipping Cream (for Topping) – Adds extra lightness and a decorative touch; feel free to use whipped coconut cream if desired.
• Vanilla Extract – Infuses an additional layer of flavor; you can omit it if you prefer a pure matcha taste.
Enjoy crafting this delightful Matcha Cheesecake with Oreo Crust and impress your family and friends with its luscious flavors!
Step‑by‑Step Instructions for Mini No-Bake Matcha Cheesecakes with Oreo Crust
Step 1: Prepare the Oreo Crust
Begin by crushing Oreo cookies into fine crumbs using a food processor or by placing them in a resealable bag and pounding with a rolling pin. In a bowl, combine the crumbs with a pinch of salt and melted unsalted butter until fully mixed. Line a muffin pan with cupcake liners and press about 1 tablespoon of the mixture into each liner. Refrigerate the crust for at least 30 minutes until firm.
Step 2: Make Matcha Filling
In a small bowl, whisk together culinary-grade matcha powder and a couple of tablespoons of whipping cream until smooth. In another bowl, whip the remaining whipping cream until stiff peaks form, taking care not to overbeat. In a separate mixing bowl, blend cream cheese, Greek yogurt, and powdered sugar until completely smooth. Gently fold the matcha cream into the cream cheese mixture until fully combined, ensuring a luscious matcha filling.
Step 3: Assemble Cheesecakes
Once the Oreo crust has set, spoon the matcha cheesecake filling into each cupcake liner on top of the crust, smoothing the surface with a spatula or the back of a spoon for an even look. Make sure to fill each liner nearly to the top, so each mini no-bake matcha cheesecake is rich and satisfying.
Step 4: Add Topping
For the finishing touch, whip additional cream with powdered sugar and a splash of vanilla extract until light and fluffy. Using a piping bag or a zip-top bag with a corner snipped off, pipe generous dollops of whipped cream on top of each mini cheesecake. If desired, sprinkle some crushed Oreo crumbs on top for an added crunch and a delightful visual appeal.
Step 5: Chill
Place the assembled cheesecakes into the refrigerator to chill and set for a minimum of 4 hours or ideally overnight. This allows the flavors to meld beautifully and ensures a creamy, firm texture. When you’re ready to serve, let them rest at room temperature for about 10-15 minutes for an ideal serving consistency or refrigerate for an additional 20-25 minutes if you’re short on time.
What to Serve with Mini No-Bake Matcha Cheesecakes with Oreo Crust
Elevate your dessert experience by pairing these delightful mini treats with complementary flavors and textures for a memorable meal.
-
Fresh Berries: The tartness of raspberries or strawberries balances the sweetness and richness of the cheesecake, adding a vibrant burst of color.
-
Matcha Green Tea: Sips of warm or iced matcha can enhance the dessert’s flavor while providing a soothing beverage option to complete your meal.
-
Chocolate Ganache: A drizzle of silky chocolate ganache adds a luxurious touch, accentuating the chocolatey Oreo crust and creating a decadent combination.
-
Coconut Sorbet: The cool, refreshing qualities of coconut sorbet contrast with the creamy matcha cheesecake, offering a delightful and light palate cleanser.
-
Mini Fruit Tartlets: Beautifully arranged fruit tartlets can add elegance to your dessert table, their crisp crusts and fresh toppings echoing the Oreo base.
-
Whipped Cream Topping: Enhance your cheesecakes with a fresh dollop of whipped cream, offering an extra cloud-like layer of sweetness that everyone loves.
-
Green Tea Latte: Serve with a warm or iced green tea latte for a cozy, comforting drink that complements matcha’s unique aroma and flavor profile beautifully.
-
Chocolate Chip Cookies: Traditional chocolate chip cookies add a familiar crunch and sweetness, creating a nostalgic touch alongside the elegant cheesecakes.
-
Mint Mojito: For a refreshing drink option, a mint mojito or mocktail can invigorate your meal, keeping things light and festive.
Make Ahead Options
These Mini No-Bake Matcha Cheesecakes with Oreo Crust are perfect for busy home cooks looking to streamline their dessert prep! You can prepare the Oreo crust and fill the cupcake liners up to 24 hours in advance. Simply crush the Oreo cookies, mix with butter, and press them into the liners to refrigerate. For the matcha filling, it’s best to mix and fold the cream right before serving to keep the texture airy, but you can whisk the matcha powder into some whipping cream up to a few hours ahead. To maintain quality, store the crusts in an airtight container in the fridge, and when ready to serve, just fill with the cheesecake mixture and chill until set—it’s a delightful treat with minimal last-minute effort!
How to Store and Freeze Matcha Cheesecake with Oreo Crust
- Fridge: Store uneaten mini cheesecakes in an airtight container in the fridge for up to 3 days. This keeps the matcha filling fresh and the crust crunchy.
- Freezer: For longer storage, freeze the cheesecakes individually wrapped in plastic wrap or in a freezer-safe container for up to 1 month.
- Thawing: When ready to enjoy, thaw in the fridge overnight for the best texture. Allow the cheesecake to sit at room temperature for 10-15 minutes before serving.
- Reheating: No need to reheat this no-bake dessert; enjoy it chilled or allow it to come to room temperature for a creamy experience!
Matcha Cheesecake with Oreo Crust Variations
Feel free to explore these delightful twists on your matcha cheesecake for a customized dessert experience!
- Gluten-Free: Use gluten-free chocolate sandwich cookies to create a crust that caters to dietary restrictions while maintaining delicious flavor.
- Fruit-Filled Delight: Fold in a layer of fresh fruit puree, like raspberry or mango, to create a vibrant and tangy contrast to the creamy matcha filling.
- Nutty Crunch: Add crushed nuts, like pistachios or almonds, to your crust for added texture and a flavor boost. It’s a delightful combination of creamy and crunchy.
- Chocolate Lovers: Drizzle melted dark chocolate on top of your whipped cream for an indulgent and rich finish that chocolate aficionados will adore.
- Minty Fresh: Substitute vanilla extract with peppermint extract for a refreshing twist—perfect for a cool dessert in warmer months. It brings the flavors to life!
- Dairy-Free: Swap cream cheese and whipped cream for cashew cream alternatives to create a creamy vegan version that’s equally tempting.
- No-Bake Layer Cake: Make one large cheesecake in a springform pan instead of mini ones for an impressive layer cake that’s perfect for gatherings.
- Mocha Matcha: Combine equal parts matcha powder and instant coffee for a caffeine kick that balances beautifully with the cheesecakes’ creaminess.
Dive into the world of flavor and texture, and check out my Pumpkin Pie Cheesecake for another cozy option that brings seasonal goodness to your table!
Expert Tips for Matcha Cheesecake with Oreo Crust
-
Whip Wisely: When whipping the cream, ensure you reach stiff peaks without overmixing, which can cause the mixture to deflate and lose its lightness.
-
Quality Matcha: Always use high-quality culinary-grade matcha for the best flavor and vibrant color. Avoid culinary matcha that is less vibrant or tastes grassy.
-
Chill Time: Don’t rush the chilling process! Allow your cheesecakes to set for at least 4 hours—or overnight for optimal texture and flavor blend.
-
Easy Removal: Use parchment liners in your muffin pan for easy removal of the mini cheesecakes, preventing any crumbly mess when serving.
-
Flavor Twists: Feel free to experiment with flavored extracts or fruit purees to personalize your Matcha Cheesecake with Oreo Crust, creating unique variations that delight the palate.
Matcha Cheesecake with Oreo Crust Recipe FAQs
How do I choose ripe ingredients for the Matcha Cheesecake?
Absolutely! While the main ingredients in this Matcha Cheesecake with Oreo Crust don’t require ripeness like fruit, quality does matter. For the best flavor, opt for culinary-grade matcha that has a vibrant green color and a fresh scent. Additionally, select cream cheese that is fresh and smooth, avoiding any with a grainy texture.
What’s the best way to store leftover cheesecakes?
Very simple! Store uneaten mini cheesecakes in an airtight container in the fridge for up to 3 days. This keeps the matcha filling fresh and prevents the crust from becoming too soft. If you’re planning to keep them longer, freezing is a great option!
Can I freeze Matcha Cheesecake with Oreo Crust?
Yes, you can! To freeze, wrap each mini cheesecake tightly in plastic wrap or store them in a freezer-safe container. They will stay fresh for up to 1 month. When you’re ready to enjoy, place them in the fridge overnight to thaw. For the best texture, let the cheesecakes sit at room temperature for about 10-15 minutes before serving.
What should I do if my cheesecake filling is too runny?
No worries! If your filling turns out too runny, it might be due to over-whipping the cream or not chilling the mixture long enough. To fix this, you can gently fold in a bit more whipped cream and refrigerate it for another hour. If it remains too soft, consider adding a bit more cream cheese to thicken the texture.
Are there any dietary considerations for this recipe?
Absolutely! This Matcha Cheesecake with Oreo Crust can be made gluten-free by substituting the Oreos with gluten-free cookie options. For dairy-free versions, use vegan cream cheese and coconut cream. Additionally, make sure to check for allergies related to matcha or other ingredients.
Can I make variations of the Matcha Cheesecake?
Yes, the more the merrier! You can create layers with fruit compote or switch up flavors by using different extracts. Additionally, making individual mini cheesecakes allows for multiple flavor options to satisfy everyone’s taste!
Irresistible Matcha Cheesecake with Oreo Crust Delight
Ingredients
Equipment
Method
- Crush Oreo cookies into fine crumbs using a food processor or by placing them in a resealable bag and pounding with a rolling pin.
- Combine the crumbs with a pinch of salt and melted unsalted butter until fully mixed.
- Line a muffin pan with cupcake liners and press about 1 tablespoon of the mixture into each liner.
- Refrigerate the crust for at least 30 minutes until firm.
- In a small bowl, whisk together culinary-grade matcha powder and a couple of tablespoons of whipping cream until smooth.
- In another bowl, whip the remaining whipping cream until stiff peaks form, being careful not to overbeat.
- In a separate bowl, blend cream cheese, Greek yogurt, and powdered sugar until completely smooth.
- Gently fold the matcha cream into the cream cheese mixture until fully combined.
- Once the Oreo crust has set, spoon the matcha cheesecake filling into each cupcake liner on top of the crust.
- Smooth the surface with a spatula or the back of a spoon, filling each liner nearly to the top.
- Whip additional cream with powdered sugar and a splash of vanilla extract until light and fluffy.
- Pipe generous dollops of whipped cream on top of each mini cheesecake.
- Sprinkle some crushed Oreo crumbs on top if desired.
- Place the assembled cheesecakes into the refrigerator to chill and set for a minimum of 4 hours or ideally overnight.
- Allow the cheesecakes to rest at room temperature for about 10-15 minutes before serving.
Leave a Reply