
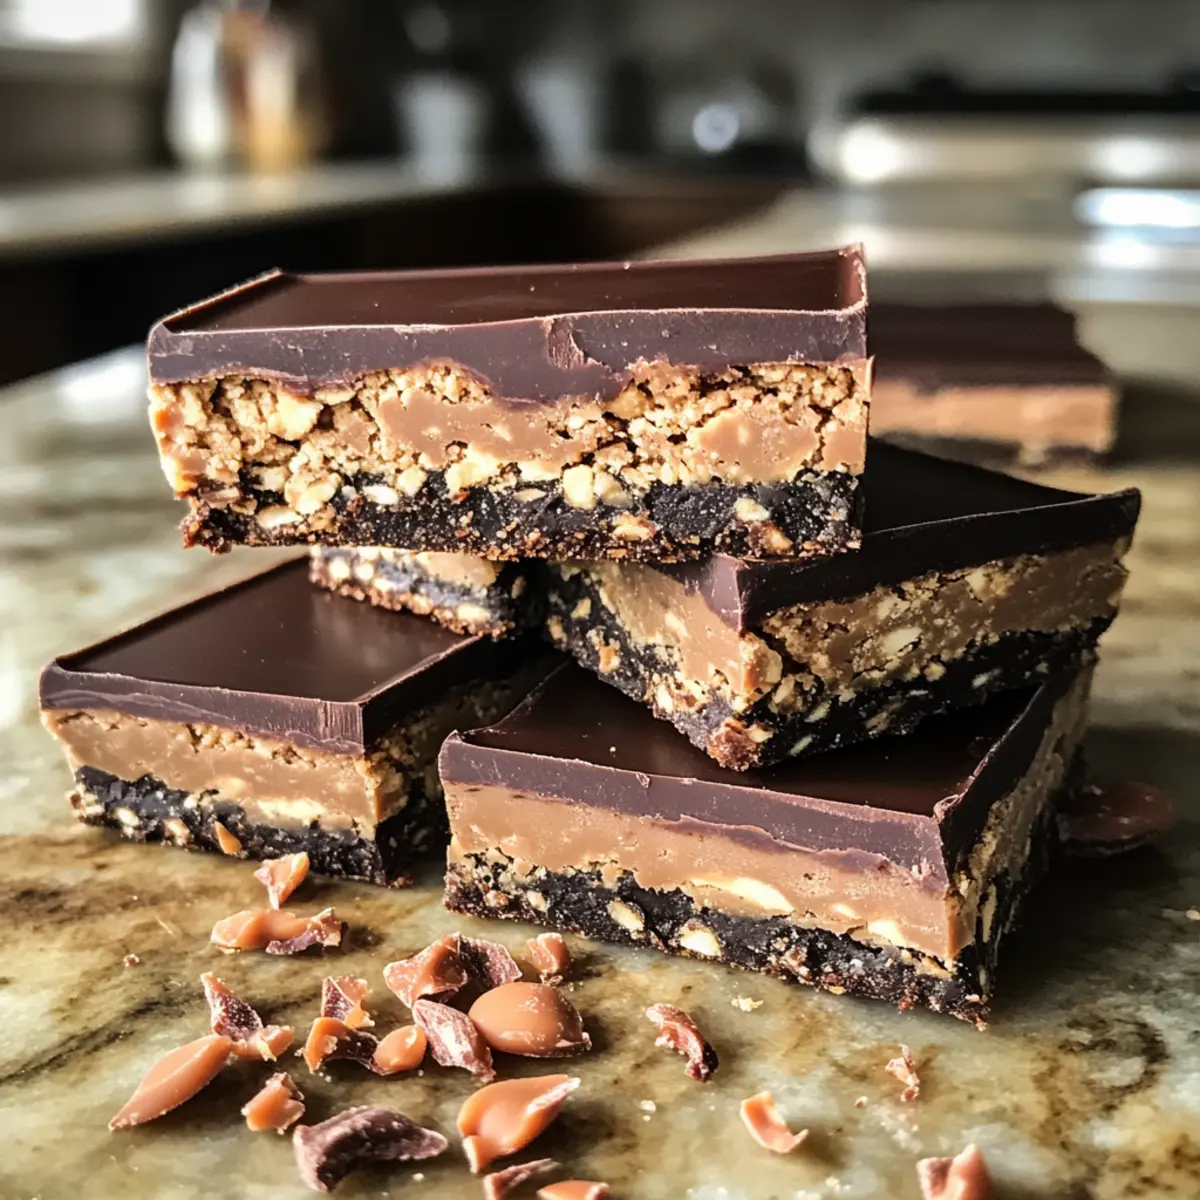
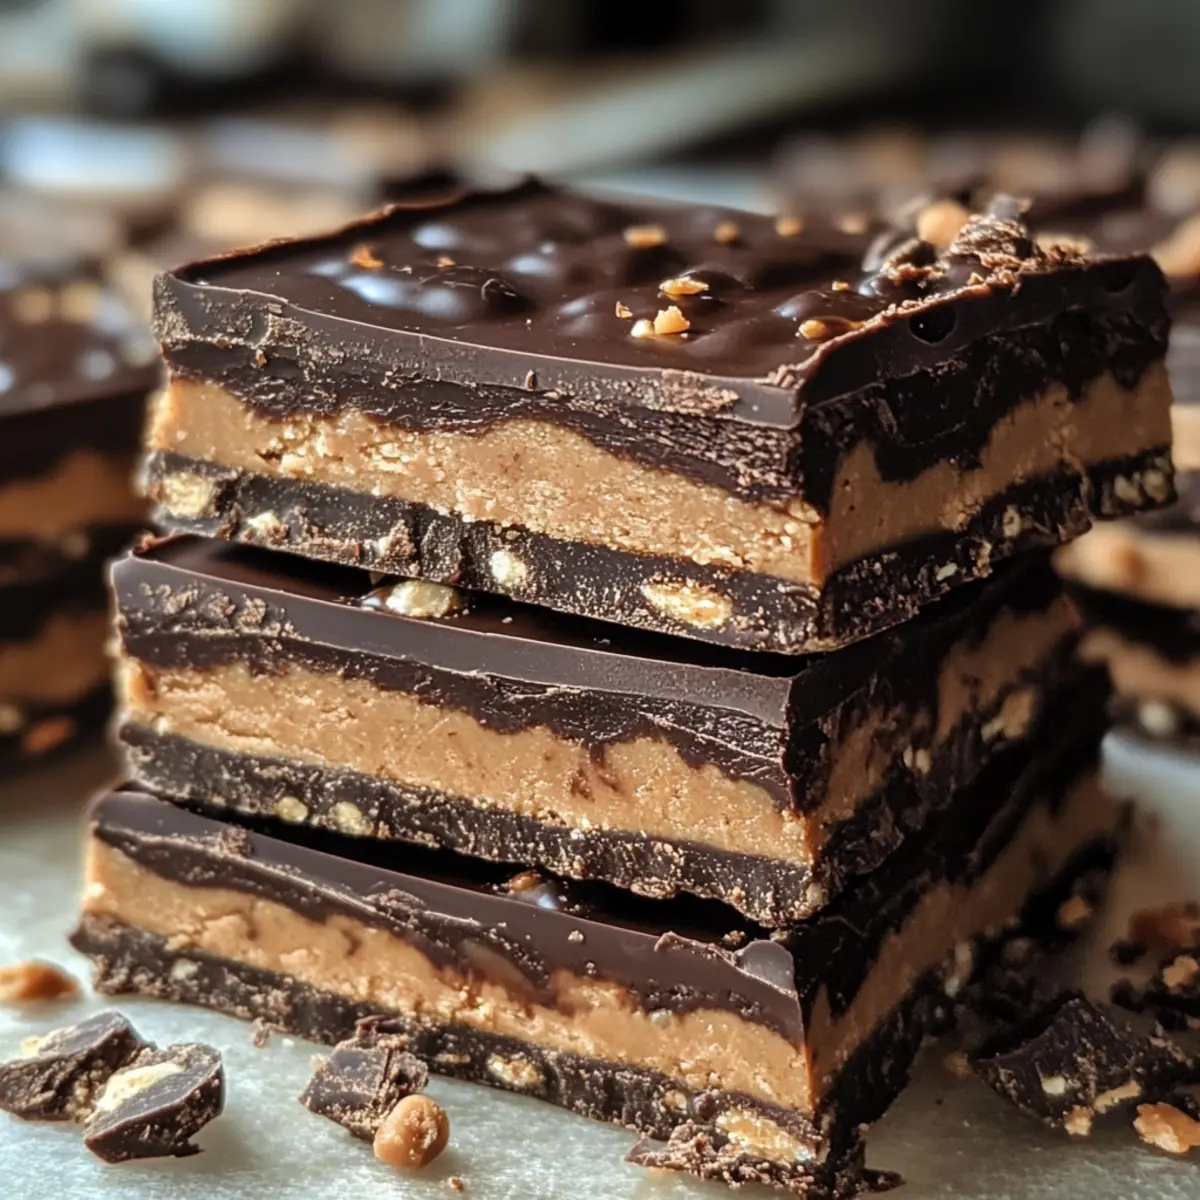
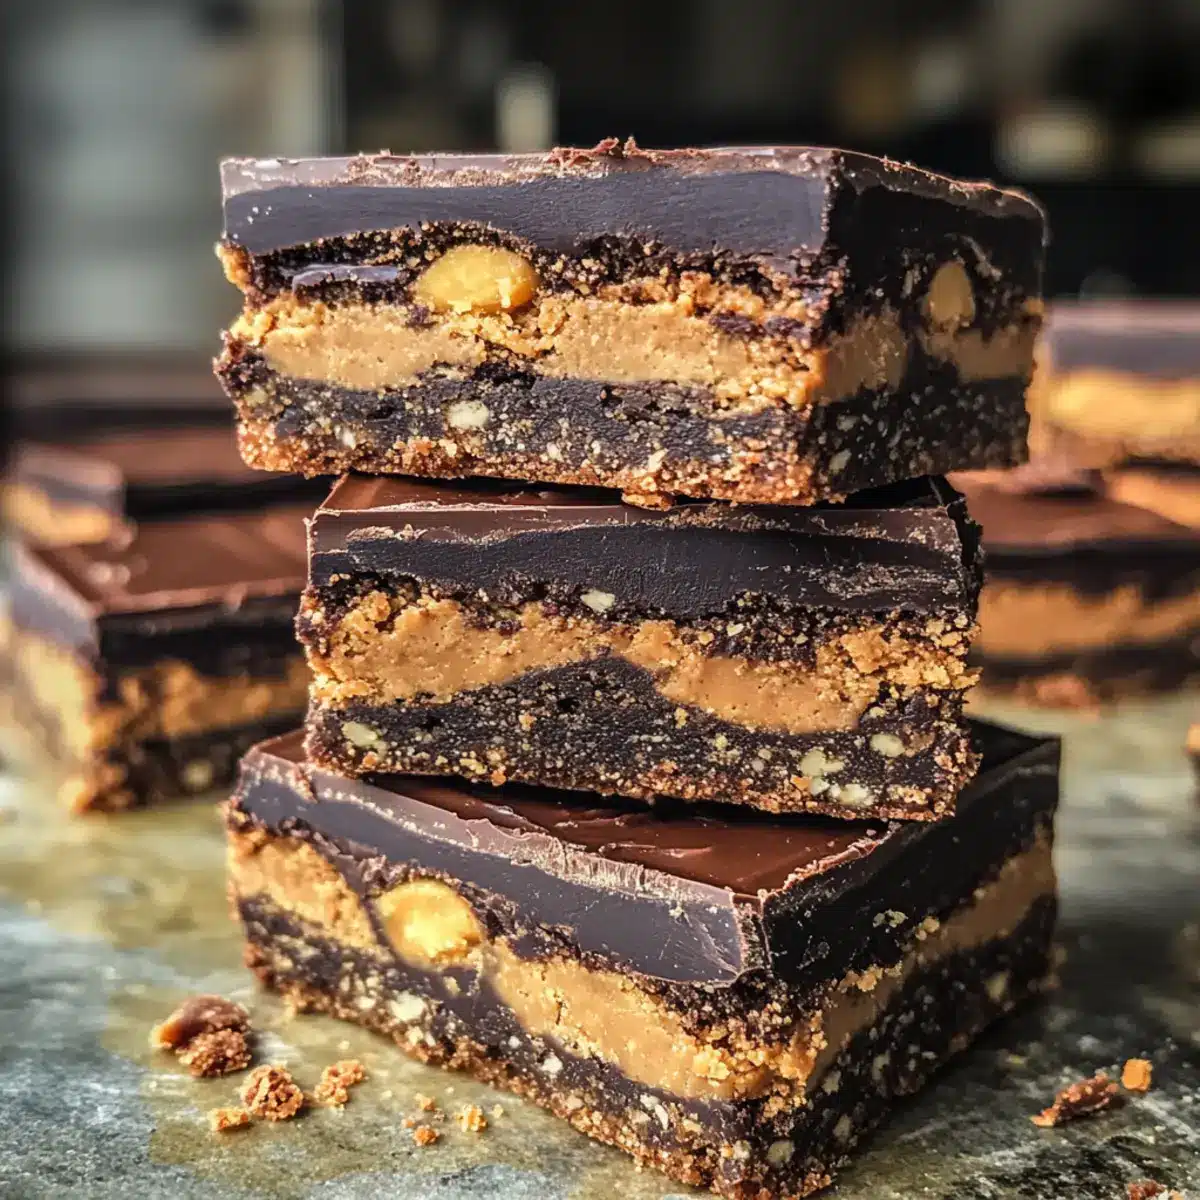
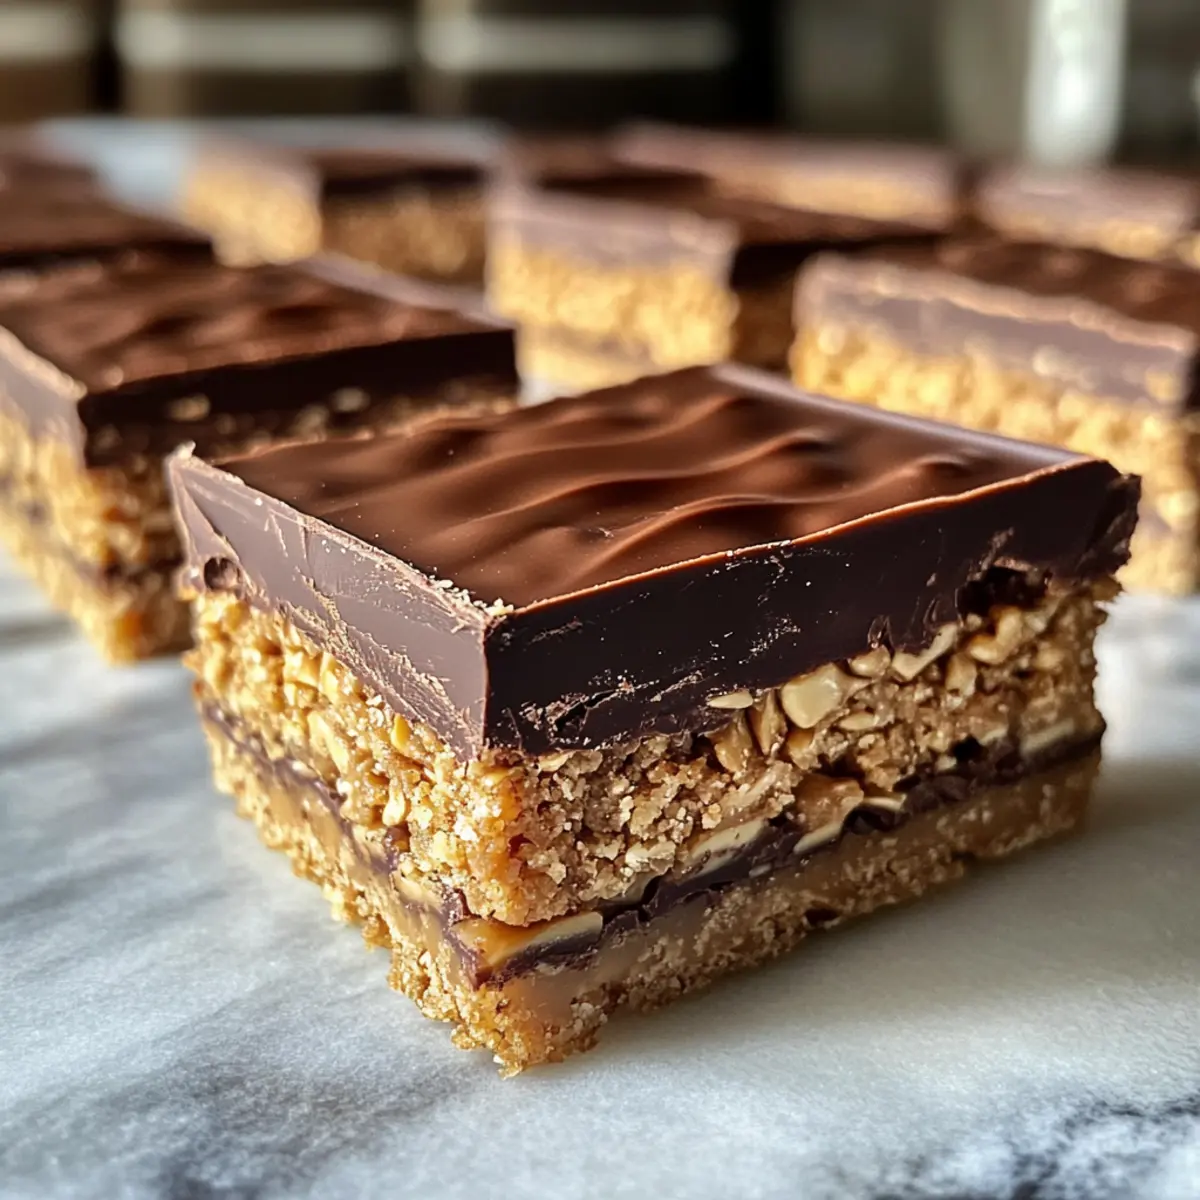
Hidden within the heart of our kitchens lies a magical ability to recreate beloved treats, transforming them into healthier versions that don’t compromise on taste. My healthy Kit Kat recipe is a shining example of this kitchen magic, allowing us to indulge guilt-free. These delightful bars are not only gluten-free and vegan but also feature a crispy crunch and a smooth chocolate-peanut butter fudge layer that will win over chocolate lovers everywhere. Whether you’re seeking a nourishing snack or a fun dessert for gatherings, these treats come to the rescue. They’re easy to whip up and perfect for those moments when you want something that feels decadent but aligns with your health goals. Curious about how to make these scrumptious bars and impress your family? Let’s dive in!
Why make a healthy Kit Kat recipe?
Transformative Experience: This recipe allows you to recreate a classic candy bar with a nourishing twist! Versatile Options ensure that everyone can enjoy, whether you need a gluten-free, vegan, or nut-free treat. Quick and Easy to assemble, it’s perfect for busy days when you crave something satisfying yet wholesome. Impressive Flavor combinations with peanut butter and dark chocolate promise to delight taste buds, making these bars a sure hit at gatherings—ideal alongside a refreshing Olive Dip Appetizer for a snack platter. Treat yourself and your loved ones to guilt-free indulgence that won’t disappoint!
Healthy Kit Kat Recipe Ingredients
Get ready to create your own delightful version of the classic candy!
For the Cookie Base
- Almond Flour – Provides structure and a nutty flavor; substitute with tigernut flour for a nut-free version.
- Coconut Sugar – Natural sweetness with a lower glycemic index compared to refined sugar.
- Ground Flax – Acts as a binding agent; you can use chia seeds for a similar effect.
- Coconut Oil – Adds moisture and helps in binding; can be replaced with vegan margarine if desired.
- Water – Activates the ingredients and helps achieve the right dough consistency.
- Vanilla Extract – Enhances the overall flavor profile wonderfully.
- Salt – A pinch of salt enhances flavors throughout the recipe.
For the Filling
- Peanut Butter – Provides richness and creaminess; substitute with sunbutter to keep it nut-free.
For the Coating
- Dark Chocolate – The perfect coating for crunch and sweetness; ensure it’s dairy-free for a vegan version.
Enjoy diving into this healthy Kit Kat recipe, and let your creativity shine as you indulge in a guilt-free treat!
Step‑by‑Step Instructions for Healthy Kit Kat Recipe
Step 1: Prepare Cookie Dough
In a medium bowl, combine almond flour, coconut sugar, ground flax, and salt. Stir in melted coconut oil, water, and vanilla extract until a dough forms. The mixture should be slightly sticky but not too wet. Allow the dough to rest for about 5 minutes to hydrate the flax, making it easier to work with as you create your healthy Kit Kat recipe.
Step 2: Roll Out Dough
Place the dough between two sheets of parchment paper and gently roll it out to approximately ⅛ inch thick. Keep the dough even to ensure uniform baking and a nice crisp texture. If the dough sticks, lift the parchment and adjust it to prevent tearing. Once rolled out, it’s ready for cutting into cookies, which form the base of your healthy Kit Kat bars.
Step 3: Cut Cookies
Using a sharp knife or a pizza cutter, slice the rolled dough into rectangles measuring approximately 3.5 inches by 0.75 inches. Aim for even sizes to ensure they bake uniformly. Carefully transfer the cut cookies onto a baking sheet lined with parchment paper, maintaining space between each piece for air circulation while baking, contributing to the delightful crunch of your healthy Kit Kat recipe.
Step 4: Bake
Preheat your oven to 350°F (175°C) and bake the cookie rectangles for 8 to 10 minutes. They should appear golden around the edges, indicating they’re fully baked. Keep a close eye during the last few minutes to prevent over-baking. After baking, allow them to cool for about 5 to 10 minutes on the sheet before transferring to a wire rack, enhancing their crispness.
Step 5: Assemble Bars
Once the cookies have cooled, create layers by spreading peanut butter evenly on half of the cookies. Then, place another cookie on each peanut butter-covered piece, forming a sandwich. Don’t rush this step; making sure each layer is well-constructed will ensure your healthy Kit Kat bars have a satisfying crunch when enjoyed.
Step 6: Coat in Chocolate
Melt dairy-free dark chocolate in a microwave-safe bowl in 30-second intervals, stirring until smooth. Carefully dip each assembled cookie bar into the melted chocolate, ensuring they are fully covered. Allow any excess chocolate to drip off before placing them back on the parchment-lined baking sheet. This rich coating brings that classic Kit Kat finish to your healthy creation.
Step 7: Chill
Once all bars are coated in chocolate, place the baking sheet in the refrigerator for at least 30 minutes, or until the chocolate is firm and set. This chilling time enhances the texture of your healthy Kit Kat recipe, making them crisp and delightful. After they have set, your delicious healthy Kit Kat bars are ready to be enjoyed!
Make Ahead Options
These healthy Kit Kat bars are perfect for meal prep enthusiasts who want to simplify their busy weeknights! You can prepare the cookie dough up to 24 hours in advance; just mix and refrigerate it, wrapped tightly to prevent drying out. Additionally, the assembled bars can be kept in the refrigerator for up to 3 days before serving, allowing the flavors to meld beautifully. When you’re ready to enjoy, simply coat the chilled bars in melted chocolate and refrigerate again for about 30 minutes to set. These make-ahead options ensure you have a delightful treat on hand, just as delicious and satisfying, without the last-minute rush!
What to Serve with Healthy Kit Kat Recipe
Indulging in these delightful, guilt-free bars invites the question of what to pair with them for a well-rounded treat experience.
-
Creamy Coconut Yogurt: This silky topping adds a refreshing contrast to the crispy bars, enhancing their flavor with each bite. A dollop on the side makes for an irresistible snack.
-
Fresh Berries: A mix of sweet strawberries, blueberries, and raspberries offers a tart burst that balances the rich chocolate flavor. Their vibrant colors and juicy textures are perfect for brightening up your dessert platter.
-
Hazelnut Milkshake: Smooth and silky, this nutty milkshake complements the chocolate-peanut butter flavors elegantly. The creamy texture adds indulgence while keeping it light and refreshing.
-
Homemade Fruit Sorbet: A scoop of sorbet brings bright, fruity notes that contrast wonderfully with the dense chocolate. It’s an elegant way to cleanse the palate between bites.
-
Dark Chocolate Drizzled Popcorn: Lightly salted popcorn drizzled with extra dark chocolate creates a crunchy and sweet snack. This pairing adds a delightful texture and an extra chocolate kick.
-
Nutty Trail Mix: A blend of seeds and dried fruit adds a crunchy, salty element that pairs beautifully with the bars. It’s a wholesome snack option that complements the flavors without overpowering them.
-
Chai Tea: The warm spices of chai tea add a comforting aroma alongside the bars, making for a soothing combination while enjoying this wholesome treat. It’s a perfect drink to sip on leisurely.
Let these pairing suggestions inspire your next gathering, making your healthy Kit Kat recipe the star of an unforgettable spread!
Storage Tips for Healthy Kit Kat Recipe
- Fridge: Store the bars in a sealed container in the fridge for up to 2 weeks. This preserves their delightful crunch while keeping them fresh and ready to enjoy.
- Freezer: For longer storage, place the healthy Kit Kat bars in an airtight container and freeze for up to 2 months. This is perfect for meal prep, allowing you to enjoy them anytime!
- Reheating: If you prefer a slightly softer texture, let the bars sit out at room temperature for 10-15 minutes before enjoying. Avoid using a microwave, as it may compromise the crunch.
- Wrapping: For individual servings, wrap each bar in parchment paper or foil before placing them in the container. This helps prevent sticking and keeps them fresh longer.
Healthy Kit Kat Recipe Variations
Feel free to let your creativity shine and adapt this recipe to suit your taste preferences and dietary needs!
-
Gluten-Free:
Use tigernut flour instead of almond flour for a nut-free and gluten-free variation that still holds that crunchy texture. -
Vegan:
Simply ensure all chocolate used is dairy-free and replace any animal-derived ingredients with plant-based alternatives, like vegan margarine for coconut oil. -
Nut-Free:
Opt for sunbutter instead of peanut butter to create a delightful nut-free version that maintains creaminess without compromising flavor. -
Paleo-Friendly:
Substitute coconut sugar with pure maple syrup or honey for a naturally sweet option that adheres to paleo guidelines. -
Flavor Boost:
Add a pinch of cinnamon or a dash of sea salt to the cookie dough for a delightful aromatic twist that elevates the overall taste. -
Coconut Infusion:
Stir in unsweetened coconut flakes into the cookie dough to add texture and a subtle tropical flavor to your healthy Kit Kat bars. -
Spicy Kick:
For those who love a little heat, sprinkle some chili powder or cayenne pepper into the chocolate before dipping the bars for a unique spicy-sweet experience. -
Decadent Variants:
Layer in some fresh fruit slices, like strawberries or bananas, between the cookies and fudge for a fresh and fruity surprise with every bite. You could also enjoy them alongside a rich dessert like Pavlova Summer Elegance or a savory note with Blue Cheese Stuffed bites at your next gathering!
Expert Tips for Healthy Kit Kat Recipe
• Thin Cookies: Ensure your cookies are rolled out thinly, around ⅛ inch. This is key to achieving that satisfying crunch found in traditional Kit Kat bars.
• Use Fresh Ingredients: Ground your own flax seeds for maximum nutrition and freshness. It makes a noticeable difference in both texture and health benefits in your healthy Kit Kat recipe.
• Chocolate Dipping: Let the melted dark chocolate cool slightly before dipping. This will help it adhere better and create a smoother finish on your treats.
• Layering Properly: Spread peanut butter evenly and don’t rush the assembly. Sturdy layers prevent the bars from falling apart and give that perfect bite.
• Storage Matters: Keep assembled bars in the fridge or freezer to maintain their best texture. This helps preserve their crunchiness in your healthy Kit Kat recipe.
Healthy Kit Kat Recipe FAQs
How do I select the right almond flour for my healthy Kit Kat recipe?
Absolutely! Look for finely ground almond flour that’s blanched for a lighter texture in your Kit Kat bars. It’s important to avoid almond meal, as it tends to be coarser and can affect the overall consistency. If you’re aiming for a nut-free version, tigernut flour is a fantastic alternative that offers a slightly sweet and nutty flavor without any allergens.
What’s the best way to store my healthy Kit Kat bars?
Absolutely! To maintain the freshness and crunch of your healthy Kit Kat bars, store them in a sealed container in the fridge for up to 2 weeks. Make sure they are tightly sealed to prevent moisture from getting in. If you’d like to keep them longer, you can freeze them in an airtight container for up to 2 months. Just remember to let them sit at room temperature for about 10-15 minutes before enjoying for a softer bite while keeping that signature crunch.
Can I freeze these Kit Kat bars? If so, how?
Very much! To freeze your healthy Kit Kat bars, place them in a single layer in an airtight container. If stacking, separate layers with parchment paper to prevent sticking. They can be frozen for up to 2 months. When you’re ready to savor them, simply transfer them to the fridge the night before for a gradual thaw, or leave them out at room temperature for around 20 minutes. Avoid the microwave, as it may compromise their delightful texture!
What should I do if my cookie base for the healthy Kit Kat recipe doesn’t hold together?
Don’t worry! If your cookie base seems crumbly and won’t hold together, it may be due to not enough moisture or binding agents in the dough. To fix this, try adding a tad more water—just a tablespoon at a time—until the dough binds nicely. You can also add a little more ground flax or chia seeds, which will absorb moisture and help stickiness. If needed, allow the dough to rest for a few minutes before trying to roll it out again for better hydration.
Are there any dietary considerations I should be aware of with this recipe?
Absolutely! This healthy Kit Kat recipe is gluten-free, vegan, and suitable for those with lactose intolerance as it uses dairy-free ingredients. However, if you’re preparing this for guests or family members with nut allergies, make sure to use tigernut flour and sunbutter instead of almond flour and peanut butter, respectively. Always double-check labels to ensure that all ingredients are allergy-friendly, especially for chocolate, as some brands may contain milk.
Guilt-Free Healthy Kit Kat Recipe You’ll Love to Make
Ingredients
Equipment
Method
- In a medium bowl, combine almond flour, coconut sugar, ground flax, and salt. Stir in melted coconut oil, water, and vanilla extract until a dough forms.
- Place the dough between two sheets of parchment paper and gently roll it out to approximately ⅛ inch thick.
- Using a sharp knife or a pizza cutter, slice the rolled dough into rectangles measuring approximately 3.5 inches by 0.75 inches.
- Preheat your oven to 350°F (175°C) and bake the cookie rectangles for 8 to 10 minutes.
- Once the cookies have cooled, spread peanut butter evenly on half of the cookies and sandwich them with another cookie.
- Melt dairy-free dark chocolate in a microwave-safe bowl in 30-second intervals, then dip each bar into the melted chocolate.
- Chill the coated bars in the refrigerator for at least 30 minutes, or until the chocolate is firm and set.
Leave a Reply