
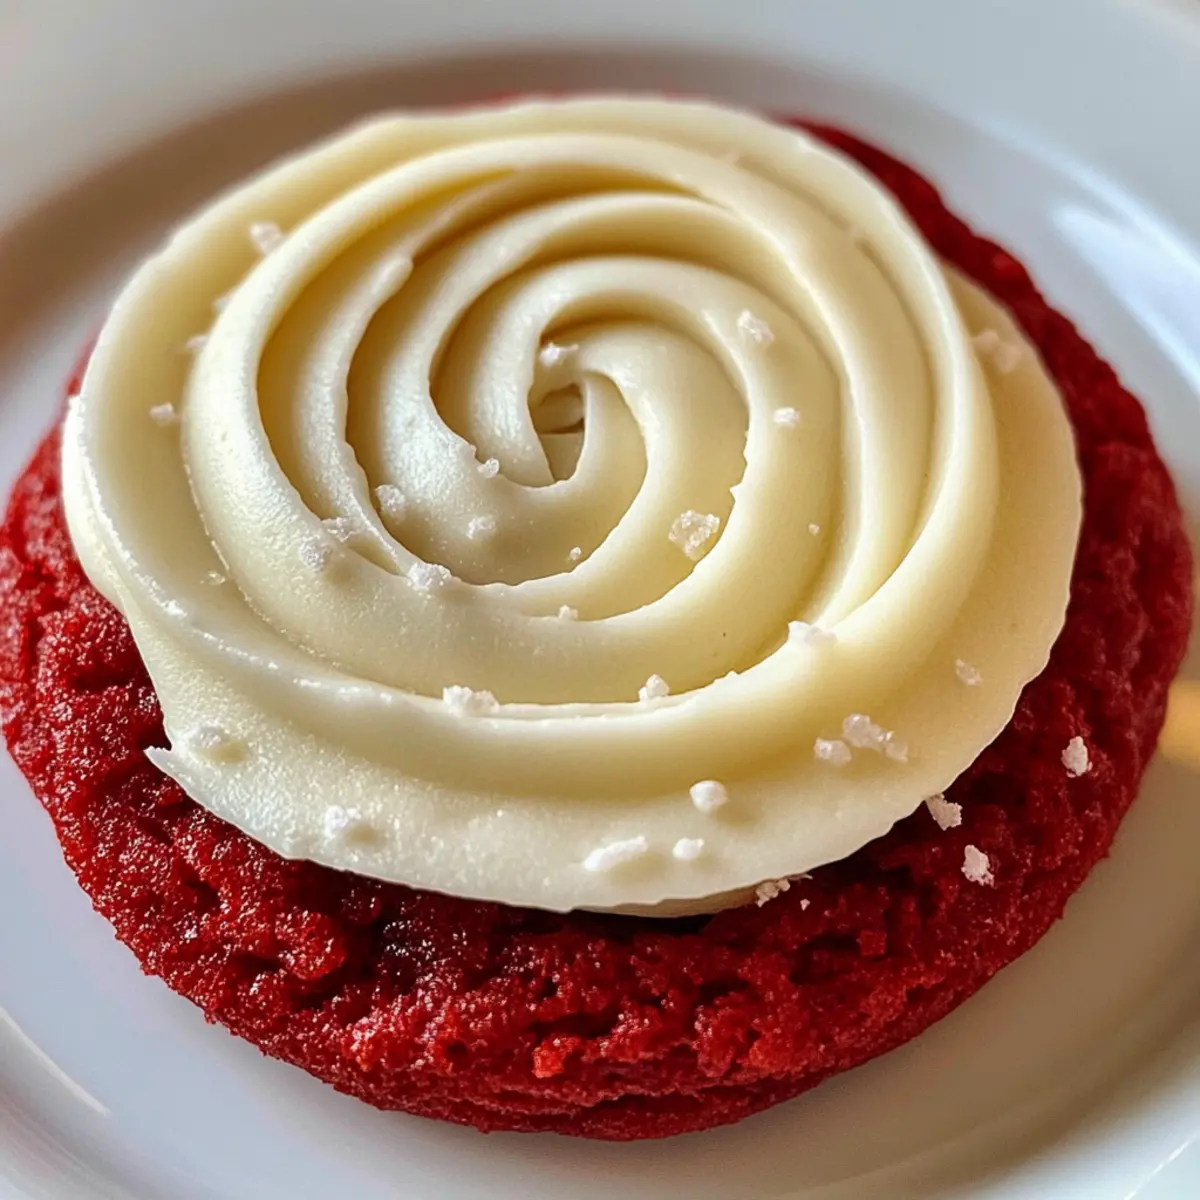
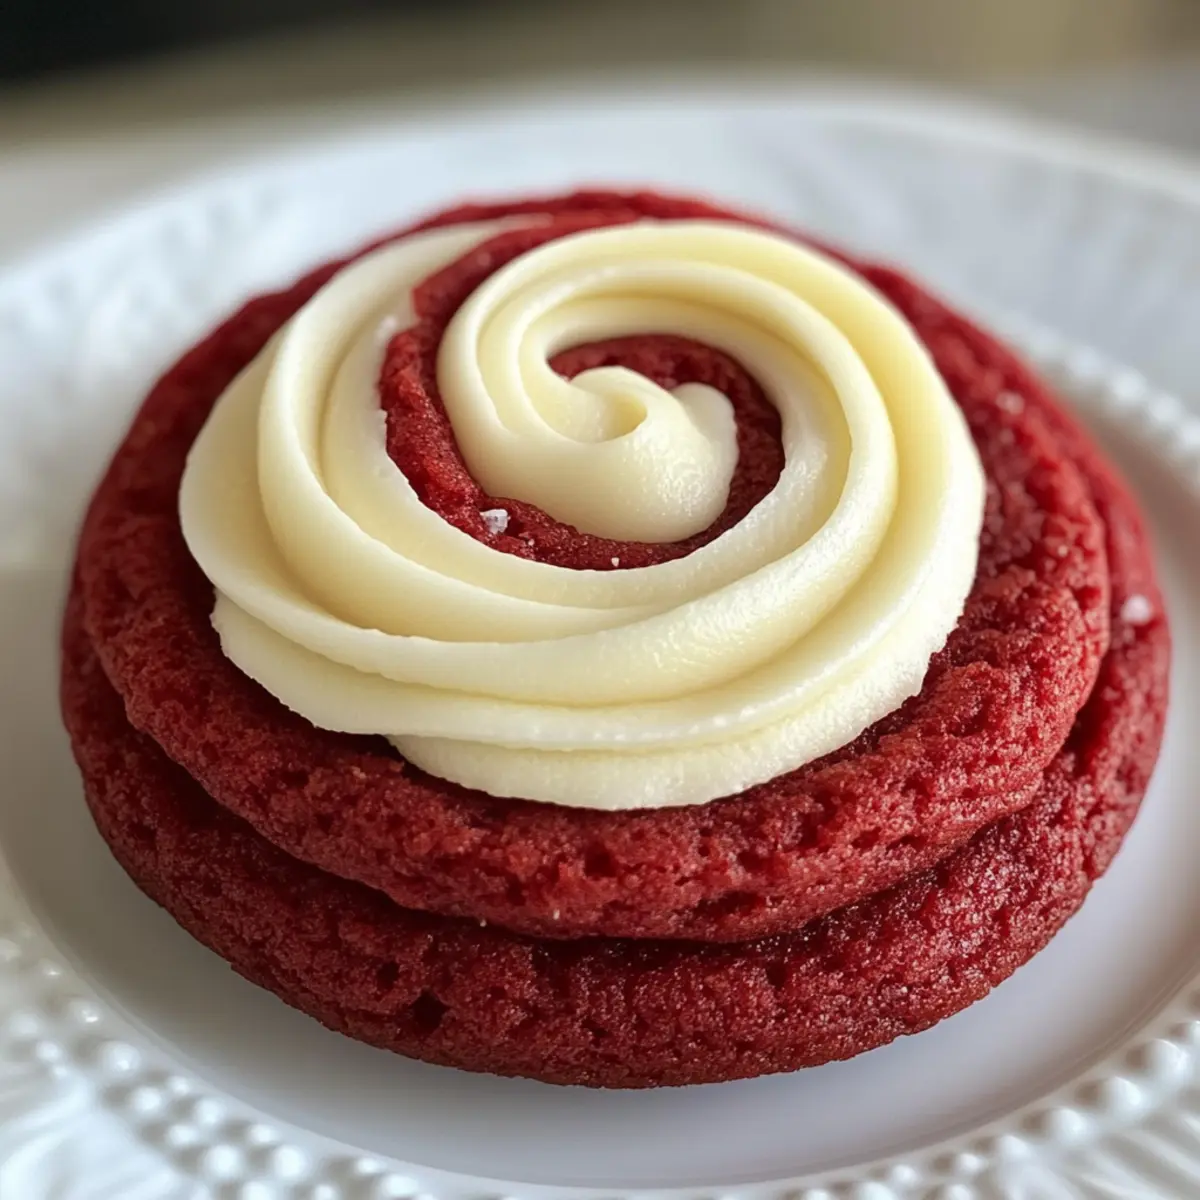
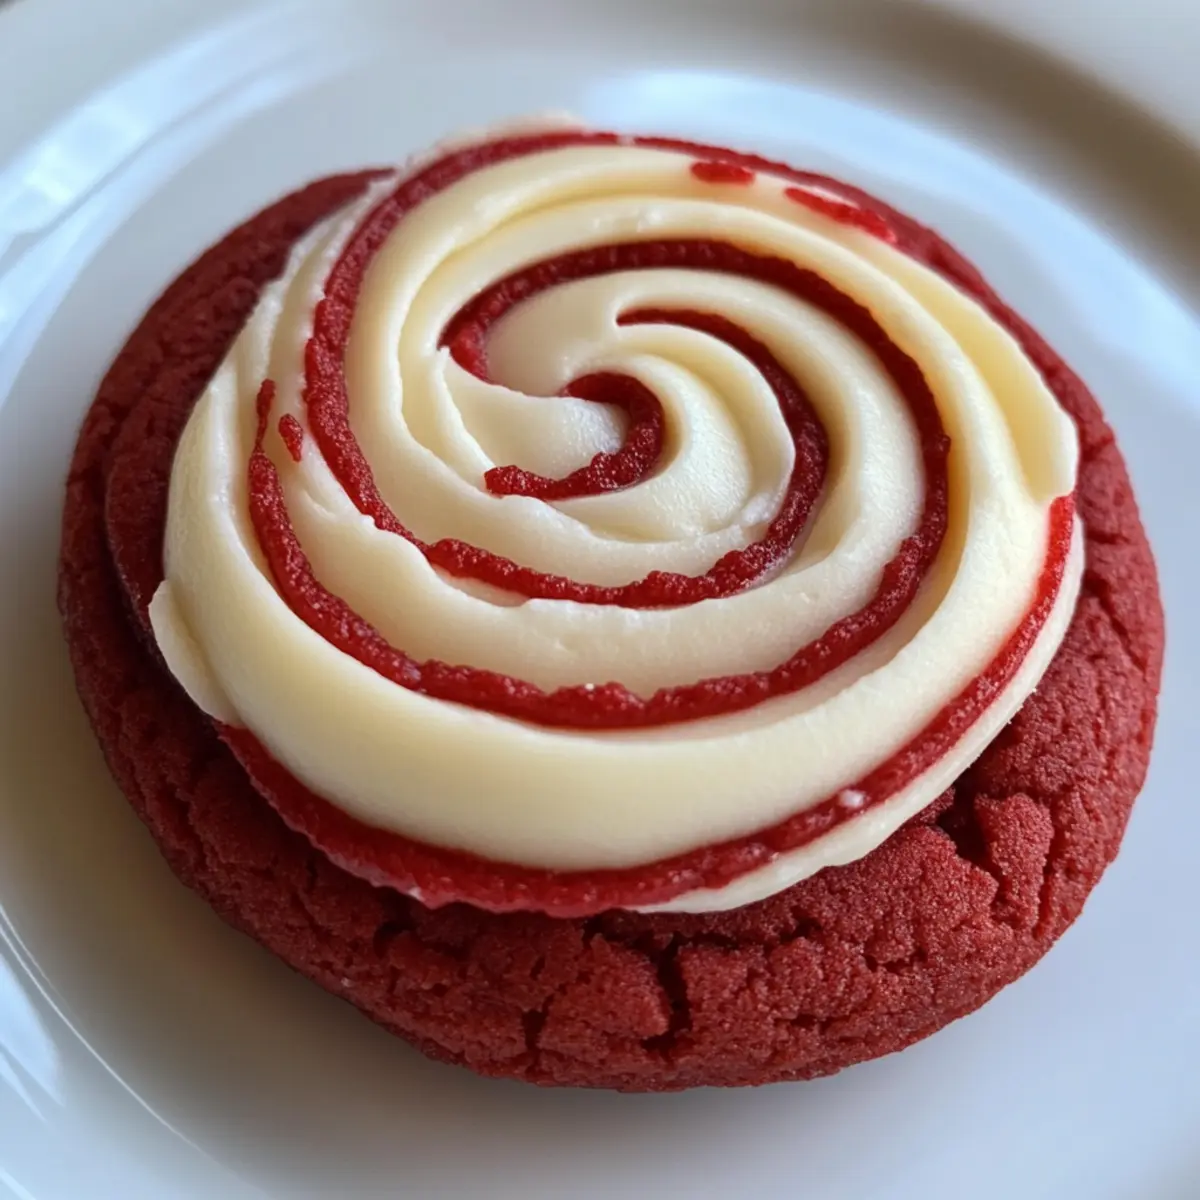
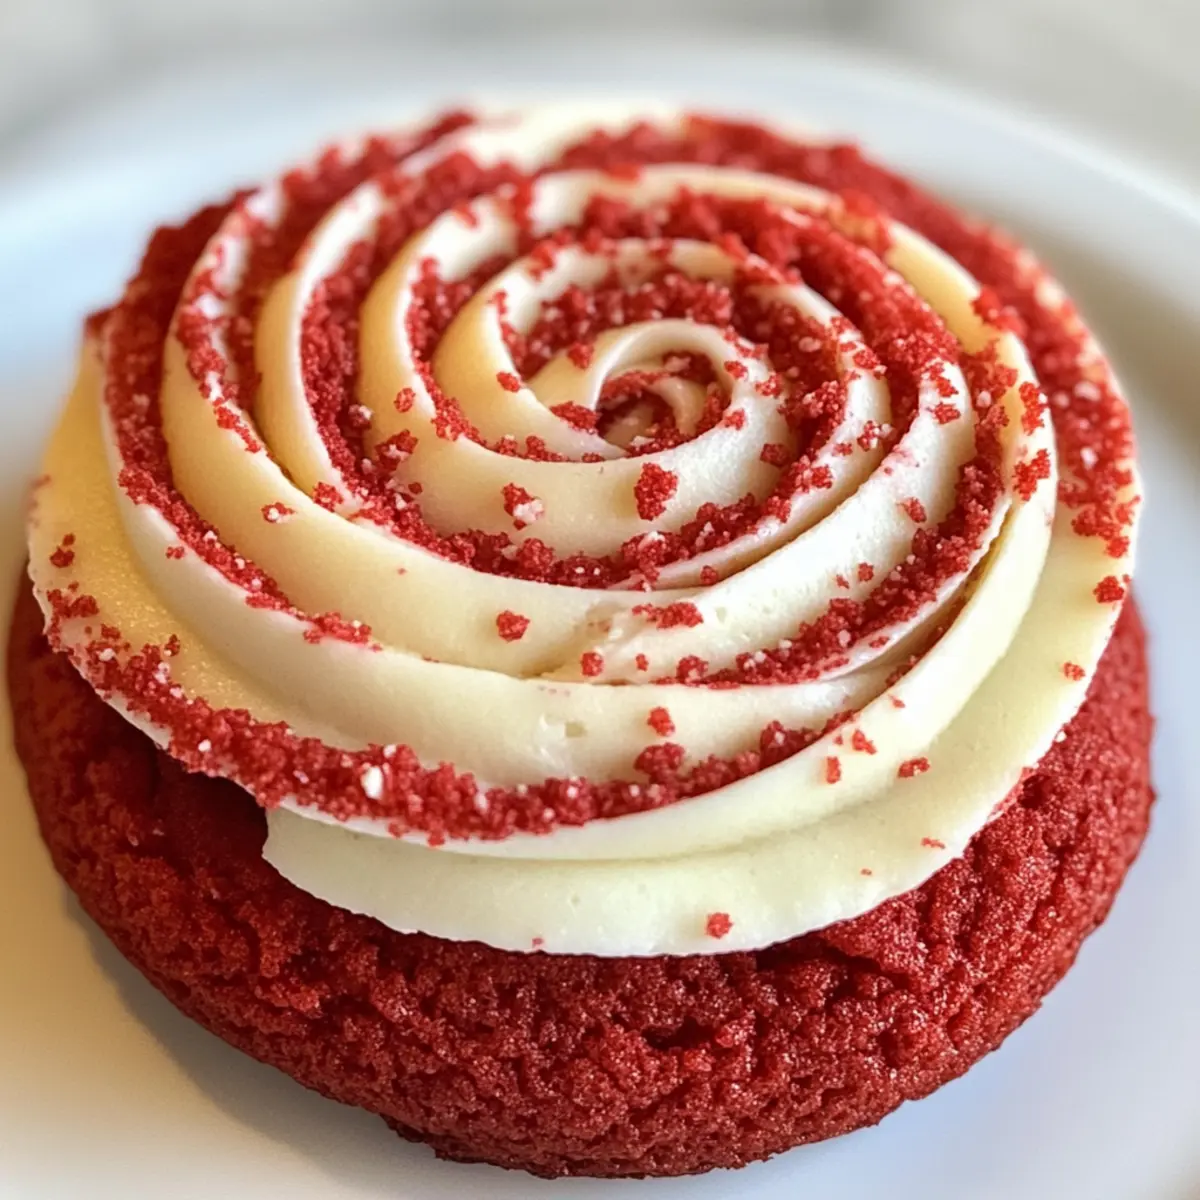
There’s something truly enchanting about the vibrant hue of red velvet cookies that brings a smile to my face every time I see them. These Crumbl Copycat Red Velvet Cookies are my go-to for a sweet escape, capturing the soft, moist texture that feels like a hug in every bite. Topped with a creamy swirl of cream cheese frosting, these cookies beautifully combine the classic flavors of cocoa and cream cheese, making them a delightful treat for any occasion. What I love most is that this straightforward recipe welcomes bakers of all levels, ensuring everyone can whip up a batch to impress friends and family. Plus, they make the perfect dessert to share at gatherings or to satisfy a craving for something sweet at home. Are you ready to add a pop of color and comfort to your baking repertoire? Let’s dive in!
Why Are These Cookies So Special?
Indulgent Flavor: Each cookie bursts with a rich chocolate flavor that perfectly balances the tang of cream cheese frosting.
Eye-Catching Presentation: The lush red color makes them a showstopper at any gathering, instantly elevating your dessert spread.
Baker-Friendly: Simple steps ensure that novice bakers can achieve delicious results without stress.
Versatile Options: Feel free to twist the recipe by adding chocolate chips or swapping the frosting for a chocolate ganache to suit your taste.
Make-Ahead Convenience: These cookies can be prepared in advance and stored easily, making them perfect for busy schedules or last-minute celebrations. Experience the joy of creating festive treats with this recipe, and consider pairing them with options like Orange Clove Cookies or German Christmas Cookies for a truly festive dessert platter!
Red Velvet Cookies Ingredients
For the Cookie Dough
• Unsalted Butter (1/2 cup) – Provides richness and moisture; can substitute with margarine if needed.
• Granulated Sugar (1/3 cup) – Adds essential sweetness to balance flavors.
• Light Brown Sugar (1/3 cup, packed) – Enhances moisture and adds a subtle caramel flavor; reduce to 1/4 cup for less sweetness.
• Large Egg (1) – Acts as a binder and adds moisture for soft cookies.
• Vinegar (1 tsp) – Adds tang and helps activate baking soda for lift, making the cookies even fluffier.
• Red Gel Food Color (1-2 tsp) – For that iconic red hue; use sparingly to adjust the shade to your preference.
• Vanilla Extract (1 tsp) – Boosts the overall flavor profile of the cookies.
• All-Purpose Flour (1 1/4 cups) – The foundation of the cookie that gives it structure.
• Cocoa Powder (2-3 tbsp) – Provides that subtle chocolate flavor; adjust based on how chocolaty you prefer your cookies.
• Baking Soda (1/2 tsp) – A key leavening agent that helps cookies rise beautifully.
• Baking Powder (1/4 tsp) – Adds extra lift for a lighter texture.
• Salt (1/4 tsp) – Enhances the flavors, balancing the sweetness.
For the Cream Cheese Frosting
• Unsalted Butter (6 tbsp) – Adds richness to the frosting.
• Cream Cheese (6 oz) – The main ingredient that brings a delightful tanginess to the frosting.
• Icing Sugar (1 cup, sifted) – Sweetens and thickens the frosting for the perfect spreadable consistency.
• Vanilla Extract (1/2 tsp) – Enhances the flavor profile of the creamy frosting.
These red velvet cookies are sure to become a beloved favorite in your home, with their enchanting flavors and beautiful presentation!
Step‑by‑Step Instructions for Crumbl Copycat Red Velvet Cookies
Step 1: Cream the Butter and Sugars
Begin by placing ½ cup of softened unsalted butter into a large mixing bowl. Using a hand mixer, cream the butter with ⅓ cup granulated sugar and ⅓ cup packed light brown sugar until the mixture is light and fluffy, approximately 2-3 minutes. This step is crucial for incorporating air, resulting in soft and moist red velvet cookies.
Step 2: Add Wet Ingredients
Next, blend in one large egg, 1 teaspoon of vinegar, 1-2 teaspoons of red gel food color, and 1 teaspoon of vanilla extract. Mix on medium speed until everything is well combined and smooth, about 1 minute. The vibrant color will enhance the visual appeal of your red velvet cookies, setting the stage for your delightful treats.
Step 3: Combine Dry Ingredients
In a separate bowl, sift together 1 ¼ cups of all-purpose flour, 2-3 tablespoons of cocoa powder, ½ teaspoon of baking soda, ¼ teaspoon of baking powder, and ¼ teaspoon of salt. Gradually fold the dry mixture into the wet ingredients using a spatula. Be careful not to overmix; you want just a few streaks of flour remaining for the perfect texture in your cookies.
Step 4: Chill the Dough
Once the dough is mixed, cover the bowl with plastic wrap and refrigerate for 15-20 minutes. Chilling the dough is essential to prevent the cookies from spreading too much during baking, ensuring they maintain a thicker and chewier texture typical of red velvet cookies.
Step 5: Preheat the Oven
While the dough chills, preheat your oven to 375°F (190°C). Line two baking sheets with parchment paper. This allows for even baking and easy cleanup, making the process smooth as your cookies transition from dough to delicious treats.
Step 6: Shape the Cookies
After chilling, remove the dough from the refrigerator and divide it into 5 equal balls. Gently shape each piece into a slightly flattened disk, approximately 1 inch thick. Place them on the prepared baking sheets, spacing them about 3 inches apart to allow for spreading while baking.
Step 7: Bake the Cookies
Bake the cookies in the preheated oven for 10-11 minutes or until the edges are set but the centers remain soft. Keep an eye on them; they should look slightly puffy and not overly firm when done, which indicates the cookies will be soft and moist upon cooling.
Step 8: Prepare the Cream Cheese Frosting
While the cookies cool on the baking sheets, make the cream cheese frosting. In a medium bowl, beat 6 tablespoons of unsalted butter with 6 ounces of cream cheese until creamy and smooth. Gradually add 1 cup of sifted icing sugar and ½ teaspoon of vanilla extract while continuing to mix, until the frosting reaches a spreadable consistency.
Step 9: Frost the Cookies
Once the cookies are completely cooled, pipe or spread the luscious cream cheese frosting onto each cookie. For a decorative touch, sprinkle some reserved cookie crumbs on top. This final step not only enhances the presentation but also adds an extra bite of red velvet bliss to your cookies.
Expert Tips for Red Velvet Cookies
- Chill the Dough: Ensure you chill the cookie dough for 15-20 minutes to prevent spreading, resulting in thicker, chewier red velvet cookies.
- Avoid Overmixing: Mix the dry ingredients just until combined to maintain a soft texture; overmixing can lead to tougher cookies.
- Perfect Baking Time: Bake until the edges are set while the centers remain soft; this creates that delightful, moist cookie texture.
- Use Quality Ingredients: Opt for high-quality cocoa powder and cream cheese to enhance the flavor and overall experience of your red velvet cookies.
- Experiment with Colors: Have fun with food coloring! You can adjust the amount for a deeper red or even try other shades for festive occasions.
How to Store and Freeze Red Velvet Cookies
Fridge: Store your red velvet cookies in an airtight container for up to 5 days. This keeps them moist and delicious, ready for whenever your sweet tooth strikes.
Freezer: Wrap each cookie individually in plastic wrap or foil, then place them in a freezer-safe bag. They can be frozen for up to 3 months, ensuring you have a treat on hand whenever desired.
Reheating: For the best taste, gently reheat frozen cookies in the microwave for about 15-20 seconds. This revives their soft, moist texture and brings back the delightful creaminess of the frosting.
Room Temperature: If you plan to enjoy the cookies within a day, keeping them at room temperature is perfectly fine; just ensure they are stored in an airtight container to maintain freshness.
Red Velvet Cookies Variations
Get ready to mix things up and personalize your red velvet cookies; the options are endless!
-
Chocolate Ganache: Replace the cream cheese frosting with a rich chocolate ganache for a double chocolate delight. The glossy finish adds a beautiful touch and intensifies the chocolate flavor.
-
Nutty Texture: Fold in 1/2 cup of chopped walnuts or pecans for a delightful crunch. The nuts not only enhance the flavor but also give a wonderful texture contrast to the soft cookies.
-
Spicy Kick: Add a pinch of cayenne pepper or cinnamon to the dough for a warm, unexpected kick. It beautifully complements the sweetness while making your cookies special!
-
Gluten-Free: Swap out the all-purpose flour for a 1:1 gluten-free baking blend. This simple substitution ensures everyone can enjoy these fabulous cookies without missing out.
-
Fun Colors: Use different gel food colorings to create a rainbow of cookies for celebrations. Imagine a platter filled with vibrant hues that brings joy to any gathering!
-
Additional Sweetness: Incorporate chocolate chips or white chocolate chunks into the dough for an indulgent burst. These little morsels elevate each bite and bring added sweetness.
-
Frosting Mystique: Try flavored frostings like lemon or peppermint to match your mood or theme. Just a few drops of essential oils or extracts can create a whole new experience!
As you experiment, consider pairing these cookies with other scrumptious treats like Christmas Fruitcake Cookies for a delightful dessert platter!
Make Ahead Options
These red velvet cookies are perfect for meal prep enthusiasts! You can prepare the cookie dough and chill it in the refrigerator for up to 24 hours before baking, which helps develop their flavor. Simply wrap the dough tightly in plastic wrap or place it in an airtight container. Alternatively, baked cookies can be stored in an airtight container at room temperature for up to 3 days or refrigerated for freshness. To enjoy their delightful flavor and texture again, reheat them gently in the microwave for a few seconds. When ready to serve, frost them with the cream cheese frosting just before enjoying, ensuring they remain soft and delicious. This method not only saves time but also guarantees that your cookies will be just as scrumptious!
What to Serve with Crumbl Copycat Red Velvet Cookies
These vibrant cookies are not just a treat on their own; they can transform your dessert table when paired with delightful accompaniments.
- Refreshing Milk: A classic pairing that balances the sweetness of the cookies and complements their rich flavors beautifully.
- Creamy Vanilla Ice Cream: The cold, creamy texture adds a delicious contrast to the warm cookies, enhancing each bite.
- Strong Brewed Coffee: The bitterness of coffee cuts through the sweetness, making it a delightful partner for a cozy afternoon treat.
- Homemade Whipped Cream: Light and fluffy, whipped cream adds a heavenly layer of softness that can elevate any dessert experience.
- Chocolate Dipping Sauce: For the chocolate lover, a rich sauce can be drizzled over the cookies, perfect for a decadent dessert experience.
- Fruit Medley Salad: A fresh mix of berries brings a vibrant burst of flavor that balances the rich red velvet cookies.
- Chilled Sparkling Cider: The effervescence and slight sweetness of sparkling cider offer a festive, refreshing contrast that’s delightful.
- Chocolate Ganache: Rich, dark chocolate adds sophistication, making these cookies even more indulgent for special occasions.
- Coconut Macaroons: Their chewy texture and tropical flavor provide a uniquely delicious pairing that will surprise your guests.
- Red Velvet Milkshake: For an adorable twist, blend the cookies into ice cream and milk for a colorful, delicious drink!
Crumbl Copycat Red Velvet Cookies Recipe FAQs
How do I choose the right ingredients for my red velvet cookies?
Absolutely! For the best results, choose unsalted butter that is soft at room temperature for creaming with the sugars. Look for high-quality red gel food coloring to achieve that beautiful hue. When selecting cream cheese for frosting, check that it’s fresh and at room temperature, which helps in creating a smooth and creamy texture. For cocoa powder, I recommend using Dutch-processed for a richer flavor.
How should I store my red velvet cookies to keep them fresh?
To keep your red velvet cookies fresh, store them in an airtight container at room temperature for up to 1 day. If you want to keep them longer, transfer them to the fridge for up to 5 days. The container helps retain moisture, ensuring they remain soft and delicious.
Can I freeze my cookies, and if so, how?
Yes, you can freeze your cookies! First, wrap each cookie tightly in plastic wrap or foil to protect them from freezer burn. Then place the wrapped cookies in a freezer-safe bag. They can be frozen for up to 3 months. When you’re ready to enjoy them, simply reheat them in the microwave for about 15-20 seconds to restore their soft texture.
Why are my cookies spreading during baking?
Very! If your cookies are spreading, it’s likely due to the dough not being chilled long enough. Make sure to refrigerate your dough for at least 15-20 minutes before shaping. Additionally, ensure that the butter is softened but not melted; using overly warm butter can also cause cookies to spread.
Are these cookies suitable for people with allergies?
While the recipe includes common allergens like gluten and dairy, you can customize it for dietary needs! For a gluten-free option, substitute the all-purpose flour with a gluten-free blend. Use dairy-free butter and cream cheese alternatives for those avoiding dairy. Always check labels for cross-contamination if allergies are a concern.
How can I make my cookies even more delicious?
Feel free to add mix-ins to elevate your red velvet cookies! I often include chocolate chips or nuts for an extra crunch. You can even experiment by trying different frostings, like a chocolate ganache, for a richer flavor or adding sprinkles on top for festive occasions.
Decadent Red Velvet Cookies with Cream Cheese Frosting
Ingredients
Equipment
Method
- Begin by creaming ½ cup of softened unsalted butter with ⅓ cup granulated sugar and ⅓ cup packed light brown sugar until light and fluffy.
- Blend in one large egg, 1 teaspoon of vinegar, 1-2 teaspoons of red gel food color, and 1 teaspoon of vanilla extract.
- In a separate bowl, sift together 1 ¼ cups of all-purpose flour, 2-3 tablespoons of cocoa powder, ½ teaspoon of baking soda, ¼ teaspoon of baking powder, and ¼ teaspoon of salt. Gradually fold the dry mixture into the wet ingredients.
- Cover the bowl with plastic wrap and refrigerate for 15-20 minutes.
- Preheat your oven to 375°F (190°C) and line two baking sheets with parchment paper.
- Remove the dough from the refrigerator, divide into 5 equal balls, and shape each into a slightly flattened disk.
- Bake in the preheated oven for 10-11 minutes or until the edges are set but the centers remain soft.
- Make the cream cheese frosting by beating 6 tablespoons of unsalted butter with 6 ounces of cream cheese until creamy. Gradually add 1 cup of sifted icing sugar and ½ teaspoon of vanilla extract.
- Once the cookies are completely cooled, frost each cookie with the cream cheese frosting.
Leave a Reply