
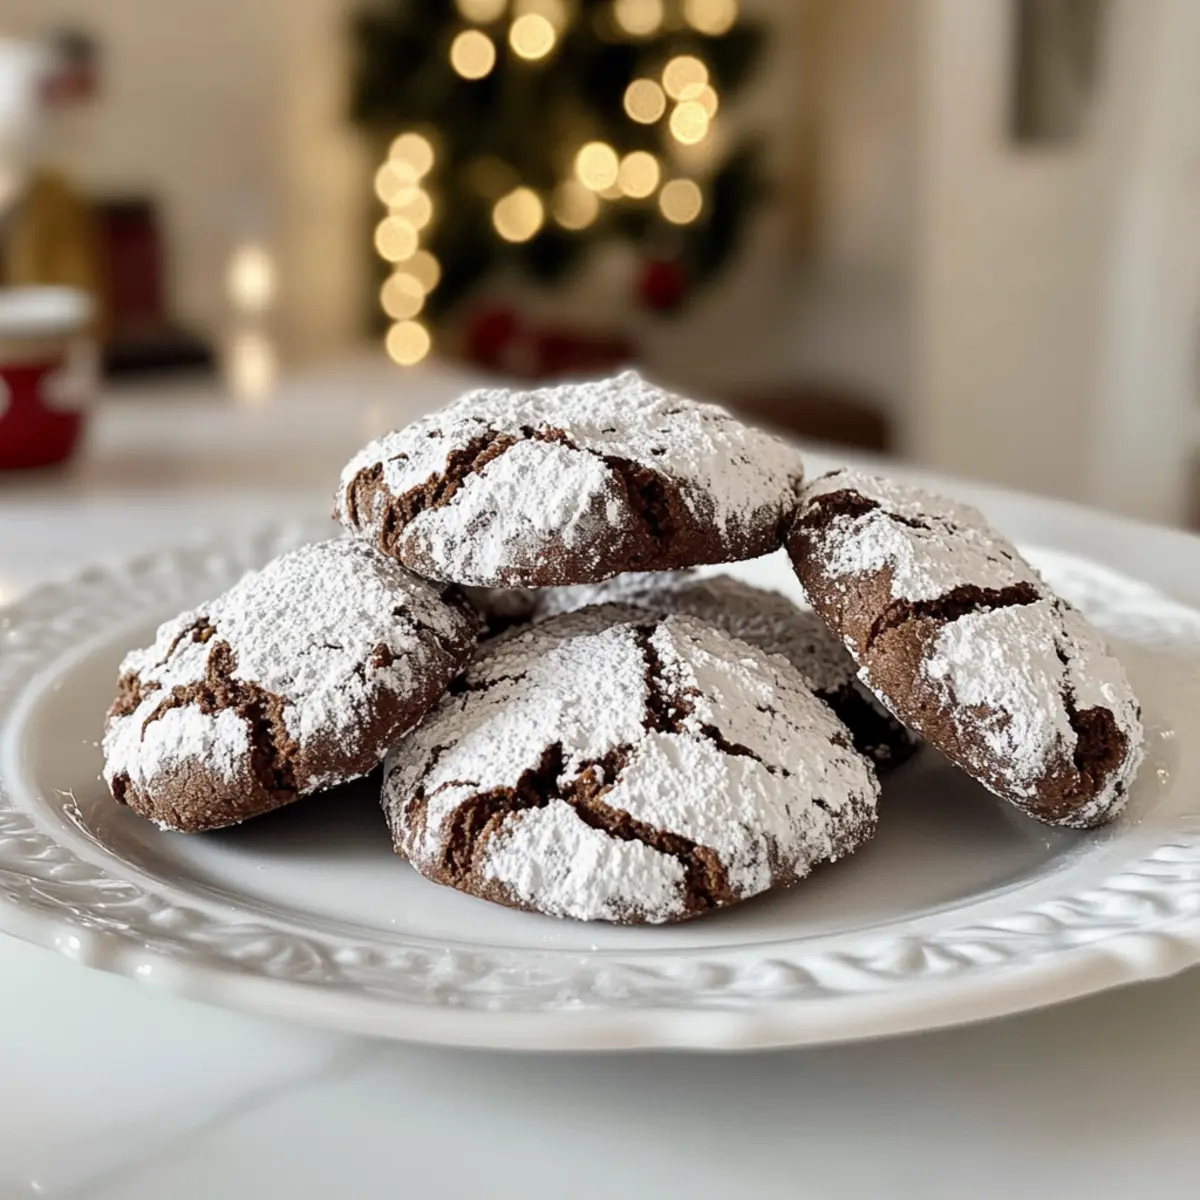
The aroma of freshly baked cookies wafting through the house can instantly transport me back to my childhood, especially when it comes to making Chocolate Crinkle Cookies. These delightful treats are the ultimate blend of rich chocolate goodness and chewy texture, perfect for satisfying even the fiercest sweet tooth. What’s even better? They come together in under 30 minutes with no chilling required, making them a fantastic option for impromptu gatherings or cozy nights in. With a simple mix of ingredients, you’ll create cookies that are crisp on the outside and tender on the inside—a true crowd-pleaser! Curious about how you can customize these delights to make them your own? Let’s dive into the recipe!
Why Are These Cookies So Special?
Quick and Easy: In just 30 minutes, you’ll whip up these delicious Chocolate Crinkle Cookies without the hassle of chilling! Perfect for those spontaneous cravings.
Irresistible Flavor: Each bite combines rich cocoa with a melt-in-your-mouth texture that’s sure to impress friends and family.
Customizable Options: Feel free to mix in your favorites, like chocolate chips or nuts for an exciting twist!
Crowd-Pleaser: Whether it’s a holiday gathering or a cozy night, these cookies are a sure hit with everyone.
Memorable Aroma: Bake them and enjoy the delicious scent wafting through your home, rekindling fond memories.
Whenever you’re in the mood for an effortless treat, consider pairing them with a glass of milk or exploring recipes like Raspberry Chocolate Lasagna for a delightful dessert experience!
Chocolate Crinkle Cookies Ingredients
-
For the Cookie Dough
-
Unsweetened cocoa powder – a must for that deep, rich chocolate flavor; avoid substitutions for the best results.
-
Granulated sugar – essential for sweetness and creating that beautiful crinkle effect; substitute with brown sugar for a more complex taste.
-
Light olive oil (or avocado oil) – adds moisture and texture; feel free to use vegetable oil or melted butter if preferred.
-
Eggs – help bind the ingredients and contribute to the cookie’s rise; use flaxseed meal mixed with water for a vegan alternative.
-
Vanilla extract – enhances the overall flavor profile; almond extract can offer a different twist if desired.
-
Baking powder – crucial for leavening and achieving that fluffy center, so make sure it’s fresh!
-
Salt – balances the sweetness and uplifts flavors; you can opt for sea salt or kosher salt.
-
All-purpose flour – provides the structure; swap for a gluten-free blend to accommodate dietary needs.
-
For Coating
-
Granulated sugar (for coating) – creates a lovely light crust; optional if you prefer a less sweet finish.
-
Powdered sugar (for coating) – gives that iconic crinkle cookie appearance; no substitutes here for the visual appeal.
With these simple ingredients, you’ll create unforgettable Chocolate Crinkle Cookies that are bound to be a hit!
Step‑by‑Step Instructions for Chocolate Crinkle Cookies
Step 1: Preheat the Oven
Start by preheating your oven to 350°F (175°C). While the oven warms up, line a baking sheet with parchment paper to prevent sticking. This step is crucial as it ensures even baking for your Chocolate Crinkle Cookies, leading to that perfect crinkle effect on top!
Step 2: Mix the Dry Ingredients
In a large mixing bowl, whisk together 1 cup of unsweetened cocoa powder, 1 cup of granulated sugar, and 1/2 cup of light olive oil until smooth and well combined. The mixture should appear thick and glossy, signaling that you’re ready to move on to the next step.
Step 3: Add Wet Ingredients
Next, crack in 2 large eggs and pour in 2 teaspoons of vanilla extract. Mix the wet ingredients into the cocoa-sugar mixture until just combined; it may look a bit loose. This is the foundation for your delicious Chocolate Crinkle Cookies, so make sure everything is well incorporated.
Step 4: Combine the Remaining Ingredients
Now, add 1 teaspoon of baking powder, 1/4 teaspoon of salt, and 1 cup of all-purpose flour to the bowl. Fold these dry ingredients into the mixture until a stiff dough begins to form, which will take about a minute of gentle mixing. Be careful not to over mix, as this can affect the texture of the cookies.
Step 5: Form the Cookie Dough Balls
Using a scoop or your hands, take approximately 1.5-inch portions of the dough and roll them into balls. If the dough feels sticky, consider chilling it in the refrigerator for about 30 minutes. This will help in handling the dough better and ensure neat, uniform cookies.
Step 6: Coat the Dough Balls
Prepare two separate bowls: one with granulated sugar and the other with powdered sugar. Roll each dough ball first in granulated sugar, then coat thoroughly with powdered sugar, ensuring a good coating that will create the signature crinkle look when baked.
Step 7: Arrange on Baking Sheet
Place the coated dough balls on the lined baking sheet, ensuring they are spaced about 2 inches apart. This spacing allows the cookies to spread beautifully without sticking together. You should see a lovely dusting of sugar on top, hinting at the deliciousness to come.
Step 8: Bake the Cookies
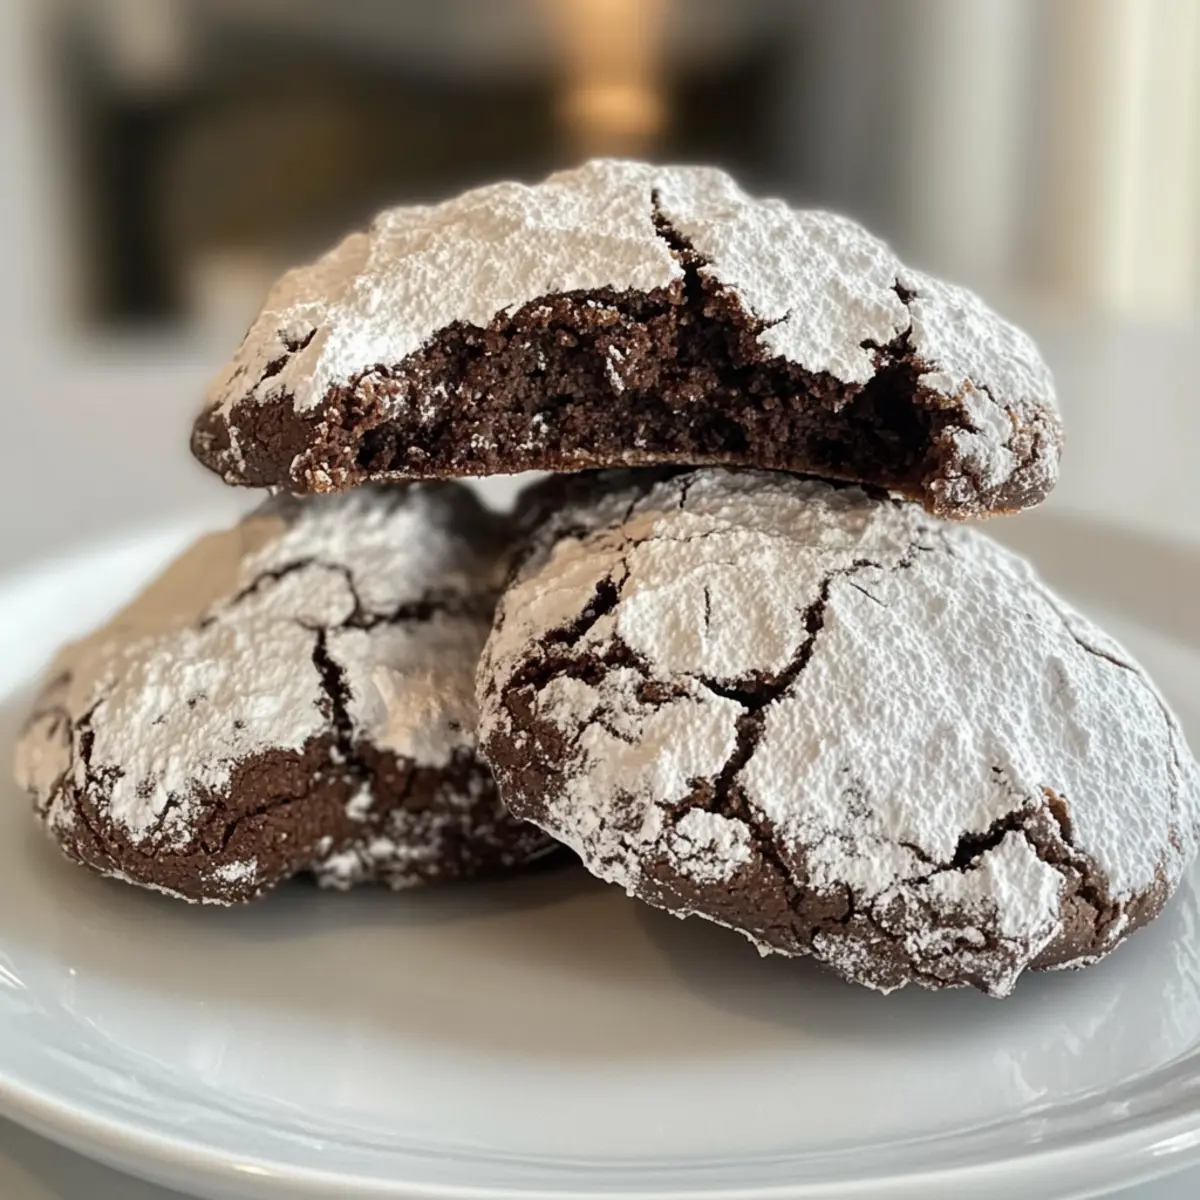
Slide the baking sheet into the preheated oven and bake for about 10 minutes. Keep a close eye on them—the tops should be crinkled and slightly set around the edges but still soft in the center, giving that ideal chewy texture.
Step 9: Cool Before Serving
Once baked, remove the cookies from the oven and let them cool on the baking sheet for 5 to 10 minutes. This helps them firm up a bit. After that, carefully transfer them to a wire rack to cool completely, allowing their delicious flavor to develop further.

Expert Tips for Chocolate Crinkle Cookies
-
Baking Time: Keep a close watch while baking; take them out when the tops are crinkled, ensuring a soft center. Overbaking can lead to dry cookies.
-
Flour Measurement: Use the spoon-and-level method to measure flour. Too much can result in dry cookies, affecting the crinkle texture you desire.
-
Coating Technique: Roll the cookie balls thoroughly in both granulated and powdered sugar. This not only adds sweetness but ensures the signature crinkle appearance when baked.
-
Egg Temperature: Ensure your eggs are at room temperature for better mixing. Cold eggs can lead to a denser cookie rather than the light, chewy texture you crave.
-
Storage Secrets: For the best freshness, store your Chocolate Crinkle Cookies in an airtight container at room temperature. Avoid stacking to keep their crinkle intact.
Make Ahead Options
These Chocolate Crinkle Cookies are fantastic for meal prep, saving you time on busy days! You can mix the dough and refrigerate it for up to 24 hours before baking—simply cover it tightly to prevent drying out. Alternatively, you can scoop and roll the dough balls, coat them in sugar, and freeze them for up to 3 months. When you’re ready to bake, just place the frozen dough balls on a baking sheet and bake straight from the freezer, adding an extra minute or two to the cooking time. This way, your Chocolate Crinkle Cookies will come out just as delicious as if you made them fresh on the spot!
Chocolate Crinkle Cookies Variations
Feel free to add your own unique twist to these delightful cookies and make them even more irresistible!
- Nutty Surprise: Fold in chopped walnuts or pecans to add crunch and a rich flavor contrast. Your taste buds will thank you for the extra texture!
- Spicy Kick: Add a pinch of cayenne pepper or ground cinnamon for a warm, spicy element. It’s a perfect surprise that will elevate the chocolate flavor!
- Chocolate Lovers: Mix in chocolate chips or chunks for an extra burst of chocolate in every bite. Imagine biting into soft cookie dough and finding pockets of melty chocolate—pure bliss!
- Fruit Infusion: Toss in dried cherries or cranberries to balance the sweetness with a touch of tartness. They provide a delightful flavor explosion that complements the cocoa.
- Vegan-Friendly: Use flaxseed meal and water instead of eggs for a vegan version. You won’t lose flavor, and everyone can enjoy these treats!
- Minty Freshness: Add a few drops of peppermint extract for a refreshing twist. These cookies become magical with that festive minty touch—perfect for holiday gatherings!
- Gourmet Toppings: After baking, sprinkle with sea salt or drizzle with white chocolate for a gourmet finish. It adds elegance and a delightful contrast to the rich chocolate!
As you’re creating your delicious variations, don’t forget to enjoy these Chocolate Crinkle Cookies alongside a glass of milk or pair them with a beautiful White Chocolate Raspberry dessert for a truly decadent experience. There’s no limit to the joy these cookies can bring!
What to Serve with Chocolate Crinkle Cookies
Indulging in the warm, rich taste of fresh-baked cookies inspires delightful meal pairings that elevate your dessert experience.
- Glass of Milk: The classic choice! Creamy milk balances the rich chocolate and enhances the cookie’s chewy texture.
- Vanilla Ice Cream: A scoop of velvety ice cream beside the cookies creates a refreshing contrast to the warm, fudgy center.
- Fresh Berries: Strawberries or raspberries bring a tart freshness, beautifully complementing the sweetness of the cookies.
- Chocolate Sauce Dip: Dive into decadence with a drizzle of warm chocolate sauce for an extra indulgent twist. The layers of flavor will mesmerize any chocolate lover.
- Hot Cocoa: Embrace the warmth with a cozy cup of hot cocoa, enriching the chocolatey goodness of your dessert.
- Whipped Cream: A dollop of airy whipped cream makes for a light and delightful topping that enhances the overall experience.
- Coffee: A robust cup of coffee provides a contrasting bitterness, perfect for those late-night cravings when the sweet tooth hits.
- Fruit Tart: For something a bit different, a slice of bright fruit tart offers a refreshing balance next to the cookie’s richness, adding a lovely texture variety.
How to Store and Freeze Chocolate Crinkle Cookies
Room Temperature: Store your baked cookies in an airtight container for up to 1 week to maintain their delicious chewy texture and freshness.
Fridge: If you want to keep them even longer, store in the refrigerator for up to 2 weeks. Just allow them to come to room temperature before enjoying.
Freezer: For longer storage, freeze the cookies for up to 3 months. Layer them between parchment paper in a freezer-safe container to prevent sticking.
Reheating: When ready to enjoy, thaw at room temperature. If you prefer them warm, pop them in the microwave for 10-15 seconds for a melty, gooey treat.

Chocolate Crinkle Cookies Recipe FAQs
How do I select the best cocoa powder for my cookies?
Absolutely! For the best flavor in your Chocolate Crinkle Cookies, I recommend using high-quality unsweetened cocoa powder. Look for a brand that appears rich and dark, as this will provide a deep chocolate flavor. Avoid any powder with added sugars or flavors, as this can alter the integrity of your recipe.
How should I store my Chocolate Crinkle Cookies to keep them fresh?
Very! To keep your cookies at their best, store them in an airtight container at room temperature for up to 1 week. If you have leftovers, you can also refrigerate them for up to 2 weeks. Just remember to let them come to room temperature before enjoying their delightful texture!
Can I freeze Chocolate Crinkle Cookies, and how should I do it?
Absolutely! To freeze your Chocolate Crinkle Cookies, place them in a single layer on a baking sheet and freeze until firm. Then, transfer them to a freezer-safe container with parchment paper between layers to prevent sticking. They will keep well for up to 3 months. When you’re ready to enjoy them, simply thaw at room temperature or heat them in the microwave for a few seconds for that fresh-baked taste!
What should I do if my cookies spread too much while baking?
No worries! If your cookies spread too much, it might be due to not enough flour in the dough. Ensure you’re using the right flour measurement by spooning the flour into your measuring cup and leveling it off. Additionally, check that your baking powder is fresh, as old leavening agents can lead to improper rising. If all else fails, slightly chilling the dough for about 30 minutes can help firm it up before baking.
Are these Chocolate Crinkle Cookies safe for people with nut allergies?
Very! This recipe does not contain any nuts, but always double-check the labels on your ingredients to ensure they haven’t been processed in facilities that handle nuts. If you’re serving individuals with nut allergies, it’s best to use certified nut-free ingredients to guarantee safety.
What variations can I try with this Chocolate Crinkle Cookie recipe?
The more, the merrier! You can mix in chocolate chips, nuts, or even spices like cinnamon or cayenne to create exciting flavor profiles. Another fun twist is to place a Hershey’s Kiss on top of each cookie just before baking for a delightful surprise. Let your creativity shine!
Irresistibly Chewy Chocolate Crinkle Cookies in 30 Minutes
Ingredients
Equipment
Method
- Preheat your oven to 350°F (175°C) and line a baking sheet with parchment paper.
- In a large mixing bowl, whisk together cocoa powder, granulated sugar, and light olive oil until smooth.
- Add eggs and vanilla extract, mixing until just combined.
- Fold in baking powder, salt, and all-purpose flour until a stiff dough forms.
- Scoop approximately 1.5-inch portions of dough and roll into balls.
- Roll each dough ball in granulated sugar followed by powdered sugar.
- Arrange the coated dough balls on the baking sheet, spaced about 2 inches apart.
- Bake for about 10 minutes, watching for crinkled tops and soft centers.
- Cool on the baking sheet for 5 to 10 minutes before transferring to a wire rack.
Leave a Reply