
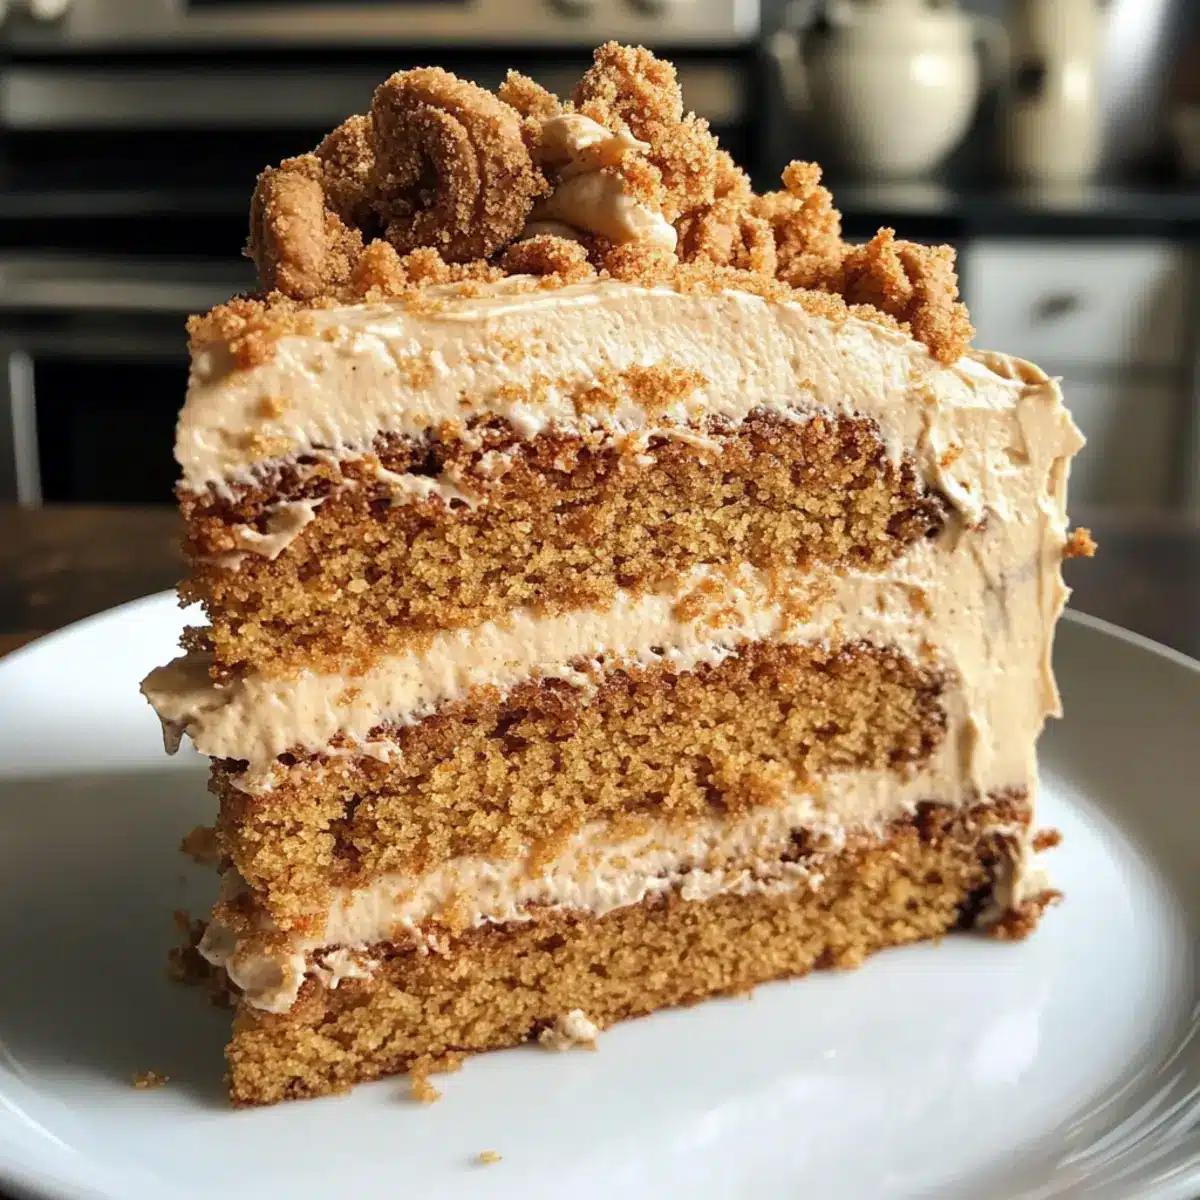
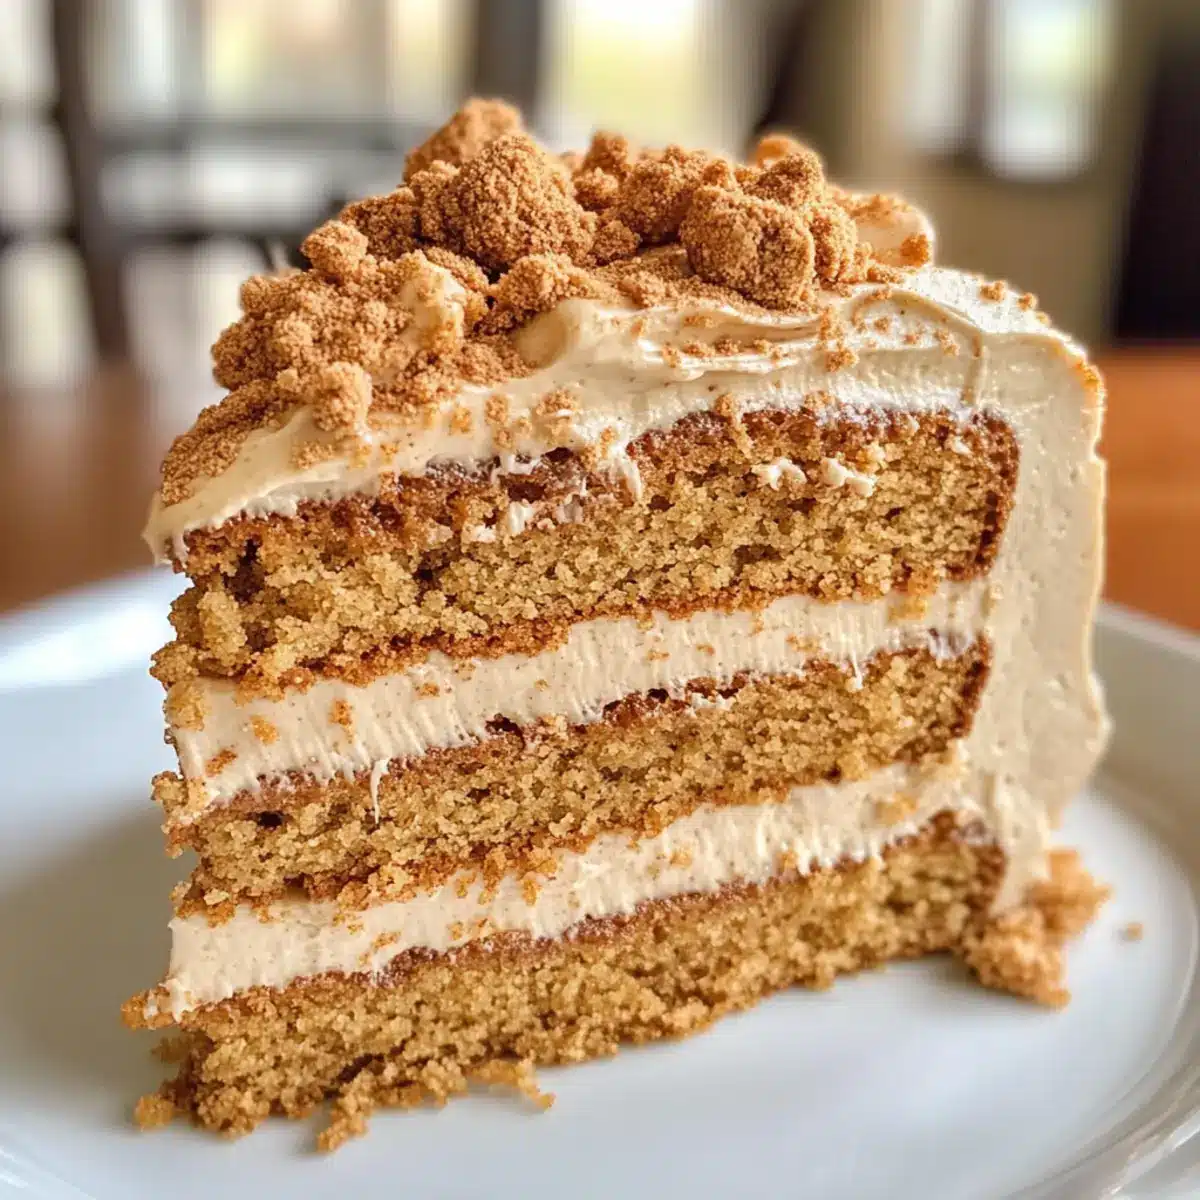
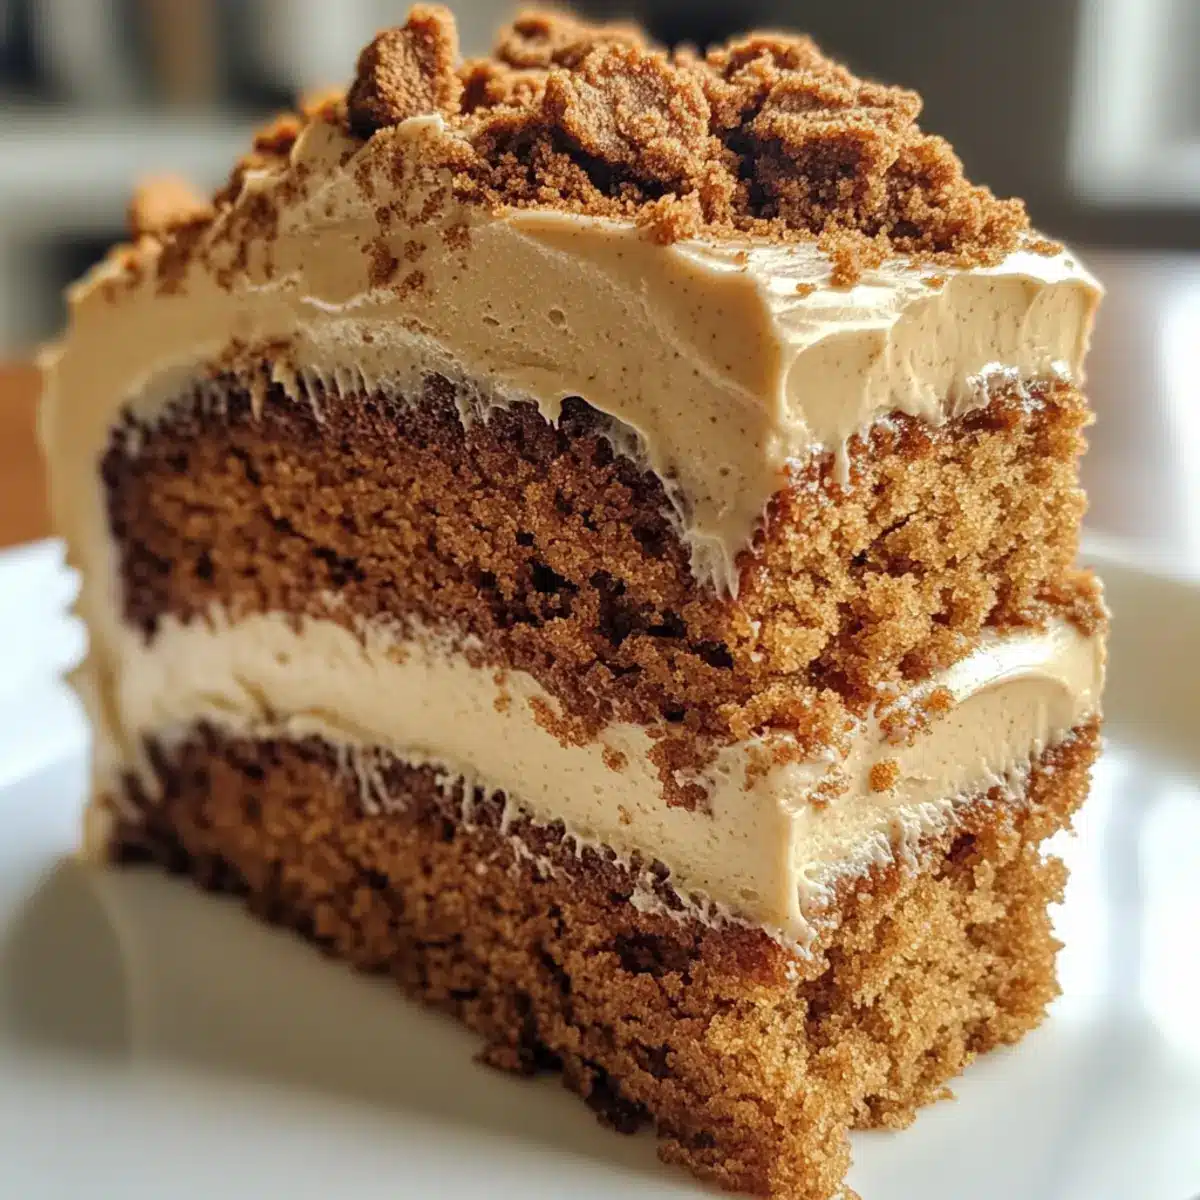
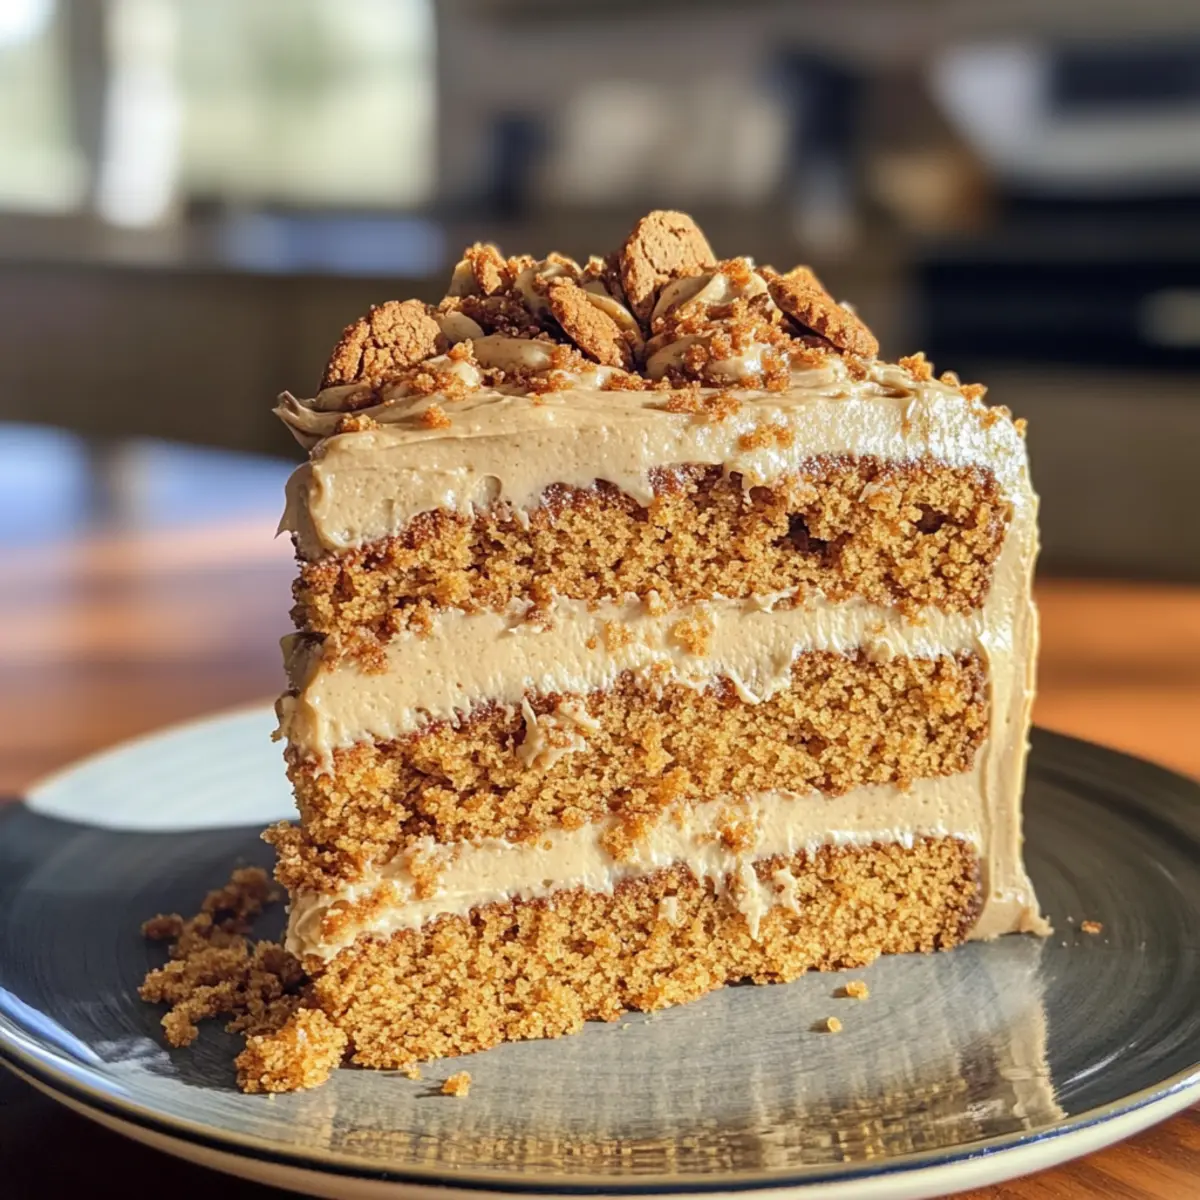
You won’t believe how easy it is to transform an everyday dessert into a heavenly delight. This Biscoff Cake, with its moist layers and a luscious cookie butter frosting, is a celebration of the beloved Biscoff cookie in every bite. Not only does this recipe offer a delicious escape from the mundane fast food routine, but it also presents a perfect opportunity to impress your friends and family—whether it’s for a birthday party or a cozy gathering over coffee. Packed with the warm flavors of dark brown sugar and cinnamon, this cake is sure to become a cherished go-to in your baking repertoire. Want to learn how to create this showstopper that will leave everyone craving more? Keep reading!
Why is Biscoff Cake so irresistible?
Indulgence is at the heart of this recipe, showcasing the iconic flavors of Biscoff cookies in a moist, decadent cake. Simplicity is key, as the straightforward steps make it accessible for bakers of all levels. Versatile enough to swap out ingredients, you can easily tailor it to suit your preferences by using different nut butters or even trying it as cupcakes! Crowd-pleaser status is guaranteed—this cake is perfect for birthdays, coffee dates, or any festive occasion. Finally, make-ahead convenience allows you to prep the layers in advance, giving you more time to relax and enjoy the company of your guests. If you’re a fan of indulgent desserts, be sure to check out our Cheesecake Fudge Bake or the delightful Butter Pecan Cake for more luscious inspirations!
Biscoff Cake Ingredients
• This delectable Biscoff Cake will have everyone coming back for seconds!
For the Cake
- All-Purpose Flour – Provides structure; can be substituted with gluten-free flour.
- Granulated Sugar – Adds sweetness to balance flavors.
- Dark or Light Brown Sugar – Infuses moisture and rich flavor with molasses notes.
- Baking Powder – Acts as a leavening agent for a fluffy cake.
- Ground Cinnamon – Offers warmth and spiciness that echoes the flavor of Biscoff.
- Fine Salt – Enhances and balances the sweetness of the cake.
- Unsalted Butter (room temperature) – Gives richness and moisture; essential for a tender crumb.
- Egg Whites – Ensures a light texture; feel free to use whole eggs for a richer cake.
- Buttermilk – Adds moisture and tenderness; for a quick substitute, mix 1 cup whole milk with 1 tbsp vinegar.
- Vegetable or Canola Oil – Keeps the cake irresistibly moist.
- Vanilla Extract or Vanilla Bean Paste – Deepens the flavor profile for an exquisite taste.
For the Frosting
- Vanilla Buttercream Frosting – Essential for layering the cake; provides sweet creaminess.
- Cookie Butter – Adds the distinctive flavor of Biscoff to the frosting; can be swapped with a different nut butter for variety.
- Heavy Whipping Cream – Helps achieve a smooth, luscious frosting consistency.
This Biscoff Cake is sure to charm everyone at your next gathering!
Step‑by‑Step Instructions for Biscoff Cake
Step 1: Preheat and Prepare Pans
Begin your Biscoff Cake by preheating the oven to 350°F (175°C). While the oven heats, prepare your two 9-inch round cake pans by lining the bottoms with parchment paper and lightly greasing the sides with non-stick spray. This ensures easy removal of the cakes once baked and promotes a beautiful, even surface.
Step 2: Mix Dry Ingredients
In a large mixing bowl, whisk together the all-purpose flour, granulated sugar, brown sugar, baking powder, ground cinnamon, and fine salt. Make sure all the dry ingredients are well incorporated and free of lumps. This mixture forms the flavorful foundation of your Biscoff Cake, creating the perfect balance of sweetness and spice.
Step 3: Combine Wet Ingredients
Add the room-temperature unsalted butter to the dry ingredients and mix until the texture resembles coarse crumbs. Next, pour in the egg whites and buttermilk, stirring until the batter is completely smooth and well blended. This step adds moisture and creates a light texture, ensuring your cake will be fluffy and delightful.
Step 4: Bake the Cake Layers
Divide the batter evenly between the prepared cake pans, smoothing the tops with a spatula for an even bake. Place the pans in the preheated oven and bake for 33–35 minutes. The cakes are ready when a toothpick inserted into the center comes out clean, signaling perfectly baked layers to create your Biscoff Cake.
Step 5: Cool and Chill Layers
Once baked, remove the cake layers from the oven and let them cool in the pans for about 10 minutes. After that, gently remove them from the pans and place them on a wire rack to cool completely. For easier handling during frosting, you can refrigerate the cooled layers for a short time.
Step 6: Prepare the Frosting
While your cake layers cool, make the frosting by beating the room-temperature unsalted butter until smooth and creamy. Gradually add the powdered sugar along with a splash of heavy whipping cream, continuing to beat until you achieve your desired consistency. This delicious frosting, infused with cookie butter, will elevate your Biscoff Cake to heavenly levels.
Step 7: Assemble the Cake
Once your cake layers are completely cooled, it’s time to assemble! Place one layer on a serving plate, spreading a generous layer of frosting on top. Add the second cake layer and frost the top and sides of the cake with the remaining vanilla buttercream. The layers of frosting will add richness to your Biscoff Cake.
Step 8: Final Touches
To finish your Biscoff Cake, drizzle some melted cookie butter on top and around the edges. If desired, decorate with chopped Biscoff cookies pressed lightly into the frosting on the sides for an irresistible crunch. This beautiful decoration also enhances the cake’s flavor and makes it visually stunning for your next celebration.
Make Ahead Options
These Biscoff Cake layers are perfect for meal prep enthusiasts! You can bake the cake layers up to 3 days in advance—just cool them completely and wrap each layer tightly in plastic wrap before refrigerating. If you want to prolong their freshness, freeze the layers for up to 1 month, allowing them to thaw in the refrigerator overnight before use. For the cookie butter frosting, prepare it ahead of time and refrigerate in an airtight container for up to 1 week or freeze for up to 3 months. When you’re ready to assemble, simply frost the chilled cake layers and add your delicious finishing touches, ensuring a show-stopping dessert with minimal last-minute effort!
What to Serve with Biscoff Cake
Indulging in a slice of Biscoff Cake is a delightful experience; why not elevate it further with the perfect pairings?
- Coffee or Espresso: The rich flavors of coffee enhance the cake’s caramel notes, creating a heavenly combination that warms the soul.
- Vanilla Ice Cream: A scoop of vanilla ice cream on the side adds a creamy texture that beautifully contrasts the cake’s rich layers.
- Caramel Sauce: Drizzling warm caramel over the cake brings an extra layer of sweetness that complements the spiced notes of Biscoff.
- Fresh Berries: The tartness of strawberries or raspberries cuts through the richness of the cake, adding a refreshing burst of flavor.
- Whipped Cream: A dollop of lightly sweetened whipped cream provides a light, airy contrast to the dense cake. Consider adding a sprinkle of cinnamon for a unique twist!
- Chai Tea: This spiced tea echoes the warm flavors of cinnamon and offers a cozy, comforting drink option for your dessert spread.
- Chocolate Ganache: For chocolate lovers, a smooth chocolate ganache can provide a rich layer of indulgence that pairs perfectly with the cake’s flavors.
- Nuts: Chopped pecans or almonds can add a delightful crunchiness and enhance the Biscoff experience with their toasty notes.
- Dessert Wine: A glass of dessert wine or sweet port can elevate the after-dinner experience, perfectly complementing the cake’s sweetness.
- Maple Syrup: A drizzle of maple syrup adds a warm, sweet complexity that further enhances the comforting flavors of your Biscoff Cake.
Biscoff Cake Variations & Substitutions
Feel free to put your unique spin on this delightful recipe, igniting your creativity and tantalizing the taste buds!
- Gluten-Free: Swap all-purpose flour with a gluten-free blend for a fabulous alternative.
- Nut-Free: Replace cookie butter with sun butter to maintain the creamy goodness without nuts.
- Chocolatey Twist: Mix in cocoa powder for a rich, chocolatey Biscoff cake that will please any chocolate lover.
- Add Heat: Incorporate a pinch of cayenne pepper or chili powder in the batter for a warm, spicy surprise.
- Biscoff Frosting Alternatives: If you’re not a fan of cookie butter, almond or cashew butter works great while adding nutty undertones.
- Cupcake Version: Transform the batter into delightful cupcakes—perfect for parties and easy serving!
- Fruity Layer: Add a layer of caramelized apples or pears between the cake layers for a scrumptious fruity twist.
- Coffee-infused: Swap some of the buttermilk for cold brew coffee to add a sophisticated depth of flavor, perfect for coffee lovers.
No matter how you choose to customize, you’ll find endless possibilities with this Biscoff Cake. If you’re looking for more delicious desserts, be sure to check out our scrumptious Pumpkin Pie Cheesecake and decadent Chocolate Raspberry Cheesecake. Happy baking!
Expert Tips for Biscoff Cake
-
Accurate Measurements: Use a kitchen scale for precision in your ingredient measurements, ensuring an even bake and perfect texture in your Biscoff Cake.
-
Chill for Easy Frosting: Refrigerate your cake layers briefly before frosting to prevent crumbling and to make frosting application smoother.
-
Taste and Adjust: Always taste your frosting during preparation. You might want to adjust the sweetness, adding more sugar or cream to reach your desired consistency.
-
Layering Technique: When assembling, alternate between frosting types (vanilla and cookie butter) for a beautiful and flavorful contrast that elevates your Biscoff Cake.
-
Adding Flavor Depth: Experiment with different nut butters to customize your frosting. This allows for exciting variations while maintaining that beloved Biscoff essence.
How to Store and Freeze Biscoff Cake
Fridge: Store your Biscoff Cake in an airtight container for up to 3 days to keep it fresh and moist.
Freezer: For longer storage, wrap the cooled cake layers tightly in plastic wrap and aluminum foil, then freeze for up to 1 month.
Frosting Storage: The cookie butter frosting can be kept in an airtight container in the fridge for up to 1 month or frozen for up to 3 months.
Reheating: If you want to enjoy leftovers, allow your cake to thaw in the fridge overnight before bringing it to room temperature. Enjoy it chilled or at room temperature!
Biscoff Cake Recipe FAQs
What type of Biscoff cookies should I use for this cake?
Absolutely! For an authentic flavor, I recommend using the classic Biscoff cookies, which you can find in most grocery stores. They bring a unique caramelized and spiced flavor that perfectly complements the cake. If you want to experiment, you could try the crunchy version for added texture!
How long can I store the Biscoff Cake?
The cake can be stored in an airtight container in the fridge for up to 3 days. To keep it fresh, ensure it’s well covered to prevent it from drying out. If you’re planning to enjoy it later, refrigerating it is the way to go!
Can I freeze leftover Biscoff Cake?
Definitely! To freeze your Biscoff Cake, wrap each cooled layer tightly in plastic wrap and then in aluminum foil. This will keep it fresh for up to 1 month. To thaw, place the layers in the fridge overnight before bringing them to room temperature. For quick access, you could also freeze individual slices!
What should I do if my frosting is too thick?
No worries! If you find your frosting too thick, you can easily adjust it by adding a tablespoon of heavy whipping cream at a time, mixing well until you reach your desired consistency. The frosting should be smooth and spreadable, making it easier to layer and decorate your Biscoff Cake!
Can I use a different type of nut butter in the frosting?
Very much so! If you want to switch it up, you can replace the cookie butter with other nut butters like almond or peanut butter, which will impart their own unique flavors. Just make sure to taste the frosting as you go since different nut butters can vary in sweetness and texture.
Is this cake suitable for those with nut allergies?
Great question! While the Biscoff cookies themselves don’t contain nuts, if you swap cookie butter with nut butter in the frosting, it could become a concern for those with allergies. Always check labels for any cross-contamination warnings, and if necessary, stick to the cookie butter for a nut-free option.
Decadent Biscoff Cake with Cookie Butter Frosting Delight
Ingredients
Equipment
Method
- Preheat the oven to 350°F (175°C) and prepare two 9-inch round cake pans with parchment paper and non-stick spray.
- In a large mixing bowl, whisk together the all-purpose flour, granulated sugar, brown sugar, baking powder, ground cinnamon, and fine salt.
- Add the unsalted butter to the dry ingredients and mix until the texture resembles coarse crumbs. Then, add the egg whites and buttermilk, stirring until smooth.
- Divide the batter evenly between the prepared cake pans and bake for 33–35 minutes or until a toothpick comes out clean.
- Let the cake layers cool in the pans for about 10 minutes, then transfer to a wire rack to cool completely.
- Beat the unsalted butter until smooth and creamy, then gradually add the powdered sugar and a splash of heavy whipping cream until desired consistency is achieved.
- Place one cake layer on a serving plate, spread frosting over it, then add the second layer and frost the top and sides.
- Drizzle melted cookie butter on top and decorate with chopped Biscoff cookies, if desired.
Leave a Reply