
As I stirred the warm, luscious mixture in the pot, the familiar aroma of chocolate enveloped me, whisking me back to childhood kitchens filled with laughter and sweet anticipation. This Silky Dark Chocolate Pudding is not just a dessert; it’s a cozy embrace for your taste buds. With its rich texture and deep flavor, it comes together in no time, making it perfect for those weeknight treat cravings or fancy dinner parties. Plus, it’s endlessly customizable—swap in dairy-free options if you prefer! If you love indulging in homemade desserts that evoke nostalgia and delight, this is the recipe that will surely become a staple in your kitchen. Curiosity piqued? Let’s dive into how you can create this delightful treat!
Why is This Chocolate Pudding Special?
Irresistible Comfort: This Silky Dark Chocolate Pudding offers a deliciously rich experience that wraps you in warmth. Quick & Easy: Perfect for those busy weeknights, it comes together in a flash, allowing you more time to enjoy. Endlessly Customizable: Want a dairy-free option? Just swap the milk for almond or oat! Gourmet Appeal: Impress your guests with its elegant presentation, topped with whipped cream and fresh berries. Nostalgic Flavors: Each creamy spoonful takes you back to cherish childhood memories, making every bite a joyful journey.
Chocolate Pudding Ingredients
-
For the Pudding Base
• Whole Milk – Adds creaminess; can substitute with almond or oat milk for a dairy-free version.
• Heavy Cream – Provides a rich texture; replace with additional milk for a lighter pudding.
• Granulated Sugar – Sweetens the pudding; coconut sugar or a sugar substitute works for lower-calorie options.
• Unsweetened Cocoa Powder – Contributes chocolate flavor; ensure it’s high-quality for the best results.
• Cornstarch – Acts as a thickening agent for a smooth consistency.
• Salt – Enhances flavor depth; optional but recommended.
• Large Egg Yolks – Adds richness; for a vegan option, use a cornstarch slurry instead.
• Unsalted Butter – Adds creaminess; omit for a dairy-free version.
• Vanilla Extract – Enhances aroma and flavor; using real vanilla or a vanilla bean paste is recommended.
• Dark Chocolate (60% cacao or higher) – Key flavor ingredient; semi-sweet chocolate can be an alternative. -
For the Toppings
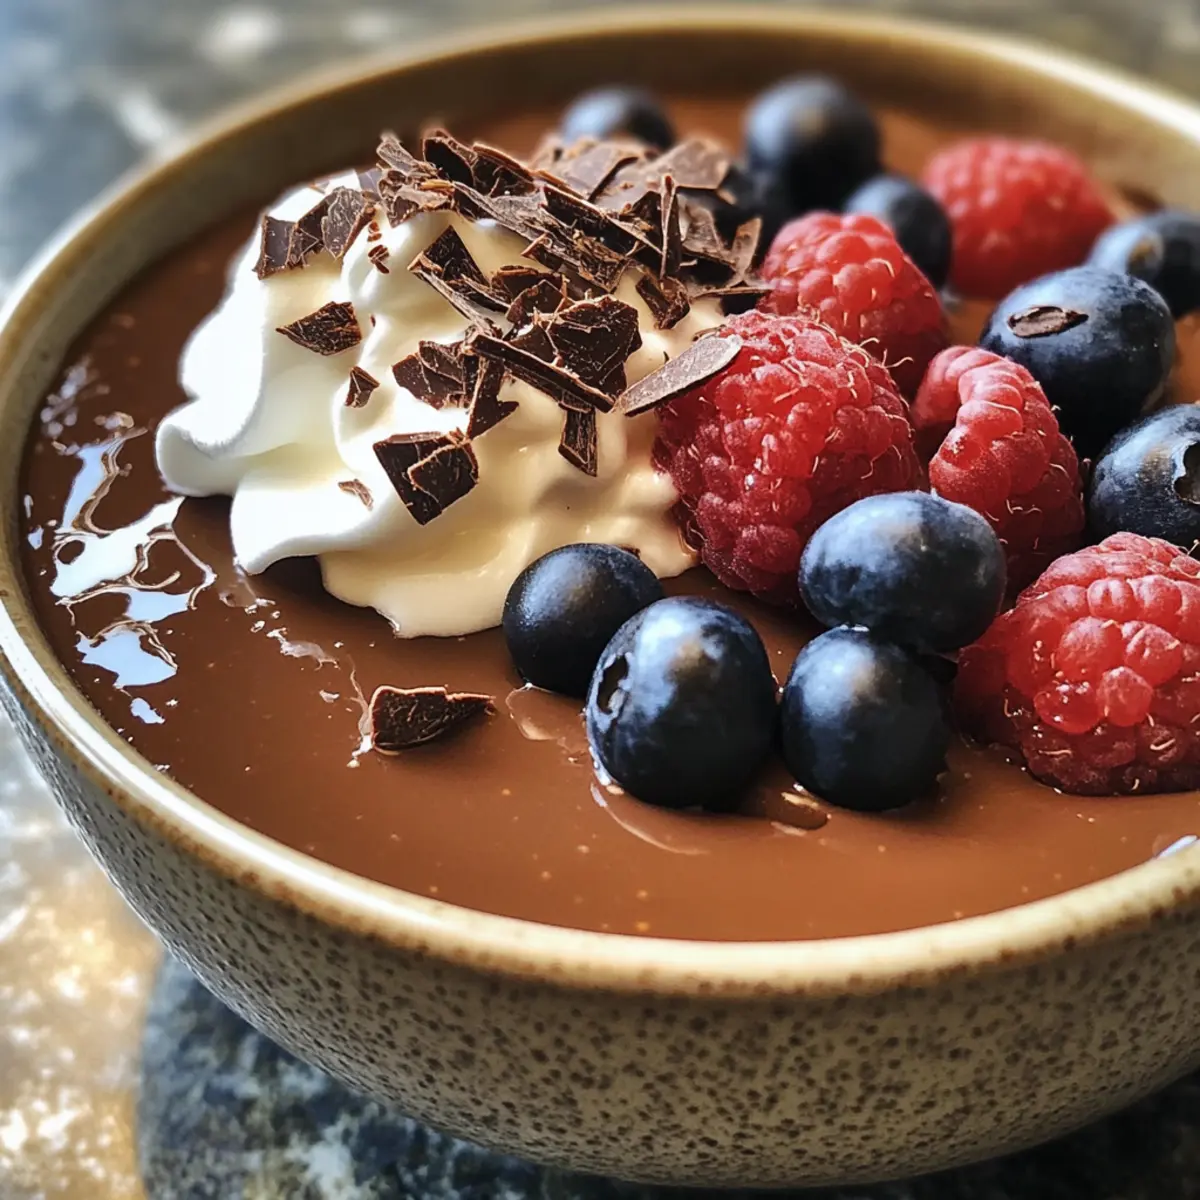
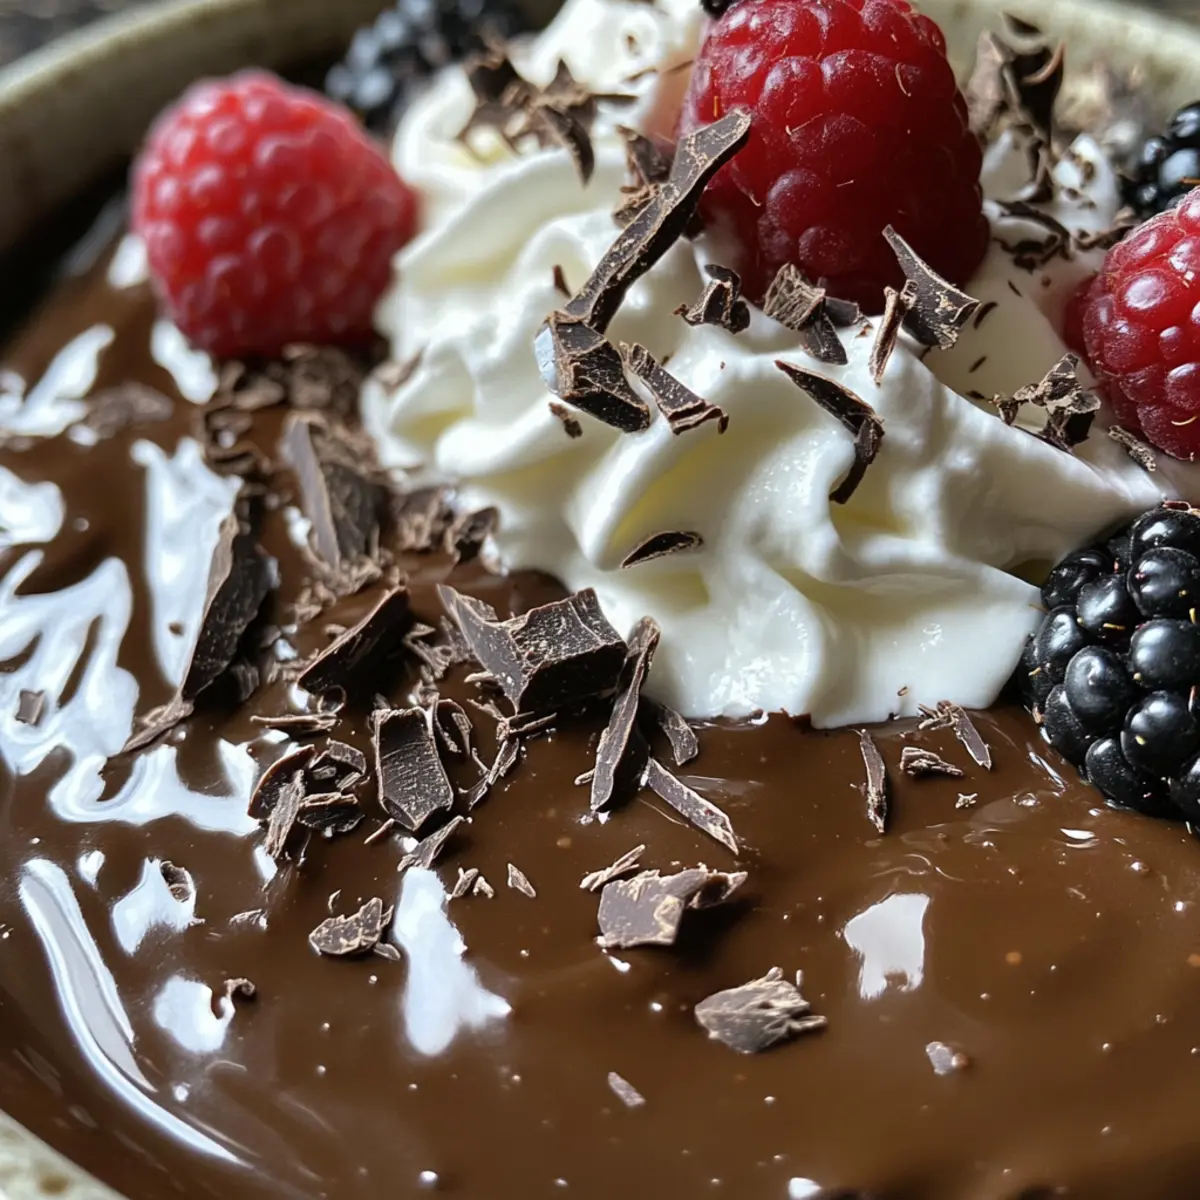
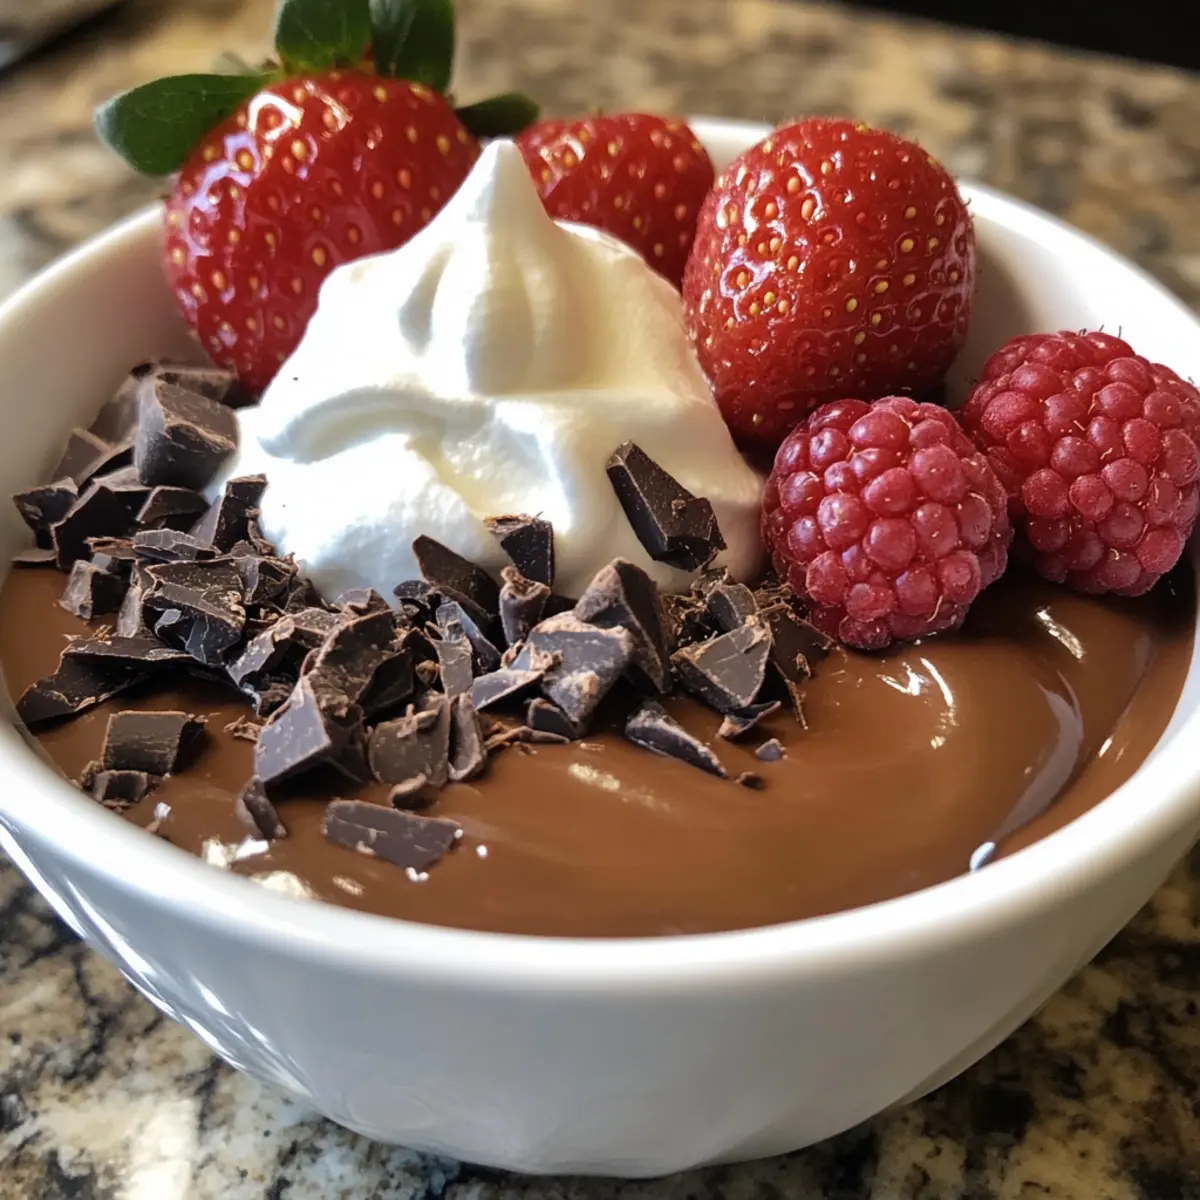
• Whipped Cream – Light and airy topping for serving; homemade is preferred.
• Chocolate Shavings – Decorative for presentation; use a vegetable peeler for thin curls.
• Fresh Berries – Offers a fresh counterpart to rich chocolate flavor; strawberries or raspberries complement the dish.
• Dash of Cinnamon – Optional; adds warmth for cozy nights in.
This delicious and creamy chocolate pudding is not only a treat for chocolate lovers but also a canvas for creativity in your kitchen!
Step‑by‑Step Instructions for Silky Dark Chocolate Pudding
Step 1: Combine Dry Ingredients
In a medium saucepan, whisk together granulated sugar, unsweetened cocoa powder, cornstarch, and a pinch of salt. Ensure there are no lumps, achieving a smooth, even mixture. This forms the base for your rich chocolate pudding.
Step 2: Add Liquids
Gradually whisk in whole milk and heavy cream until fully incorporated and smooth. Place the saucepan over medium heat, stirring gently as the mixture begins to heat up. Look for small bubbles forming around the edges, signaling it’s time for the next step.
Step 3: Incorporate Egg Yolks
In a separate bowl, whisk the large egg yolks to break them up. Slowly temper the yolks by adding a scoop of the warm chocolate mixture, whisking constantly to avoid scrambling. Once blended, return the tempered yolks to the saucepan, stirring until well combined.
Step 4: Cook to Thicken
Continue heating the mixture over medium heat, stirring constantly. Watch for it to thicken and become bubbly, which should take about 7-10 minutes. Remove the saucepan from heat once it reaches a pudding-like consistency, a key step in achieving the perfect Silky Dark Chocolate Pudding.
Step 5: Stir in Chocolate and Butter
Add the chopped dark chocolate and unsalted butter into the thickened mixture. Stir until everything is melted and smooth, followed by the added warmth of vanilla extract for enhanced aroma. This final touch elevates the rich chocolate flavor just right.
Step 6: Dispense Pudding
Pour the luscious chocolate pudding into serving dishes, ensuring an even distribution. To prevent a skin from forming, press plastic wrap directly onto the surface of the pudding before covering the dishes completely.
Step 7: Chill
Refrigerate the pudding for at least 2 hours to allow it to set properly. The cooling process not only firms up the pudding but also intensifies the delectable chocolate flavors.
Step 8: Serve
Once set, remove the pudding from the refrigerator and garnish with whipped cream, chocolate shavings, or fresh berries as desired. Serve chilled for a delightful finish to your homemade Silky Dark Chocolate Pudding experience.
How to Store and Freeze Chocolate Pudding
Fridge: Keep your freshly made chocolate pudding covered in the refrigerator for up to 4 days to maintain its rich flavor and creamy texture.
Freezer: While not recommended for the best texture, you can freeze chocolate pudding in an airtight container for up to 2 months. Thaw in the fridge overnight and stir before serving.
Make-Ahead Tips: Prepare your chocolate pudding up to 24 hours in advance. Just store it covered in the fridge; it will set perfectly and be ready to enjoy.
Reheating: If served warm, gently reheat in the microwave, stopping every 15 seconds to stir, until just warm, but remember, it tastes best chilled!
Make Ahead Options
These Silky Dark Chocolate Puddings are perfect for meal prep enthusiasts! You can make the pudding base up to 24 hours in advance by following the entire cooking process, allowing it to cool completely before refrigerating. Just press plastic wrap against the surface to prevent skin formation, ensuring it remains silky smooth. You can also prepare any toppings, like whipped cream and chocolate shavings, a few hours before serving and store them separately for maximum freshness. When ready to indulge, simply garnish and enjoy! These make-ahead tips save time and let you savor rich, homemade chocolate pudding without the last-minute rush.
Chocolate Pudding Variations & Substitutions
Feel free to get creative with your Silky Dark Chocolate Pudding; the recipe is your canvas waiting for delightful flavors and textures!
-
Dairy-Free: Swap whole milk and heavy cream with almond or oat milk for a creamy, dairy-free experience.
-
Sugar Alternatives: Use coconut sugar or a sugar substitute for a lower-calorie option while maintaining sweetness.
-
Richness Boost: Add an extra yolk for richer pudding, or to lighten it, replace heavy cream with additional milk.
-
Chocolaty Depth: Incorporate a hint of espresso powder for a coffee kick that enhances the chocolate flavors beautifully.
-
Texture Twists: Stir in crushed cookies or nuts as toppings for an added crunchy texture, elevating your dessert’s experience.
-
Flavor Enhancements: Experiment with flavored extracts like peppermint or orange for a fresh twist on this classic recipe.
-
Elegant Presentation: Instead of chocolate shavings, use fresh berries or citrus zest for a vibrant, colorful finish.
Don’t forget that if you’re a fan of other delectable desserts, you might also enjoy trying options like Bake Chocolate Banana for a no-bake delight or a luscious White Chocolate Raspberry cheesecake that takes your dessert table to new heights.
What to Serve with Silky Dark Chocolate Pudding
Delight in the experience of creating a full meal that perfectly complements this rich dessert.
- Fresh Berries: Bright and juicy, strawberries or raspberries add a refreshing burst that balances the chocolate’s richness.
- Whipped Cream: This light and airy topping enhances the pudding’s luxurious texture while adding a touch of sweetness.
- Chocolate Biscotti: A crunchy side that complements the pudding; perfect for dipping or enjoying alongside each spoonful.
- Espresso or Coffee: The boldness of coffee brings out the chocolate’s depth, making it a wonderful beverage pairing for your dessert.
- Salted Caramel Sauce: Drizzle over the pudding for a sweet and salty combination that tantalizes the taste buds.
- Vanilla Ice Cream: Pairing it with a scoop of creamy vanilla adds a classic touch, creating a comforting dessert experience.
- Nutty Shortbread Cookies: These crumbly delights provide a satisfying texture contrast while adding a hint of nuttiness to the chocolate sensation.
- Coconut Whipped Cream: For a dairy-free twist, this light topping adds a tropical flair that complements the dark chocolate beautifully.
- Chocolate Sauces: Elevate your serving with additional chocolate sauce for those who crave even more richness and decadence.
Expert Tips for Chocolate Pudding
- Quality Chocolate: Use high-quality dark chocolate (60-70% cacao) to ensure an indulgent flavor and smooth texture in your chocolate pudding.
- Steady Stirring: Always stir constantly while cooking to prevent lumps from forming, ensuring your pudding is silky and smooth.
- Proper Egg Tempering: Gradually mix the egg yolks with the warm mixture to avoid scrambling. This is essential for achieving that rich consistency.
- Covering Technique: To prevent unsightly skin formation, press plastic wrap directly onto the surface of the pudding before chilling.
- Flavor Boost: Consider adding a dash of espresso powder or cinnamon for a delightful twist that enhances the chocolate flavor of your pudding.
Silky Dark Chocolate Pudding Recipe FAQs
What type of chocolate should I use for the pudding?
Absolutely! For the best results, use high-quality dark chocolate with a cocoa content of 60% or higher. This ensures a rich and indulgent flavor. If you can’t find dark chocolate, semi-sweet chocolate can be a suitable alternative, though the taste will be slightly sweeter.
How long can I store the chocolate pudding in the refrigerator?
Very! Your freshly made chocolate pudding can be stored in the refrigerator for up to 4 days. Make sure to cover it tightly to prevent it from absorbing any odors and to keep it fresh.
Can I freeze chocolate pudding, and if so, how?
Yes, you can! While it’s not recommended due to potential texture changes, if you decide to freeze it, pour the pudding into an airtight container and freeze for up to 2 months. When you’re ready to enjoy it again, thaw it overnight in the refrigerator, then stir gently before serving to bring back its creamy consistency.
What should I do if my pudding is lumpy?
No worries! If you find lumps in your pudding after cooking, you can strain it through a fine-mesh sieve to remove them. Just be sure to gently press the pudding through, as this will keep it nice and smooth. Remember to stir constantly while cooking to minimize lump formation next time!
Are there any dietary considerations for this chocolate pudding?
Absolutely! This Silky Dark Chocolate Pudding can easily be made dairy-free by substituting whole milk and heavy cream with almond or oat milk and omitting the butter. For those with egg allergies, you can replace the egg yolks with a cornstarch slurry made of 2 tablespoons cornstarch mixed with 2 tablespoons water. Enjoy guilt-free and delicious!
What toppings are great for serving the chocolate pudding?
The more the merrier! For a delightful presentation, try adding whipped cream, chocolate shavings, or fresh berries like strawberries or raspberries. You can also get creative with crushed cookies or nuts for added texture and flavor!

Silky Chocolate Pudding: A Decadent Homemade Treat
Ingredients
Equipment
Method
- In a medium saucepan, whisk together granulated sugar, unsweetened cocoa powder, cornstarch, and a pinch of salt.
- Gradually whisk in whole milk and heavy cream until fully incorporated and smooth. Place over medium heat.
- In a separate bowl, whisk the large egg yolks to break them up. Slowly temper the yolks with the chocolate mixture.
- Continue heating the mixture over medium heat, stirring constantly until thick and bubbly, about 7-10 minutes.
- Add the chopped dark chocolate and unsalted butter into the thickened mixture, stirring until melted and smooth.
- Pour the pudding into serving dishes, pressing plastic wrap directly onto the surface to prevent a skin.
- Refrigerate the pudding for at least 2 hours to set properly.
- Once set, garnish with whipped cream, chocolate shavings, or fresh berries and serve chilled.
Leave a Reply