
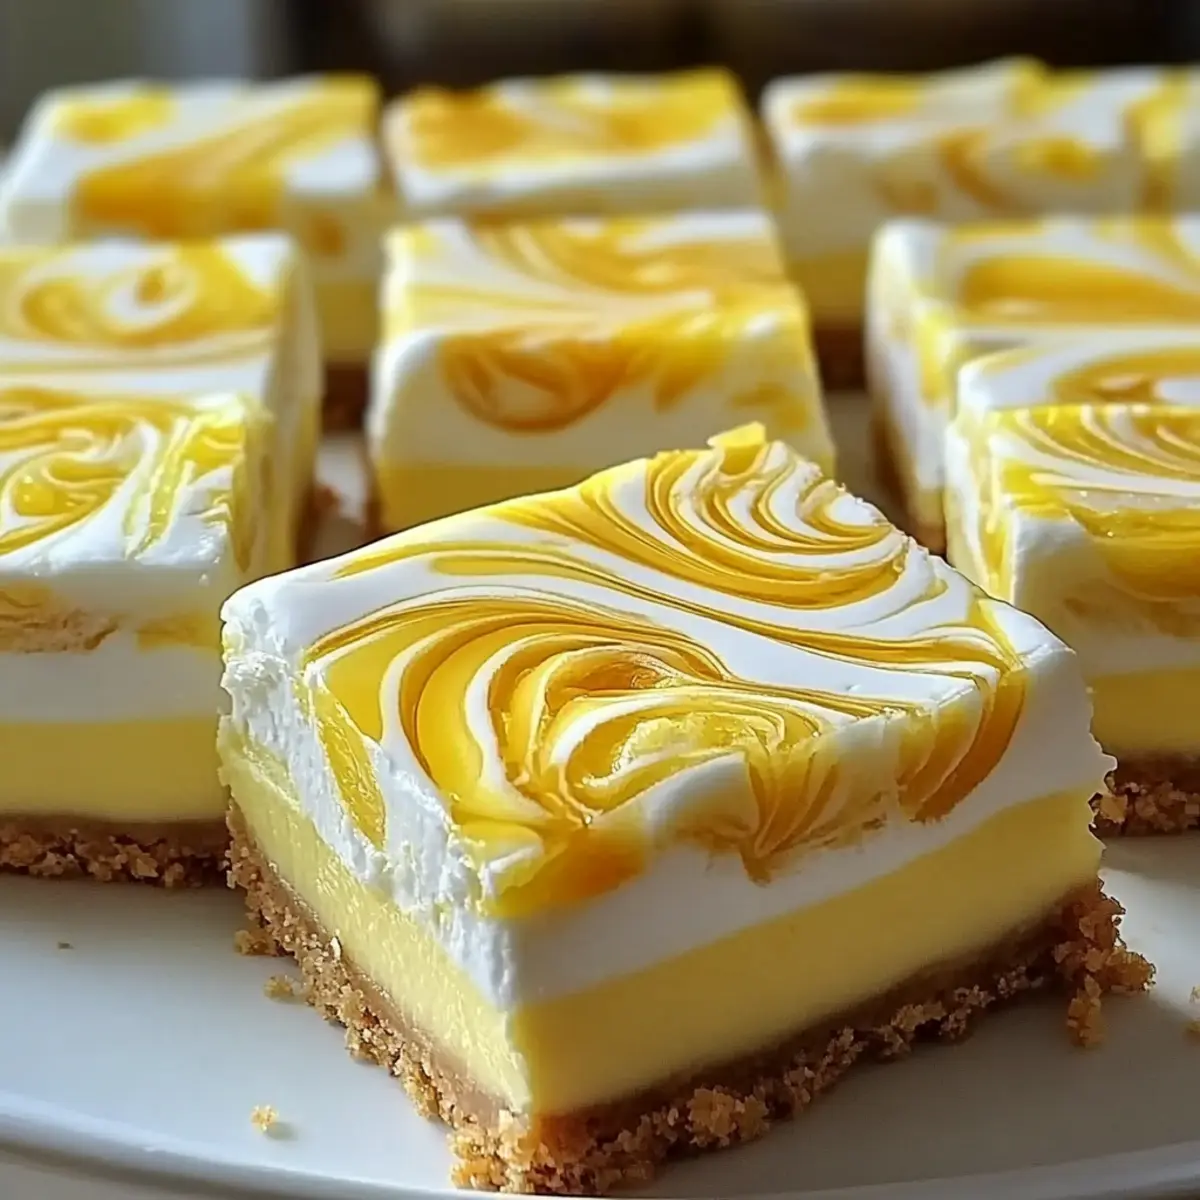
As I pulled the warm cheesecake bars from the oven, I couldn’t help but smile at how beautifully the swirling lemon curd danced atop the creamy filling. These Elegant Lemon Marbled Cheesecake Bars marry rich, velvety goodness with a bright citrus burst, creating a dessert that’s both sophisticated and utterly delightful. With a buttery graham cracker crust (or gluten-free alternative if you’d like) and an effortless prep process, this recipe is a sure way to impress guests at your next gathering—or simply indulge in a refreshing treat after a long day. Plus, they’re low-carb friendly, making guilt-free enjoyment a reality. Are you ready to indulge your senses with this zingy twist on a classic dessert? Let’s dive in!
Why are Lemon Marbled Cheesecake Bars special?
Indulgent yet Light: The creamy cheesecake filling is perfectly complemented by the refreshing lemon curd, providing a sophisticated dessert experience that feels neither heavy nor overwhelming.
Versatile Options: Whether you need a gluten-free crust or are looking for low-carb tweaks, you can easily customize these bars to fit dietary needs.
Quick and Simple: With straightforward instructions, you can whip up a batch in no time, making them ideal for busy schedules or last-minute gatherings.
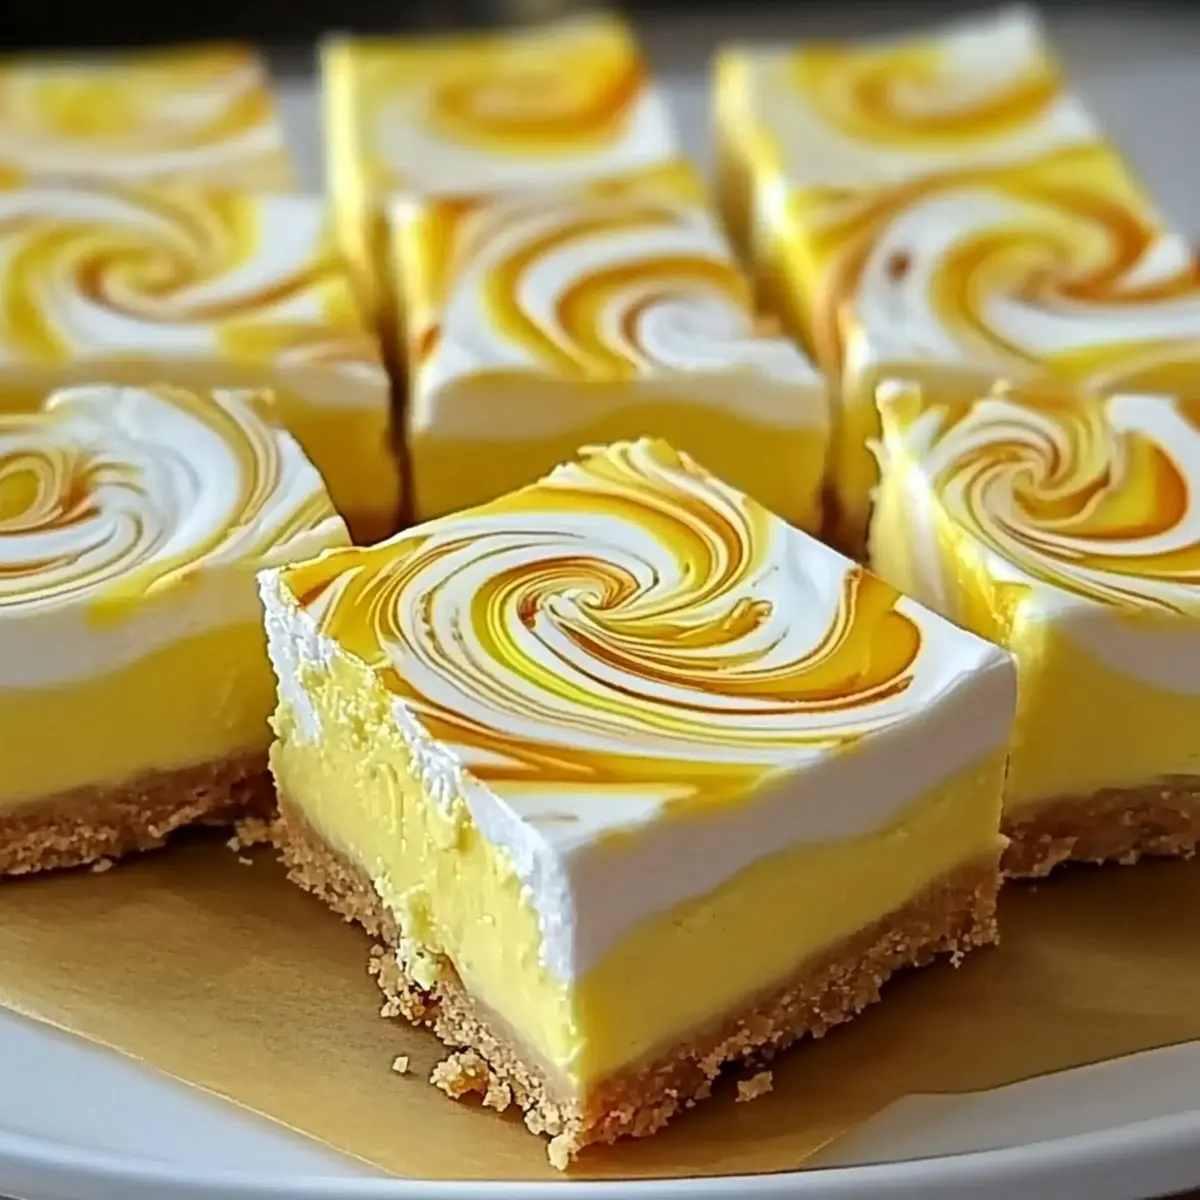
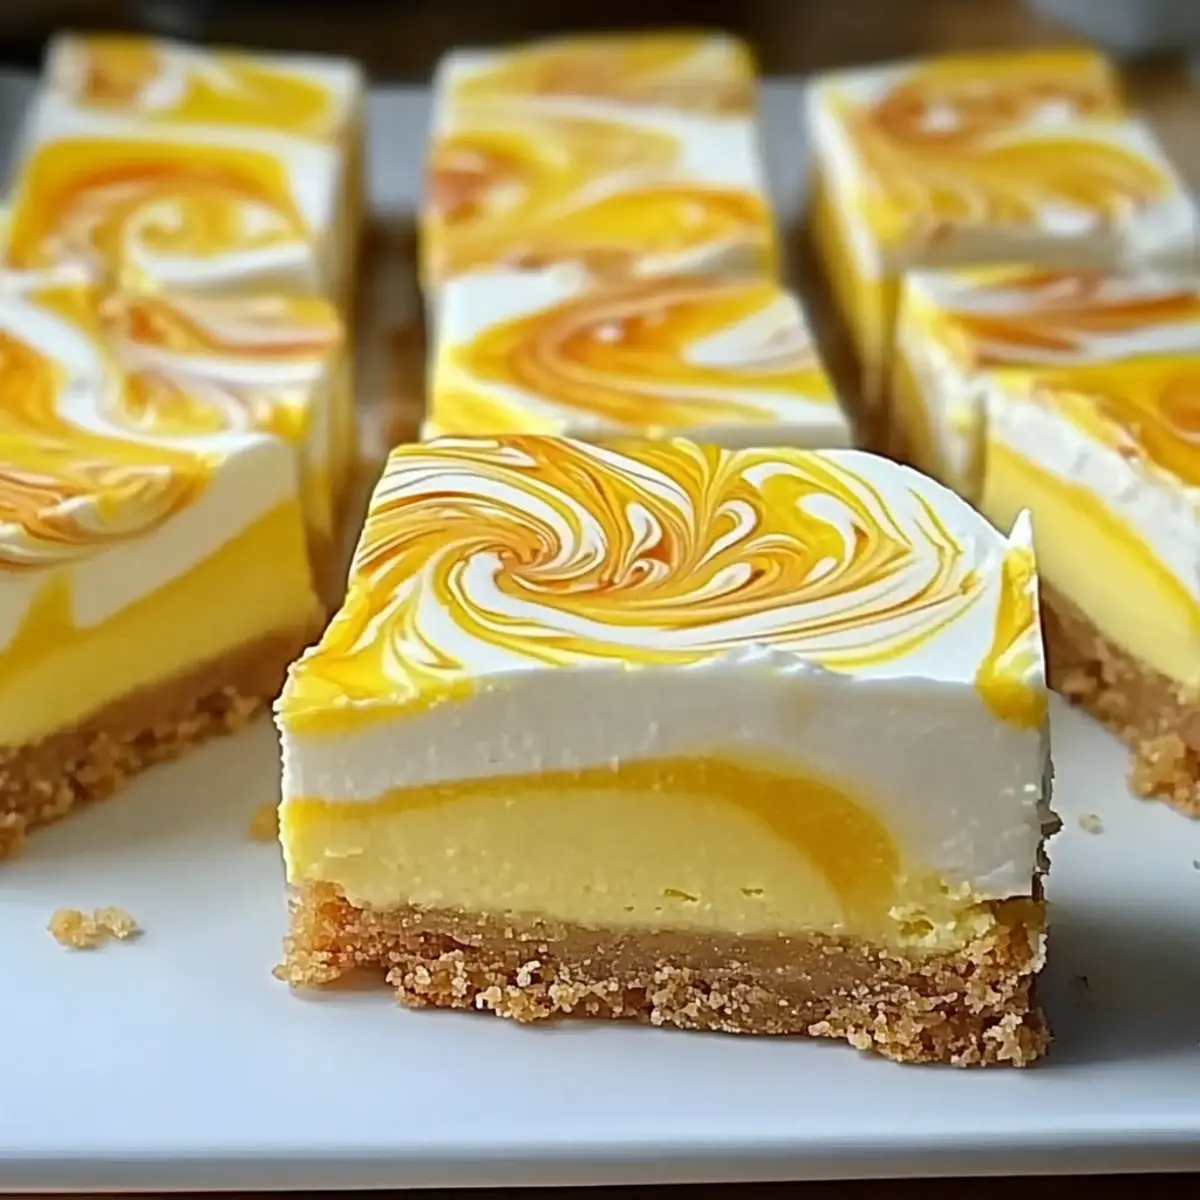
Impressive Presentation: The stunning swirls of lemon not only taste amazing but also create a beautiful visual appeal that’s sure to wow your guests.
Perfect for Any Occasion: Whether at brunch, a summer barbecue, or as a light after-dinner treat, these bars offer a refreshing touch to any meal. Dive into our other cheesecake delights like Pumpkin Pie Cheesecake or Chocolate Raspberry Cheesecake for more inspiration!
Lemon Marbled Cheesecake Bars Ingredients
For the Crust
• Graham Crackers – Base for a crunchy, buttery crust; swap with almond flour for a gluten-free option.
• Butter – Binds the crust together and adds richness; use unsalted butter for better control over saltiness.
For the Cheesecake Filling
• Cream Cheese – Creates a rich, creamy filling; ensure it’s at room temperature for easy mixing.
• Sugar – Sweetens the filling; feel free to adjust for low-carb diets.
• Eggs – Provide structure and stability; choose high-quality eggs for optimal results.
• Vanilla Extract – Enhances the overall flavor; opt for pure vanilla for the best taste.
• Lemon Zest – Imparts an aromatic citrus flavor; fresh zest is recommended for a bright profile.
• Lemon Juice – Adds tanginess and balances sweetness; freshly squeezed is optimal, with bottled as a last resort.
• Yellow Food Coloring (optional) – Enhances the visual appeal of the lemon batter for a vibrant look.
Creating these Lemon Marbled Cheesecake Bars is not only about taste but also about making a dessert that looks as good as it tastes! Ready to indulge? Let’s get cooking!
Step‑by‑Step Instructions for Lemon Marbled Cheesecake Bars
Step 1: Preheat and Prepare the Pan
Begin by preheating your oven to 325°F (165°C). While the oven warms up, line an 8×8-inch baking pan with parchment paper, allowing some overhang for easy removal after baking. This step ensures your Lemon Marbled Cheesecake Bars will come out clean and intact, making for a beautiful presentation.
Step 2: Prepare the Crust
In a mixing bowl, crush the graham crackers until fine and mix them with melted unsalted butter until well combined. Press this mixture firmly into the bottom of the prepared baking pan, creating an even layer. Bake the crust in the preheated oven for 10 minutes, until it’s lightly golden and fragrant, then remove it and allow it to cool slightly.
Step 3: Mix the Cheesecake Filling
In a large mixing bowl, beat the room-temperature cream cheese using an electric mixer on medium speed until smooth and creamy, about 2 minutes. Gradually add sugar, mixing until combined, then add eggs one at a time, mixing just until incorporated. Stir in vanilla extract and lemon zest, creating a velvety filling that’s perfect for your Lemon Marbled Cheesecake Bars.
Step 4: Create the Lemon Layer
Carefully divide the cheesecake batter in half; reserve one half in the bowl. In the remaining half, mix in freshly squeezed lemon juice and optional yellow food coloring to enhance the lemon flavor and visual appeal. This combination brings the delightful citrus essence that will complement the creamy cheesecake nicely.
Step 5: Layer and Swirl the Batter
Pour the plain cheesecake batter over the cooled graham cracker crust, spreading it into an even layer. Next, dollop the lemon-infused batter over the top. Use a knife or skewer to gently swirl the two batters together, creating a marbled effect. This step enhances both the flavor and the appearance of your Lemon Marbled Cheesecake Bars.
Step 6: Bake the Bars
Place the baking pan into the oven and bake the bars for 30-35 minutes. Keep an eye on them; the edges should be set, while the center should still have a slight jiggle. This ensures a perfectly creamy texture once cooled. Remove from the oven and allow the bars to cool to room temperature.
Step 7: Chill the Cheesecake Bars
After cooling, cover the baking pan with plastic wrap and refrigerate the bars for at least 4 hours, or overnight if possible. Chilling is crucial, as it allows the flavors to meld beautifully and helps with cutting clean slices. When you’re ready to serve, lift the bars from the pan using the parchment overhang for easy slicing.
Step 8: Serve and Enjoy
Once chilled, slice your Lemon Marbled Cheesecake Bars into squares or rectangles for serving. For an extra touch, consider topping them with fresh berries or a sprinkle of powdered sugar. These delicious bars bring a refreshing citrus treat that’s sure to impress your guests or elevate your dessert game at home!

Storage Tips for Lemon Marbled Cheesecake Bars
Room Temperature: Lemon Marbled Cheesecake Bars can be left at room temperature for up to 2 hours. After that, refrigerate to maintain freshness.
Fridge: Store leftovers in an airtight container in the fridge for up to 5 days. Enjoy these delicious bars chilled for the best taste.
Freezer: Wrap squares tightly in plastic wrap and store in a freezer-safe container for up to 2 months. Thaw in the refrigerator overnight before serving.
Reheating: If desired, you can gently reheat individual squares in the microwave for about 10-15 seconds, making sure not to overheat. Enjoy them warm for a different experience!
What to Serve with Elegant Lemon Marbled Cheesecake Bars
As you savor the creamy citrus delight of these bars, consider pairing them with complementary flavors and textures that elevate your dessert experience.
-
Fresh Berries: The tartness of strawberries, blueberries, or raspberries adds a burst of freshness that beautifully contrasts the creamy bars. Consider a mixed berry medley on the side for a vibrant touch.
-
Whipped Cream: A dollop of lightly sweetened whipped cream offers a luscious contrast to the vibrant lemon, making each bite even more decadent. It’s an easy yet elegant addition for a charming presentation.
-
Iced Tea: A glass of refreshing iced tea—especially lemon or chamomile—will bring a delightful balance to the rich cheesecake. Add a slice of lemon for a beautifully coordinated drink.
-
Coconut Sorbet: Light and fruity, coconut sorbet serves as a cool and creamy complement, enhancing the bright flavors of the bars. Its subtle sweetness rounds out this delightful pairing perfectly.
-
Chocolate Drizzle: For those who adore chocolate, a light drizzle of dark chocolate adds a rich contrast to the zesty cheesecake bars. It’s an unexpectedly delicious combination that will surprise your taste buds.
-
Citrus Salad: A light citrus salad with oranges, grapefruits, and a hint of mint can enhance the lemony notes in the bars. This refreshing dish adds a layer of brightness and complexity to your dessert spread.
-
Sparkling Water: For a low-calorie option, serve your cheesecake bars with sparkling water garnished with fresh mint or cucumber slices. This refreshing drink will cleanse the palate between bites.
Lemon Marbled Cheesecake Bars Variations
Feel free to let your creativity shine and adjust the recipe to suit your taste and dietary needs!
-
Gluten-Free: Swap graham crackers for almond flour for a deliciously gluten-free crust that doesn’t compromise flavor.
-
Low-Carb: Use a sugar substitute like erythritol for a low-carb version of the filling, allowing you to enjoy these bars guilt-free.
-
Ginger Snap Crust: Instead of graham crackers, use crushed ginger snaps for a delightful spice kick that complements the lemon beautifully.
-
Nutty Addition: Incorporate crushed nuts like pecans or walnuts into the crust for added crunch and a unique flavor profile.
-
Whipped Cream Topping: Serve your bars with a dollop of fresh whipped cream or a splash of berry coulis for a touch of elegance and extra sweetness.
-
Seasonal Flavors: Infuse the batter with seasonal flavors—like a hint of lavender in spring or cranberry swirls in winter—to keep your dessert exciting all year.
-
Dairy-Free: Substitute cream cheese with a dairy-free alternative made from cashews or coconut for all the creamy delight without the dairy.
-
Chocolate Drizzle: Add a drizzle of melted dark chocolate on top prior to serving for a luxurious twist—a great way to satisfy chocolate lovers!
Feel inspired to check out our other treats like Sugar Cookie Cheesecake or Pistachio Mushroom Cheesecake for more delicious ideas!
Expert Tips for Lemon Marbled Cheesecake Bars
-
Room Temperature Cream Cheese: Ensure your cream cheese is at room temperature to achieve a smooth batter. Cold cream cheese can lead to lumps in your Lemon Marbled Cheesecake Bars.
-
Avoid Overmixing: Be gentle when mixing in the eggs; overmixing can cause cracks during baking. A light hand will ensure your bars stay beautiful and intact.
-
Use a Water Bath: For even baking and to minimize cracks, consider placing your baking pan in a larger pan filled with water. This technique helps the bars cook evenly.
-
Gradual Cooling: After baking, let your cheesecake bars cool gradually in the oven with the door slightly ajar. This helps prevent cracks from sudden temperature changes.
-
Chill Before Slicing: Allow the bars to chill in the refrigerator for at least 4 hours. This step is essential for achieving clean, neat edges when cutting your Lemon Marbled Cheesecake Bars.
Make Ahead Options
These Lemon Marbled Cheesecake Bars are perfect for busy home cooks looking to whip up a delightful treat in advance! You can prepare the graham cracker crust up to 3 days ahead by baking it and storing it wrapped tightly in plastic wrap at room temperature. The cheesecake filling can also be mixed 24 hours in advance; simply refrigerate it until you’re ready to use it, ensuring to give it a good stir before combining with the lemon batter. When you’re ready to bake, layer the crust with the filling, swirl the lemon batter in, and bake as directed. This way, you’ll enjoy all the refreshing flavors of your Lemon Marbled Cheesecake Bars with minimal effort on the day of serving!
Lemon Marbled Cheesecake Bars Recipe FAQs
How do I select ripe lemons for my Lemon Marbled Cheesecake Bars?
Absolutely! Look for lemons that are firm, with smooth skin and a vibrant yellow color. Avoid any that have dark spots or feel overly soft, as these may be overripe. Fresh lemons will provide the best juice and zest, enhancing the flavor of your cheesecake bars.
What are the best storage methods for Lemon Marbled Cheesecake Bars?
Store your Lemon Marbled Cheesecake Bars in an airtight container in the fridge for up to 5 days. You’ll want to keep them chilled for the best flavor! If you plan to enjoy them later, wrap them tightly in plastic wrap or foil and place them in a freezer-safe container—this way, they can be preserved for up to 2 months!
Can I freeze Lemon Marbled Cheesecake Bars? If so, how?
Yes, you can! To freeze your Lemon Marbled Cheesecake Bars, first, let them cool completely after baking. Then, cut them into squares and wrap each one tightly in plastic wrap. Place the wrapped bars in a freezer-safe container or a resealable freezer bag. Label them with the date, and they’ll be good for up to 2 months. When you’re ready to indulge, thaw them in the refrigerator overnight for a refreshing treat!
What should I do if my cheesecake bars crack while baking?
Very! If your cheesecake bars develop cracks during baking, don’t fret. Start by ensuring your cream cheese is at room temperature and that you avoid overmixing after adding the eggs. Additionally, consider using a water bath while baking to create a moist environment, reducing the chance of cracks. If cracks do appear, a light dusting of powdered sugar on top can beautifully disguise them!
Are there any dietary considerations for Lemon Marbled Cheesecake Bars? Can I make them gluten-free?
Absolutely! To make your Lemon Marbled Cheesecake Bars gluten-free, simply substitute the graham crackers with almond flour or a gluten-free cookie crumble. If you have dairy allergies, you can opt for a dairy-free cream cheese alternative, ensuring everyone can enjoy this delightful treat. Always double-check ingredient labels for potential allergens!
What if I cannot find fresh lemons? Can I use bottled lemon juice instead?
While fresh lemons are always recommended for their bright flavor and zest, bottled lemon juice can serve in a pinch. Just be mindful that bottled juice may have preservatives that alter the flavor slightly. For the best results, prioritize fresh juicing whenever possible!
Lemon Marbled Cheesecake Bars for a Refreshing Treat
Ingredients
Equipment
Method
- Preheat your oven to 325°F (165°C) and prepare an 8×8-inch baking pan with parchment paper.
- Crush the graham crackers until fine and mix with melted unsalted butter. Press into the baking pan and bake for 10 minutes.
- Beat the room-temperature cream cheese in a bowl until smooth, then add sugar and eggs one at a time, mixing until combined. Stir in vanilla extract and lemon zest.
- Divide the cheesecake batter in half. In one half, mix in lemon juice and optional food coloring.
- Spread the plain cheesecake batter over the crust, dollop the lemon batter on top, and swirl to create a marbled effect.
- Bake the bars for 30-35 minutes until edges are set and center jiggles slightly. Let them cool to room temperature.
- Cover and refrigerate for at least 4 hours before slicing and serving.
- Slice into squares and serve. Optionally top with fresh berries or powdered sugar.
Leave a Reply