
As I stood in the kitchen, the rich aroma of sizzling potatoes filled the air, instantly transporting me to festive family gatherings. There’s something magical about crispy potato latkes; they not only capture the essence of Hanukkah but also bring everyone together around the table. My recipe for perfect latkes embraces tradition while ensuring that you can whip them up with ease—ideal for those busy holiday nights. These golden-brown beauties offer the irresistible crunch we all crave, and with the option to switch things up using sweet potatoes, you’ll have a crowd-pleaser that caters to different tastes. Ready to create a dish that will warm hearts and bellies alike? Let’s dive into making these delightful latkes together!
Why are these latkes so special?
Crispy Texture: The key to latkes is achieving that satisfying crunch on the outside, while maintaining a tender inside. Rich Flavor: Caramelized onions beautifully enhance the taste, infusing each bite with savory goodness. Versatile Recipe: Whether you stick to traditional potatoes or opt for sweet potatoes, you can customize this dish to appease everyone at your table! Quick and Easy: This recipe is simple, making perfect latkes possible even during the busiest holiday season. Plus, they pair wonderfully with apple sauce or sour cream for a classic touch—just like my Chicken Cordon Bleu with Swiss Cheese! So, gather your friends and family, and enjoy heartwarming moments around a plate of these delightful latkes!
Perfect Latkes Ingredients
• Discover the essential components for making perfect latkes that everyone will adore!
For the Latkes
- Potatoes – Use starchy varieties like Yukon Gold or Russet for the best crispiness.
- Onions – Enhance the flavor and moisture; scallions can be a milder substitute if preferred.
- Eggs – Two large eggs bind everything together nicely without making them too eggy.
- Flour – About 3-4 tablespoons helps stabilize the mixture; too much can make them pancake-like.
- Salt – Essential for enhancing the overall flavor balance of your latkes.
- Pepper – A dash adds a gentle, warming spice to the mix.
- Oil – For frying; canola or another flavorful oil ensures they fry beautifully.
Optional Variation
- Sweet Potatoes – Replace regular potatoes with an equal amount of sweet potatoes for a sweeter twist. Add herbs like parsley for a fresh flavor boost!
Step‑by‑Step Instructions for Perfect Latkes
Step 1: Grate the Potatoes and Onions
Begin by peeling about 4 medium starchy potatoes and 1 onion. Using a box grater or food processor, grate the potatoes and onion together until finely shredded. This combination will enhance the flavor and texture of your perfect latkes. Aim for a bowl full of shreds, which should take about 5–10 minutes.
Step 2: Remove Excess Moisture
Next, it’s crucial to squeeze out excess moisture for crispy latkes. Transfer the grated mixture into a colander lined with a clean kitchen towel. Gather the edges of the towel and twist it gently to expel as much liquid as possible. This step helps maintain that sought-after crunch in your latkes, so take your time to get a good result!
Step 3: Prepare the Mixture
In a large mixing bowl, combine the drained potato and onion mixture with 2 beaten eggs, 3–4 tablespoons of flour, and a generous pinch of salt and pepper. Stir until the ingredients are well combined, forming a cohesive mixture. This should take about 2–3 minutes, ensuring the eggs and flour are evenly distributed throughout.
Step 4: Heat the Oil
In a large skillet, pour enough oil (about ¼–½ inch deep) to fry the latkes; canola or another flavorful oil works best. Heat the oil over medium-high heat until it’s hot enough. You can test the temperature by carefully dropping a small dollop of latke mixture into the oil; it should bubble and sizzle immediately, signaling it’s ready for frying.
Step 5: Fry the Latkes
Using a spoon, carefully drop heaping tablespoons of the latke mixture into the hot oil, leaving space between them. Gently flatten each mound to form discs, about ¼ to ½ inch thick. Fry the latkes for about 4 minutes on each side or until they turn golden brown and crispy. Keep an eye on them so they don’t burn!
Step 6: Drain and Serve
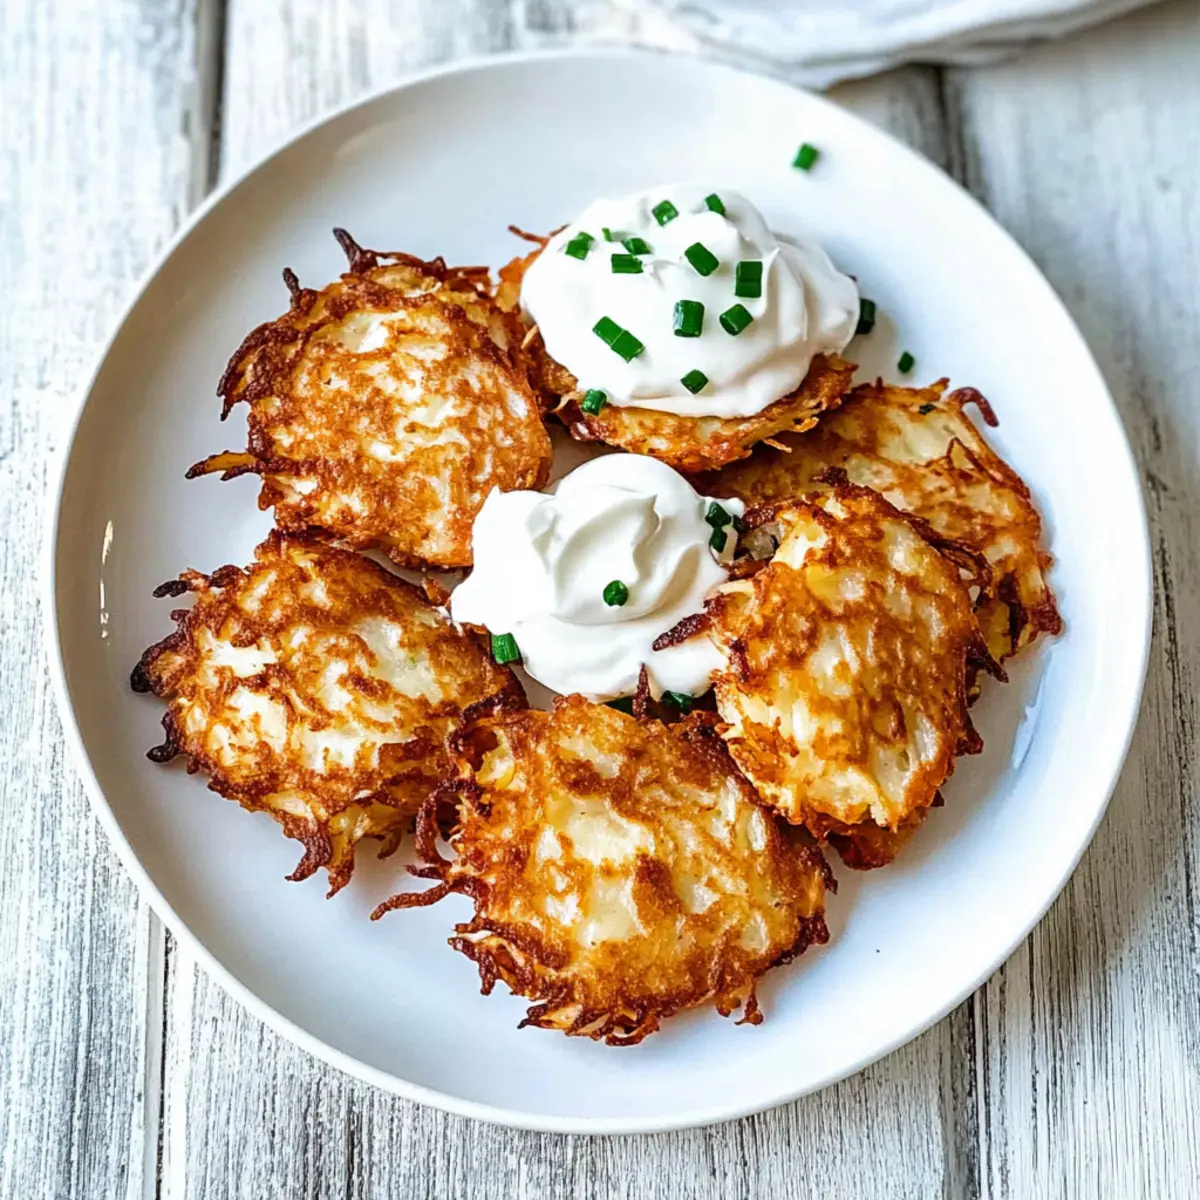
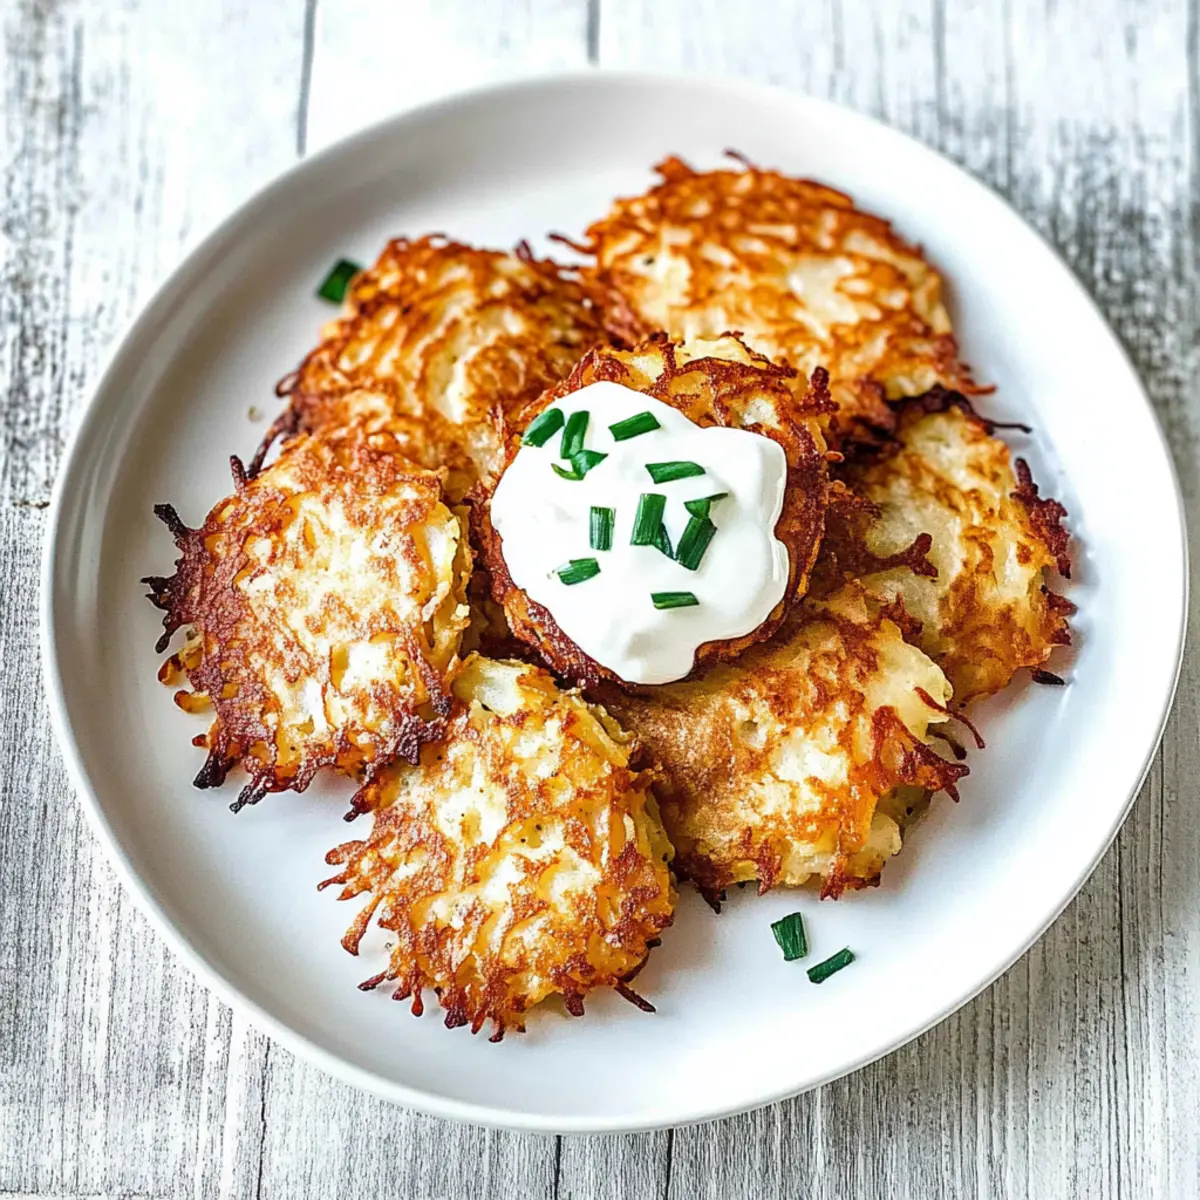
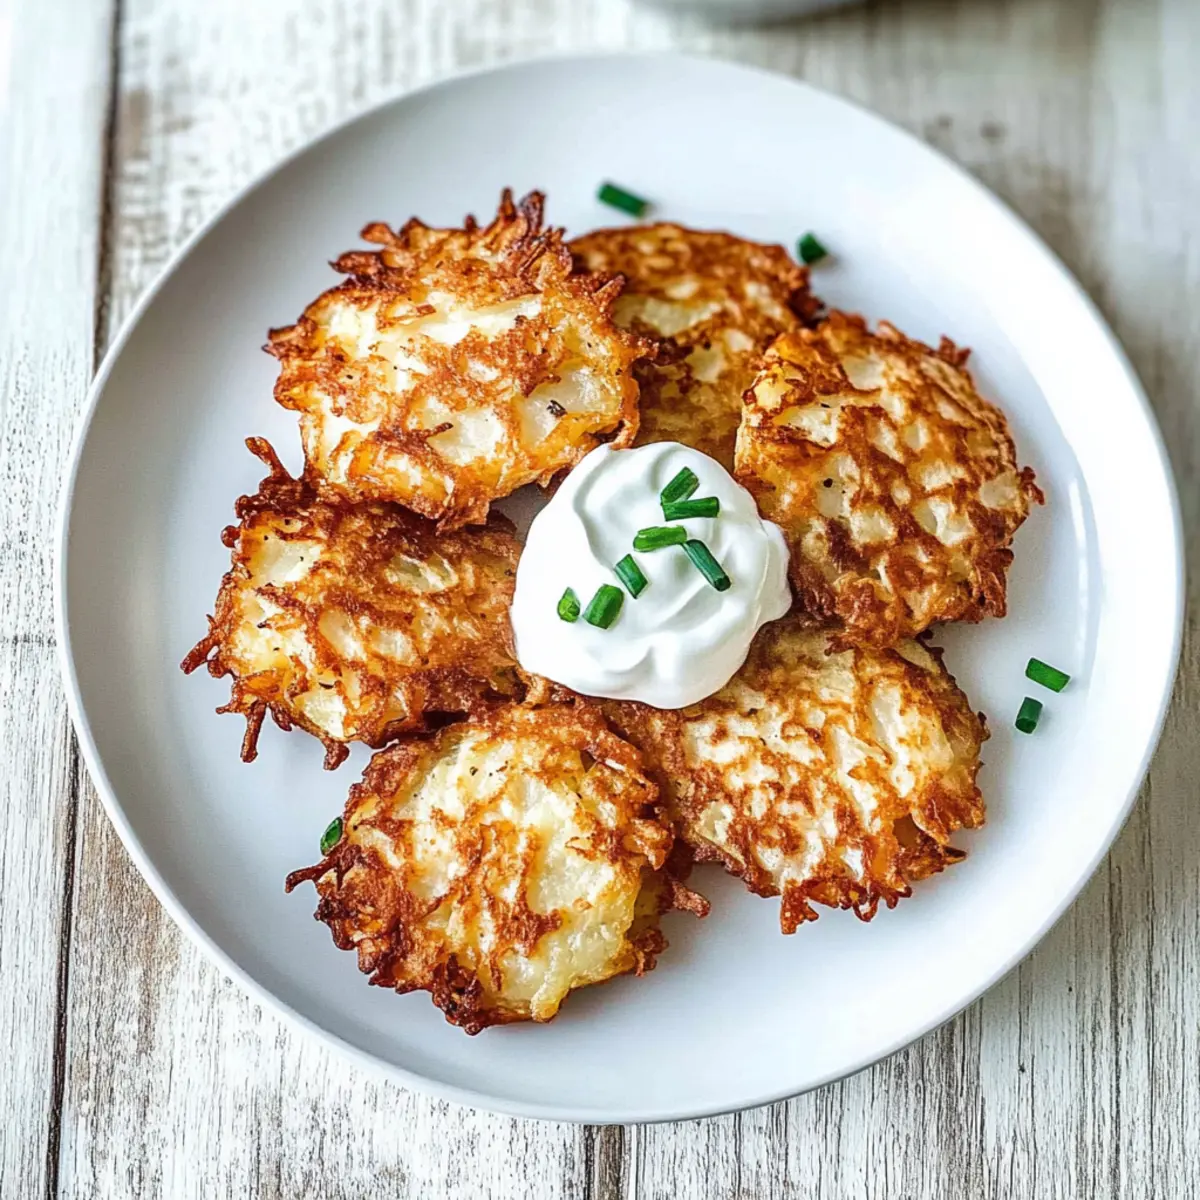
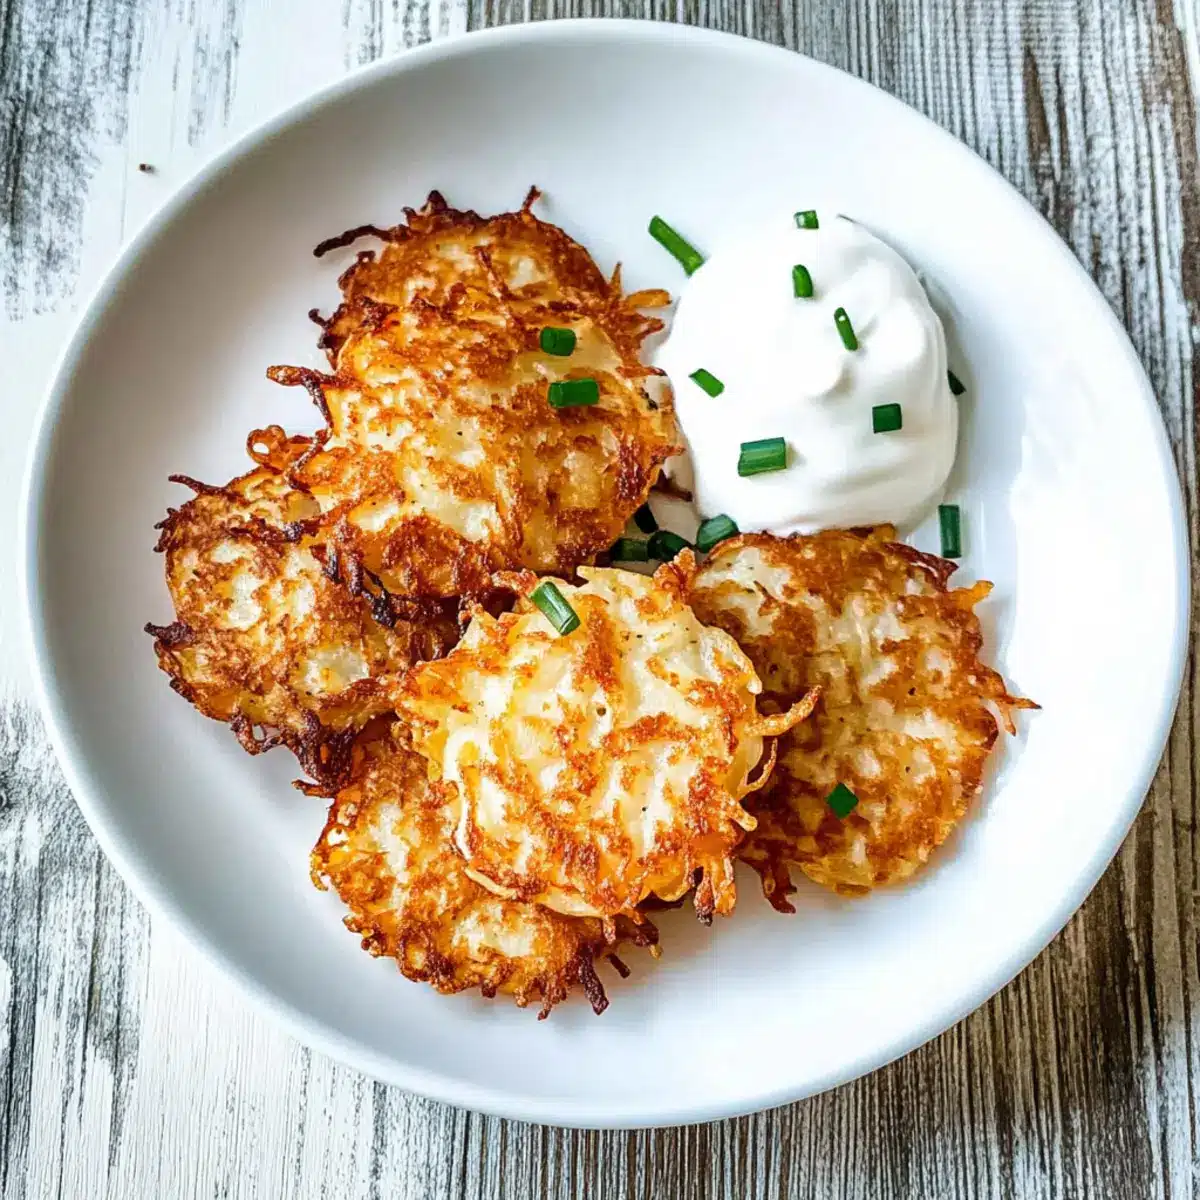
Once cooked, transfer the browned latkes to a plate lined with paper towels to drain any excess oil. This step ensures they remain crispy and delicious. Serve your perfect latkes immediately while hot, alongside sour cream or apple sauce for that classic touch! Enjoy the savory goodness with your loved ones around the table.
Perfect Latkes Variations & Substitutions
Feel free to play around with these variations to make your latkes even more delicious and tailored to your taste!
-
Sweet Potatoes: Swap traditional potatoes for sweet potatoes to add a hint of natural sweetness. Great for a colorful plate!
-
Herb-Infused: Add finely chopped fresh herbs like parsley or dill to the mixture before frying for a fragrant twist. This will elevate flavor to a new level.
-
Spiced Latkes: Add a pinch of cumin or smoked paprika for a gentle heat and extra depth. It gives the latkes a warm, inviting flavor profile.
-
Onion-Free: If you prefer milder latkes, skip the onions altogether and use scallions. This keeps things fresh while maintaining a delicious taste.
-
Zucchini Twist: For a veggie-packed version, mix in grated zucchini, ensuring you squeeze out excess moisture to keep them crispy. This adds a whole new texture.
-
Cheesy Delight: Incorporate shredded cheese like Parmesan or cheddar into the mixture for a savory richness that melts beautifully while frying.
-
Stuffed Latkes: For something special, stuff latkes with a dollop of your favorite filling—think apple sauce or a savory cheese blend before frying to surprise your guests!
-
Mini Latkes: Shape smaller, bite-sized latkes for easy appetizers or party snacks. Perfect for gatherings, just like my delightful Chicken Cordon Bleu, bringing everyone together in a scrumptious feast!
Expert Tips for Perfect Latkes
-
Use Starchy Potatoes: Choosing starchy potatoes like Russets or Yukon Gold ensures that your latkes have the best crispy texture. Avoid waxy potatoes, which can make them soggy.
-
Remove Moisture: Don’t skip the step of squeezing out excess moisture from the potatoes and onions. This is crucial for achieving perfect latkes that are crispy rather than mushy.
-
Monitor Oil Temperature: Keep the oil at medium-high heat while frying. If it’s too hot, the latkes will burn; too cool, and they’ll absorb too much oil.
-
Avoid Overmixing: When combining your ingredients, mix just until combined. Overmixing can make your latkes tough instead of pleasantly crispy.
-
Don’t Prep Too Early: Once mixed, cook the latkes right away. Letting the potato mixture sit too long can lead to soggy latkes, affecting their overall crispiness.
-
Experiment with Variations: Feel free to switch it up! Using sweet potatoes or adding herbs can introduce delightful new flavors while still providing that iconic crunch in your perfect latkes.
What to Serve with Crispy Potato Latkes
There’s nothing quite like enjoying the delightful crunch of latkes alongside a carefully curated meal that complements their rich flavors.
- Applesauce: The sweet, tartness of applesauce offers a refreshing contrast to the savory latkes while enhancing their comforting warmth.
- Sour Cream: Creamy and tangy, sour cream adds a luscious richness that balances the flavors of crispy latkes beautifully.
- Roasted Brussels Sprouts: These crunchy greens add an earthy tone and a touch of bitterness that pairs wonderfully with the richness of latkes.
- Steamed Green Beans: Their fresh, vibrant crisper texture complements the latkes and adds a pop of color to your festive table.
- Pickled Vegetables: A tangy side of pickled veggies brightens the palate, offering a zesty counterpoint to the hearty latkes.
- Cranberry Relish: A dollop of sweet and tart cranberry relish brings a festive flair, enhancing the flavor profile of your holiday meal.
- Challah Bread: Serve slices of warm challah on the side for a traditional touch, perfect for soaking up any extra dip.
- Red Wine: A glass of fruity red wine can elevate the meal, highlighting the latkes and balanced with the other savory sides.
- Chocolate Babka: For dessert, a slice of rich, gooey chocolate babka offers a sweet note that perfectly wraps up your holiday feast.
Make Ahead Options
These crispy potato latkes are perfect for meal prep enthusiasts! You can prepare the latke mixture up to 24 hours in advance, allowing you to save valuable time during busy holiday festivities. Simply follow the initial steps of grating the potatoes and onions, squeezing out excess moisture, and combining the ingredients in a bowl. Store the mixture tightly covered in the refrigerator to maintain freshness and prevent browning. When ready to serve, heat the oil and fry the latkes as instructed for that crispy, golden perfection. This way, you can enjoy delicious, homemade latkes with minimal effort and maximum flavor, just as wonderful as if made fresh!
How to Store and Freeze Perfect Latkes
Fridge: Store leftover latkes in an airtight container in the refrigerator for up to 2 days. To keep them crispy, place parchment paper between layers.
Freezer: For longer storage, freeze the latkes in a single layer on a baking sheet until firm, then transfer them to a freezer-safe bag. They can be frozen for up to 3 months.
Reheating: To reheat, place frozen latkes directly on a baking sheet in a preheated oven at 400°F (200°C) for about 10-15 minutes, or until crispy. Avoid microwaving as it may make them soggy.
Make-Ahead Tips: While it’s best to enjoy perfect latkes fresh, you can prepare the mixture a few hours in advance and store it in the fridge, ensuring you still achieve that delightful crunch.
Crispy Traditional Potato Latkes Recipe FAQs
How do I choose the best potatoes for latkes?
Absolutely! For the ultimate crispy latkes, I recommend using starchy potatoes like Russet or Yukon Gold. These varieties ensure that your latkes achieve that desired crunch on the outside while remaining tender inside. Avoid waxy potatoes, as they can become too moist and lead to sogginess in your latkes.
How should I store leftover latkes?
Very! Store any leftover latkes in an airtight container in the refrigerator for up to 2 days. To help maintain their crispiness, you can layer parchment paper between each layer of latkes. When you’re ready to enjoy them again, simply reheat in the oven to bring back that delightful crunch.
Can I freeze my latkes?
Absolutely! To freeze latkes, lay them in a single layer on a baking sheet and place them in the freezer until firm, which usually takes about an hour. Then, transfer them to a freezer-safe bag. They can be frozen for up to 3 months. When ready to eat, just pop them directly in a preheated oven at 400°F (200°C) for about 10-15 minutes or until crisp.
What if my latkes don’t turn out crispy?
If your latkes are lacking that perfect crispiness, it may be due to excess moisture. Make sure to squeeze out as much liquid as possible from the grated potatoes and onions before mixing. Additionally, monitor the oil temperature while frying; if it’s too cool, the latkes can absorb oil and become soggy. Aim for a medium-high heat for optimal frying!
Are there any dietary considerations for latkes?
Absolutely! While traditional latkes are vegetarian-friendly, it’s important to check for allergies, especially with the addition of eggs and flour. For those with egg allergies, you can use a flaxseed meal or applesauce as substitutes in your mixture. Plus, if you’re catering to gluten-free diets, a suitable gluten-free flour can be used to keep everyone included at the table!
How can I keep my latkes from browning too quickly?
Very! To avoid over-browning, maintain a moderate temperature while frying. If you notice them cooking too fast, it’s a good idea to lower the heat slightly. Additionally, avoid overcrowding the pan—fry them in batches if necessary, allowing enough space for the latkes to cook evenly without steaming each other.
Crispy Perfect Latkes: A Festive Treat You’ll Love
Ingredients
Equipment
Method
- Grate the potatoes and onions together until finely shredded.
- Remove excess moisture by squeezing the grated mixture in a kitchen towel.
- In a mixing bowl, combine drained mixture with eggs, flour, salt, and pepper.
- Heat oil in a skillet over medium-high heat until hot.
- Drop spoonfuls of the mixture into the hot oil and flatten slightly.
- Fry for about 4 minutes on each side until golden brown and crispy.
- Drain on paper towels and serve immediately with sour cream or apple sauce.
Leave a Reply