
As I stood in the kitchen, the sweet aroma of caramel wafted through the air, transforming an ordinary day into something magical. This Decadent Salted Caramel Layer Cake is my ultimate showstopper, a recipe that turns any gathering into a celebration. With layers of moist vanilla cake filled with rich, homemade salted caramel and topped with luscious salted caramel buttercream, it’s a delightful treat that brings joy with every bite. Whether you’re hosting a birthday party or simply indulging in the sweeter side of life, this cake is not just a dessert; it’s a delicious experience. Not only is it a crowd-pleaser, but it also incorporates the perfect balance of sweet and salty flavors, making it irresistible. Curious to dive into the bliss of homemade salted caramel? Let’s get baking together!
Why Is This Cake So Irresistible?
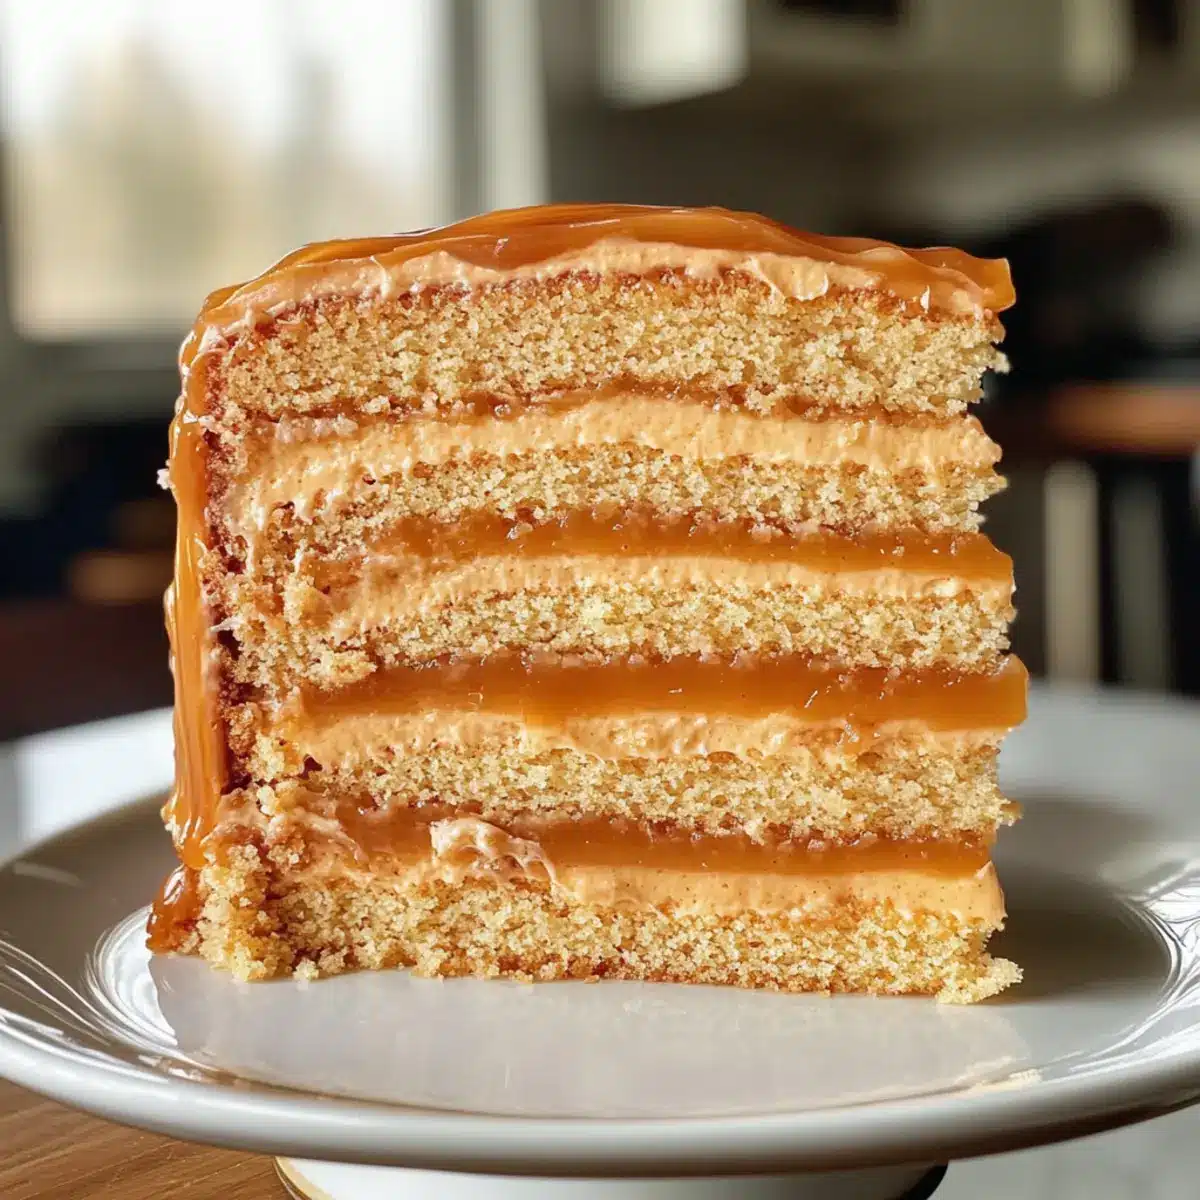
Decadent Layers: Each slice reveals dreamy vanilla cake surrounded by rich, homemade salted caramel, creating a showstopper worthy of any celebration.
Flavor Harmony: The enchanting blend of sweet and salty flavors captures your taste buds, making it perfect for those who crave a gourmet treat.
Time-Saving Tips: Prep your cake, caramel, and buttercream a day ahead to streamline your baking experience while gaining those oh-so-impressive layers.
Crowd-Pleaser: This dessert doesn’t just satisfy your sweet tooth; it wows guests and creates memorable moments around the table, especially when paired with a scoop of ice cream or a dollop of whipped cream!
Ready to take your baking game up a notch? Check out my other favorites like Autumn Pumpkin Cake or Caramelized Apple Pie. You won’t be disappointed!
Salted Caramel Cake Ingredients
For the Cake
• Granulated Sugar – Sweetening agent for both the cake and caramel; substitute with coconut sugar for a less refined option.
• Water – Assists in dissolving sugar during caramelization.
• Butter – Provides richness and moisture; use vegan butter for a dairy-free version.
• All-Purpose Flour – Forms the structure of the cake; swap with gluten-free flour for a gluten-free option.
• Cornstarch – Adds tenderness to the cake; omit for a denser outcome.
• Baking Powder & Baking Soda – Leavening agents to ensure the cake rises properly.
• Sour Cream – Adds moisture and tang to the batter; Greek yogurt can be a delicious substitute.
• Vegetable Oil – Keeps the cake moist; any neutral oil such as canola works well.
• Vanilla Extract – Enhances cake flavor; a splash of almond extract can offer a delightful twist.
For the Salted Caramel
• Granulated Sugar – Primary component for rich caramel; keep an eye on it to prevent burning.
• Water – Helps to dissolve the sugar for a smooth caramel.
• Butter – Provides richness; use unsalted for full control over saltiness.
• Heavy Cream – Creates a smooth, luxurious texture; coconut cream is a great dairy-free substitute.
• Salt – Enhances flavor; sea salt is recommended for that perfect balance.
For the Buttercream
• Butter – Make sure it’s at room temperature for the best texture; substitutes with vegan butter work too.
• Powdered Sugar – Sweetens and thickens the buttercream; xylitol powdered sugar can provide a low-sugar option.
• Vanilla Extract – Enhances flavor; consider using pure vanilla for an upscale touch.
• Salt – Just a pinch to balance sweetness and elevate flavors.
This delightful Salted Caramel Cake is ready to amaze your taste buds and create unforgettable moments!
Step‑by‑Step Instructions for Salted Caramel Cake
Step 1: Caramel Preparation
In a medium saucepan, combine 1 cup of granulated sugar and 1/4 cup of water over medium heat. Stir gently until the sugar dissolves, then let it cook undisturbed until it turns a deep amber color, about 8–10 minutes. Remove from heat and carefully add 6 tablespoons of butter and 1/2 cup of heavy cream, stirring constantly to combine. Allow the caramel to cool in the refrigerator while preparing the cake layers.
Step 2: Cake Layers
Preheat your oven to 340°F (170°C) and grease three 8-inch round cake pans. In a large bowl, sift together 2 cups of all-purpose flour, 1 1/2 teaspoons of baking powder, 1 teaspoon of baking soda, and 1 tablespoon of cornstarch. In another bowl, beat 1 cup of granulated sugar with 1/2 cup of softened butter until light and fluffy. Add in 2 large eggs, 1 cup of sour cream, and 1/4 cup of vegetable oil, mixing until well blended before gradually incorporating the dry ingredients.
Step 3: Baking the Cake
Divide the cake batter evenly among the prepared cake pans and smooth the tops. Bake in the preheated oven for 20–23 minutes, or until a toothpick inserted in the center comes out clean. Once baked, let the cake layers cool in the pans for 10 minutes, then transfer to a wire rack to cool completely before frosting.
Step 4: Buttercream Preparation
In a mixing bowl, beat 1 cup of softened butter on medium speed until creamy, about 2–3 minutes. Gradually add in 4 cups of powdered sugar and 1 teaspoon of vanilla extract, mixing until combined. Scrape down the sides and add in 1/2 cup of the cooled salted caramel, blending on low until fully incorporated. Beat on high until the buttercream is light and fluffy, about 4–5 minutes.
Step 5: Assembling the Cake
Place one cooled cake layer on a serving plate and spread a generous layer of salted caramel buttercream on top. Add a second layer of cake and repeat the process, leaving the top layer bare for now. Apply a thin crumb coat of buttercream around the entire cake to seal in crumbs, then refrigerate for 30 minutes to set. This will ensure that the final frosting layer looks smooth and professional.
Step 6: Final Frosting and Decoration
Remove the cake from the fridge and apply a thick layer of the remaining salted caramel buttercream over the top and sides. Use a spatula or cake scraper to create a smooth finish. Drizzle additional salted caramel sauce over the top for an elegant touch, letting it cascade down the sides. Finally, sprinkle a pinch of sea salt on top for that irresistible contrast, completing your magnificent Salted Caramel Cake.
Make Ahead Options
These decadent Salted Caramel Cake components are ideal for busy home cooks looking to save time without sacrificing taste! You can prepare the cake layers up to 24 hours in advance: simply bake and allow them to cool completely before wrapping them tightly in plastic wrap and refrigerating. The homemade salted caramel can also be made ahead and stored in the fridge for up to 3 days, ensuring it’s perfectly ready to layer. On the day you plan to serve, whip up the buttercream (which can also be made in advance) and assemble your cake quickly for stunning results. Just remember to let your cake sit at room temperature for about 30 minutes before serving, allowing all those flavors to come alive!
Salted Caramel Cake Variations
Customize your salted caramel cake experience with these delightful twists that will tantalize your taste buds!
-
Gluten-Free: Use a 1:1 gluten-free flour blend to make this cake suitable for gluten-sensitive friends without compromising flavor.
-
Dairy-Free: Substitute vegan butter and coconut cream in the buttercream for a deliciously creamy, dairy-free frosting. You won’t even miss the dairy!
-
Chocolate Twist: Incorporate cocoa powder into the cake batter for a chocolatey version, then use chocolate ganache instead of caramel for an indulgent experience.
-
Fruity Layers: Add fresh fruit layers, such as strawberries or raspberries, between the cake layers for a burst of freshness that complements the rich caramel.
-
Spiced-Up Flavor: Mix in cinnamon or pumpkin spice to the batter for a warm, cozy flavor profile perfect for fall gatherings.
-
Nutty Crunch: Fold in chopped pecans or walnuts for added texture; they’ll provide a delightful crunch alongside the buttery layers.
-
Extra Salt: Increase the saltiness by sprinkling sea salt flakes on top before serving to enhance the sweet-and-salty contrast.
Don’t forget to pair this cake with a scoop of vanilla ice cream or a dollop of whipped cream, like in my Butter Pecan Cake recipe, for an unforgettable dessert experience! Happy baking!
Storage Tips for Salted Caramel Cake
-
Fridge: Store the cake in an airtight container for up to 3-4 days. This helps preserve its moistness and prevents it from absorbing odors.
-
Freezer: For longer storage, freeze individual layers wrapped tightly in plastic wrap and then aluminum foil for up to 2 months. Thaw in the fridge overnight before frosting.
-
Reheating: If you want to enjoy a warm slice, microwave a piece for about 10-15 seconds. This works well for the salted caramel cake while keeping the flavors intact.
-
Make-Ahead: Prepare the cake, caramel, and buttercream a day in advance. Refrigerate individually, and assemble just before serving for the best results!
What to Serve with Decadent Salted Caramel Layer Cake?
Indulging in a slice of this heavenly cake may invite you to create a complete dining experience that charms every palate.
- Vanilla Ice Cream: A scoop of creamy vanilla ice cream complements the salty-sweet cake, delivering a delightful contrast that enhances every bite.
- Fresh Berries: Strawberries or raspberries add a fresh, tart element, cutting through the sweetness and offering a pop of color on your dessert plate.
- Whipped Cream: A dollop of fresh whipped cream brings lightness to the rich layers, adding a smooth texture that perfectly balances the cake’s decadence.
- Chocolate Sauce: Drizzling some warm chocolate sauce over the cake offers a luscious twist, creating a harmony of flavors that chocolate lovers will adore.
- Espresso or Coffee: A rich espresso provides a robust counterbalance to the sweet layers, enhancing the overall flavor profile and making each bite even more indulgent.
- Almond Croissants: Served warm, almond croissants add a flaky texture and subtle nutty flavor that complements the cake’s rich essence, turning dessert into a luxurious breakfast treat.
- Nutty Toppings: Chopped pecans or walnuts sprinkled on top add crunch and earthiness, enhancing the cake’s flavor while providing a delightful textural contrast.
- Dessert Wines: Pairing with a glass of sweet dessert wine, like Port or Sauternes, enriches the experience, allowing you to savor the full depth of flavors present in the cake.
Expert Tips for Salted Caramel Cake
-
Room Temperature Butter: Ensure your butter is at room temperature when making the buttercream; this will achieve the best texture and creaminess.
-
Frosting Layers: After applying the crumb coat, refrigerate the cake to set it; this prevents the buttercream from melting during the final decoration.
-
Avoid Burnt Caramel: Watch your sugar closely as it caramelizes; if it starts turning too dark too quickly, reduce the heat to avoid a bitter flavor.
-
Taste and Adjust: Always taste your salted caramel as you make it; you can adjust the salt to create a balance that suits your preference.
-
Cooling Time: Let your cake layers cool completely before frosting to prevent melting the buttercream, ensuring a beautiful final presentation.
Enjoy the delightful process of creating your Salted Caramel Cake!
Salted Caramel Cake Recipe FAQs
What type of sugar is best for making salted caramel?
Absolutely! For making salted caramel, granulated sugar is your go-to option, as it dissolves easily and caramelizes beautifully. Keep an eye on it as it cooks, ensuring it reaches a deep amber color, typically around 8–10 minutes over medium heat. Avoid using powdered sugar, as it won’t caramelize properly.
How should I store leftovers of the salted caramel cake?
I recommend storing your Salted Caramel Cake in an airtight container in the fridge for up to 3-4 days. This helps maintain the cake’s moistness while preventing it from absorbing any fridge odors. If you have it cut, place a piece of wax paper between the slices before sealing to keep them fresh!
Can I freeze the salted caramel cake?
Very! You can freeze individual layers of the Salted Caramel Cake wrapped tightly in plastic wrap and then in aluminum foil for up to 2 months. When you’re ready to enjoy, simply thaw the layers in the fridge overnight. This way, you ensure the caramel and cake remain delicious and intact!
What should I do if my caramel sugar burns?
Should this happen, don’t worry—it happens to the best of us! If your caramel starts turning too dark too quickly, reduce the heat immediately. A burnt caramel will taste bitter, so it’s wise to keep the sugar moving at the initial stages and watch for that golden color. If in doubt, start over with a fresh batch at a lower heat.
Is this cake suitable for people with dietary restrictions?
Absolutely! You can make this Salted Caramel Cake a little friendlier for various diets. Swap the dairy butter for vegan butter and use plant-based heavy cream for a dairy-free version. For gluten-free folks, simply replace the all-purpose flour with a good gluten-free flour blend of your choice. Just ensure to check labels for any potential allergens!
Irresistible Salted Caramel Cake That Will Wow Your Guests
Ingredients
Equipment
Method
- In a medium saucepan, combine 1 cup of granulated sugar and 1/4 cup of water over medium heat. Stir gently until the sugar dissolves, then let it cook undisturbed until it turns a deep amber color, about 8–10 minutes. Remove from heat and carefully add 6 tablespoons of butter and 1/2 cup of heavy cream, stirring constantly to combine. Allow the caramel to cool in the refrigerator while preparing the cake layers.
- Preheat your oven to 340°F (170°C) and grease three 8-inch round cake pans. In a large bowl, sift together 2 cups of all-purpose flour, 1 1/2 teaspoons of baking powder, 1 teaspoon of baking soda, and 1 tablespoon of cornstarch. In another bowl, beat 1 cup of granulated sugar with 1/2 cup of softened butter until light and fluffy. Add in 2 large eggs, 1 cup of sour cream, and 1/4 cup of vegetable oil, mixing until well blended before gradually incorporating the dry ingredients.
- Divide the cake batter evenly among the prepared cake pans and smooth the tops. Bake in the preheated oven for 20–23 minutes, or until a toothpick inserted in the center comes out clean. Once baked, let the cake layers cool in the pans for 10 minutes, then transfer to a wire rack to cool completely before frosting.
- In a mixing bowl, beat 1 cup of softened butter on medium speed until creamy, about 2–3 minutes. Gradually add in 4 cups of powdered sugar and 1 teaspoon of vanilla extract, mixing until combined. Scrape down the sides and add in 1/2 cup of the cooled salted caramel, blending on low until fully incorporated. Beat on high until the buttercream is light and fluffy, about 4–5 minutes.
- Place one cooled cake layer on a serving plate and spread a generous layer of salted caramel buttercream on top. Add a second layer of cake and repeat the process, leaving the top layer bare for now. Apply a thin crumb coat of buttercream around the entire cake to seal in crumbs, then refrigerate for 30 minutes to set.
- Remove the cake from the fridge and apply a thick layer of the remaining salted caramel buttercream over the top and sides. Use a spatula or cake scraper to create a smooth finish. Drizzle additional salted caramel sauce over the top and sprinkle a pinch of sea salt on top.
Leave a Reply